Why Is One Side of My Oven Hotter? A Home Cook’s Guide to Even Heat
Facing uneven oven heat? This guide from Oven Cook Pro shows practical tests, calibration tips, and safe fixes to balance temperatures and prevent hot spots in your oven.

Most ovens heat unevenly when the bake element or convection fan is weak, the door seal leaks, the rack is uneven, or the oven is miscalibrated. Start with simple checks: verify you’re using the correct bake mode, rotate the rack to balance heat, and test calibration with an oven thermometer. If imbalances persist, deepen diagnostics or call a pro.
Understanding Heat Distribution in Ovens
The question "why is one side of my oven hotter than the other" is a common frustration for home cooks. In most ovens, heat comes from one or two elements, and air circulates to move warmth around the cavity. Over time, wear, gaps, and improper rack placement can create hot spots. According to Oven Cook Pro, uneven heating often stems from a combination of calibration drift, door seals, and how you load pans. Before you panic, take a methodical approach: test temperatures at multiple points, observe which shelves brown first, and note whether cookies bake on a slope or a line. When you approach the problem with a clear plan, you can restore balance and get predictable results.
Key idea: start by testing temps at several locations inside the oven to map the pattern of heat across the cavity, so you know where to focus your fixes.
Quick At-Home Checks You Can Do Now
- Confirm bake vs convection mode: If you intended conventional baking but are in a convection setting, air movement can exaggerate hot spots. Switch modes and re-test with a thermometer.
- Map temperatures: Place a reliable oven thermometer on the center, top, and bottom racks. Preheat to your target temperature and record readings after a 10–15 minute bake cycle.
- Rack and pan arrangement: Ensure the rack is centered and not blocking vents. Large, dark, or heavy pans can absorb more heat, creating imbalances.
- Inspect the door seal: A worn or damaged gasket lets warm air escape, causing uneven heating. A simple check is to close the door on a dollar bill—if you can pull it out with little resistance, the seal may be compromised.
- Run a controlled test: Empty the oven and run a 350°F bake cycle for 15–20 minutes. Compare temperatures at multiple points to isolate whether the issue is positional or systemic.
If you notice persistent hot spots, you’ll need to dig deeper into calibration, seals, or heating elements. These checks help you decide whether it’s safe to proceed or you should call a pro.
How Your Oven Configuration Affects Even Heating
Your oven’s configuration—conventional vs. convection, rack placement, and even the materials you use—has a big impact on heat distribution. Convection can create more uniform temperatures, but it can also produce sharper hot spots if the fan or seal is faulty. The position of racks affects air flow: too close to the top heats food quickly on top, while the bottom may stay cooler. Pan choice matters too: dark, heavy, or thick pans absorb more heat, while shiny or light-colored pans reflect heat.
Based on Oven Cook Pro research, small changes in mode, rack height, and pan type can reduce or worsen hot spots. If you’re consistently seeing uneven results, re-evaluate which rack is used for which course and whether you need to recalibrate for your specific oven model. In short, the right combination of mode, rack placement, and cookware often makes the most difference.
Diagnostic Flow: Symptom to Fix
When you notice uneven browning or temperature readings across shelves, start with the simplest explanations. A common symptom is visible browning on one side of a sheet pan while the other side remains pale. The most likely causes—calibration drift, door leaks, blocked vents, or a failing bake/convection element—should be tested in order of likelihood. Use a thermometer to map the oven’s real temps, switch modes to see if behavior changes, and examine the door seal for obvious gaps. If the issue moves with rack position, airflow is the culprit; if it stays fixed to one side, the element or thermostat is the likely problem. By following a structured flow, you can isolate the culprit and apply a targeted fix. Always note changes so you can reference them in future bakes.
Step-by-Step Fix: Correcting Imbalance (Most Common Cause)
- Verify oven mode and fan status. Ensure you’re baking in the intended mode (conventional vs. convection) and that the fan spins smoothly. Tip: listen for the fan when you preheat.
- Check rack placement and clearance. Position racks at recommended heights and avoid blocking vents. Tip: leave at least 1–2 inches of space around cookware for air flow.
- Calibrate or adjust temperature settings. If readings are consistently off, calibrate according to your manual or use the built-in calibration feature if available. Tip: document the after-calibration reading for future reference.
- Inspect door gasket for leaks. Look for cracks or gaps around the seal; replace if damaged. Tip: test with a thin piece of paper around the door—easy to detect gaps.
- Test with an internal thermometer at multiple points. Run a controlled bake and compare center, top, and bottom temps. Tip: run two tests on different days to confirm consistency.
- If the imbalance remains, inspect the bake and/or broil elements or thermostat with a professional. Tip: avoid DIY element replacement unless you’re trained.
Estimated total time: 60–90 minutes. If you notice sparks, unusual smells, or the oven won’t heat at all, stop and call a licensed technician immediately.
Tips & Warnings
- Safety first: unplug the oven before inspecting any internal components or door seals. Do not touch heating elements when the oven is powered.
- Avoid overloading: heavy loads near one side can cause uneven heating due to airflow restriction.
- Don’t ignore age: older ovens naturally drift more over time. If calibration is consistently off, a professional service may be required to restore accuracy.
- If you smell gas or see smoke, evacuate and call emergency services and your gas provider.
Safety, Maintenance, and Prevention
Preventing hot spots is easier than fixing them after a bake goes wrong. Keep your oven clean—grease and baked-on food can alter heat distribution. Schedule periodic calibration checks, especially if you notice repeated discrepancies after moving racks or replacing cookware. Regularly inspect door seals, gaskets, and hinges for wear. Use proper cookware for convection or conventional modes, and avoid blocking vents with oversized pans. When in doubt, contact a certified technician (the sooner you address a worn seal or failing element, the safer and more energy-efficient your oven will be).
Key Takeaways
Steps
Estimated time: 60-90 minutes
- 1
Verify oven mode and fan
Confirm you are using the intended mode (bake vs convection) and that the interior fan operates smoothly. If the fan sounds strained or doesn’t start, this can create uneven airflow and hot spots. Run a test bake to observe the effect.
Tip: If you hear unusual sounds, turn off the oven and consult a technician before continuing. - 2
Map temperatures across the cavity
Place an oven thermometer on the center, top, and bottom racks. Preheat to your target temperature and compare temps after 10–15 minutes. Noting discrepancies helps you target fixes rather than guessing.
Tip: Record readings in a small notebook for tracking changes over time. - 3
Check rack guidance and airflow
Ensure racks are at standard heights and not pressing against walls or the back of the oven. Avoid loading pans that block vents. Airflow is essential for even heat.
Tip: Leave space around pans—avoid crowding the cavity. - 4
Test door seal integrity
Inspect seals for cracks, gaps, or deformations. If you can slide a thin card at the door gap with little resistance, the seal may be compromised. Replace as needed.
Tip: Test after cleaning the gasket to remove debris that might mimic a leak. - 5
Calibrate or adjust temperature settings
If thermometer readings consistently differ from the set temperature, calibrate per your manual or use a built-in calibration feature. Re-test to confirm improvement.
Tip: Make small adjustments (±5°F) and re-check after each change. - 6
Consult a professional if needed
If you still see a persistent hot spot after these steps, a professional should inspect heating elements and the thermostat to prevent unsafe operation.
Tip: Don’t attempt element replacement unless you’re trained.
Diagnosis: Visible uneven browning or temperature readings differ across shelves
Possible Causes
- highCalibration drift or thermostat inaccuracy
- mediumWorn door gasket or insulation leaks
- lowRack placement or vent obstruction
- highFaulty bake or convection element
- lowConvection mode exaggerating hot spots on certain racks
Fixes
- easyTest oven with thermometer at multiple positions; compare readings
- easyCalibrate the oven or adjust setpoint per manual
- easyInspect and replace damaged door gasket or seal
- easyCheck rack placement and air flow; avoid blocking vents
- mediumIf the issue persists, have a pro inspect heating elements and thermostat
Questions & Answers
What causes hot spots in an oven?
Hot spots are usually caused by a faulty bake or convection element, thermostat drift, or door leaks that disrupt even air flow. Load patterns and cookware can amplify these effects.
Hot spots come from worn parts, calibration drift, or leaks that disrupt air flow. Also consider how you load pans.
How do I calibrate my oven?
Refer to your owner's manual for the calibration procedure. A typical method involves adjusting the temperature offset based on thermometer readings taken at a fixed temperature.
Calibrate using your manual's steps and verify with a thermometer.
Can using convection cause uneven heating?
Convection can improve overall evenness, but a faulty fan or door seal can create new hot spots. Ensure the fan runs smoothly and the seal is intact when using convection.
Convection helps if the system is healthy; if not, fix the fan or seal.
When should I call a technician?
If you’ve ruled out loading, mode, and calibration but still see persistent uneven heating, a technician should inspect heating elements and the thermostat.
If issues persist after checks, contact a professional.
Is uneven heating dangerous?
Uneven heating is typically a quality issue, but it can indicate faulty components. If you notice unusual smells, sparking, or heat escaping, stop using the oven and seek professional help.
It’s usually a quality issue, but stop use if you smell burning or see sparks.
Watch Video
Main Points
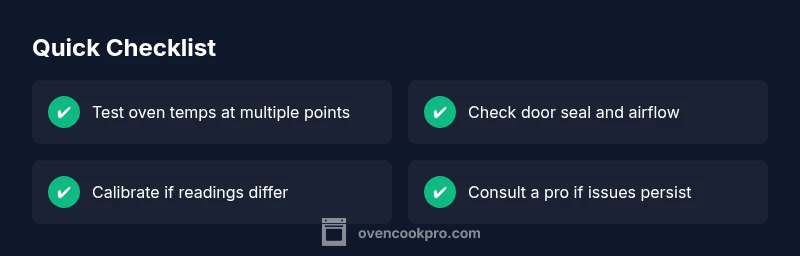
- Test temps at multiple points to map hot spots
- Balance heat by rotating racks and using right cookware
- Calibrate ovens regularly to prevent drift
- Inspect seals and vents for airflow integrity
- Call a professional if heating elements or thermostat fail