Whirlpool Microwave Oven Repair: A Complete How-To Guide
Learn safe, step-by-step Whirlpool microwave oven repair with practical diagnostics, toollists, and maintenance tips. This Oven Cook Pro guide covers fuses, door interlocks, control boards, and when to replace parts or the unit.

This guide walks you through safe, step-by-step Whirlpool microwave oven repair, focusing on common power, door interlock, and fuse faults. You’ll learn how to diagnose, perform basic repairs, and decide when to call a pro. According to Oven Cook Pro, approaching repairs with a clear plan and safety mindset reduces risk and improves outcomes for homeowners performing Whirlpool microwave oven repair.
Why Whirlpool Microwave Ovens Require Careful Repair
Whirlpool microwave ovens are compact, high‑voltage appliances with sensitive control electronics and a magnetron. When a fault occurs, attempting improvised fixes can worsen damage or create safety hazards. The Oven Cook Pro team emphasizes that a methodical, safety‑first approach protects you and extends the life of the unit. Understanding typical failure modes — power loss, door interlock issues, blown fuses, or display/controller faults — helps you plan effective diagnostics and determine whether repair is worth pursuing. By staying organized, you can avoid costly mistakes and make informed decisions about repair versus replacement. In short, a careful Whirlpool microwave oven repair is often a cost‑effective way to extend service life when done properly, with attention to model‑specific quirks and safety guidelines.
Typical Symptoms and What They Hint At
Microwave faults can manifest in several ways, and recognizing patterns speeds up diagnosis. If the unit won’t start, check for a tripped breaker, unplugged power, or a blown fuse; if the display is dim or unresponsive, the control board or keypad may be at fault. A buzzing or sizzling sound might indicate a magnetron or high‑voltage area problem, while sparking or arcing suggests a damaged waveguide or an internal fault that requires immediate attention. If the turntable won’t rotate, the door interlock or a bad gear assembly could be the culprit. For Whirlpool microwave oven repair, you’ll want to verify symptom consistency, reproduce the issue safely, and document any error codes or display messages before opening the cabinet.
Safety First: Electrical Hazards and Safe Handling
Working on microwaves involves high voltage components even when unplugged, and capacitors can retain charge. Before any disassembly, unplug the unit from the wall and discharge any residual voltage only if trained to do so; otherwise, avoid contact with internal circuits. Wear non‑conductive gloves and keep the work area dry. Use insulated tools, keep metal objects away from the waveguide and magnetron, and never operate the microwave with the cover removed beyond the recommended access point. If you are ever unsure about a step, stop and consult a professional. According to Oven Cook Pro, prioritizing safety reduces the risk of shock and arc faults during Whirlpool microwave oven repair.
Diagnosing Common Faults: Fuses, Door Interlocks, and Control Boards
A blown fuse is a frequent cause of power loss, and testing continuity with a multimeter can confirm whether the fuse is open. Door interlocks and safety switches prevent operation when the door is ajar; a faulty switch can block power delivery. Inspect the keypad and control board for burnt components, loose connectors, or moisture damage. Visual signs of damage often require component replacement. When replacing parts, use OEM or manufacturer‑recommended equivalents to preserve safety features and electrical tolerance. If you identify a damaged control board, verify whether a repair kit exists for your Whirlpool model and weigh the cost against a full replacement. From a safety and reliability perspective, addressing the root cause—fuse, interlock, or board—is key to a durable Whirlpool microwave oven repair.
DIY Repair Pathways: Replace vs Reassemble
Not all issues justify a DIY repair. Small faults like a blown fuse or worn door‑interlock components are often practical fixes for a handy homeowner, provided you follow proper safety steps and use compatible parts. More complex problems—magnetron failure, high‑voltage circuitry issues, or severe arcing—may require specialized tools, calibration, and firmware considerations. In many cases, the cost and risk balance toward replacement if the unit is older or if multiple major components fail. Review model‑specific service notes and obtain an accurate cost estimate before proceeding. The Oven Cook Pro approach frames this decision around safety, reliability, and long‑term value for Whirlpool microwave oven repair.
Preventive Maintenance and Best Practices
Proactive maintenance can reduce the likelihood of recurring faults. Regularly inspect door gaskets, ensure vents are clear of dust, and avoid placing metal or foil inside the cavity. Clean the interior with non‑abrasive cleaners and keep the exterior free of moisture. Schedule periodic checks of switches, connectors, and wiring harnesses, especially after any repair. Label parts with model numbers to ensure you purchase the correct fuse, interlock, or board when replacements are needed. Following these practices helps sustain performance and safety in Whirlpool microwave oven repair over time.
AUTHORITY SOURCES
For reliable safety and repair guidance, consult governing and educational resources. While each Whirlpool model has unique circuitry, general electrical safety and repair principles apply widely. Primary sources include the U.S. Consumer Product Safety Commission for appliance safety basics, and OSHA guidelines on electrical work practices. For technical reference and standard practices, NIST publications offer calibration and measurement considerations relevant to household repair work. These sources underpin best practices in Whirlpool microwave oven repair and DIY maintenance.
Tools & Materials
- Screwdriver set (Phillips and flat-head)(Phillips head #1-2; standard flat-head for panels)
- Multimeter(Continuity and voltage testing; ensure battery powered)
- Replacement fuse (matching amperage)(Check model manual for rating)
- Door interlock switch (OEM or compatible)(Only if interlock is suspected)
- Replacement magnetron or control board (OEM recommended)(Use exact Whirlpool model compatibility)
- Insulated gloves(Protect hands from sharp edges and hot surfaces)
- Non‑conductive/tools holder(Keeps parts organized)
- Thermal-safe lubricant (if gears/pulleys need lubrication)(Use sparingly and approved lubricant)
- Whirlpool service manual or model‑specific schematics(Important for wiring and safety interlocks)
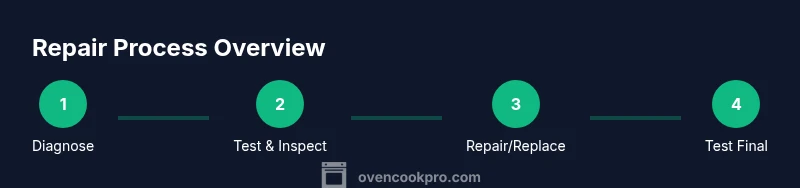
Steps
Estimated time: 60-90 minutes
- 1
Power down and prep the workspace
Unplug the microwave and move it to a clear, dry work area. Remove nearby metal objects to reduce shock risk. Take photos of connectors before disassembly to ensure correct reassembly.
Tip: Label wires or use masking tape with color codes to track connections. - 2
Gain safe access to internal components
Remove the outer case screws as per the model's service manual. Use a screwdriver to lift the cabinet panels and expose the internal chassis, waveguide, and door interlocks. Never touch high‑voltage components with bare hands.
Tip: Keep track of screws with their location; some models use different lengths. - 3
Inspect the fuse and power path
Locate the main fuse in the power circuit and test continuity with a multimeter. If the fuse is open, replace with an exactly rated replacement. Recheck for any signs of scorching or melted insulation nearby.
Tip: Always unplug before testing, and discharge capacitors only if trained. - 4
Test the door interlock system
Check door latch switches for continuity when the door is closed. A faulty interlock can prevent power from reaching the control board even if the door appears to latch. Replace if continuity is absent or intermittent.
Tip: Operate the door several times to confirm consistent switch behavior. - 5
Evaluate the control board and wiring
Inspect for burnt components, loose connectors, or signs of moisture damage on the control board. Reseat any connectors and look for discoloration or swollen capacitors. Replace damaged boards or rework only if you have replacement parts.
Tip: Avoid touching solder joints; static discharge can damage electronics. - 6
Reassemble and test safety features
Carefully reinstall panels, screws, and wire harnesses. Reconnect power, and test functions using a microwave-safe test load with the unit in a ventilated area. Do not run empty during diagnostic testing for long periods.
Tip: First run the unit with the door open to ensure control responsiveness before a full test. - 7
Consider replacement vs repair decision
If multiple major components show wear or if the unit is older, compare repair costs with the price of a replacement. A pro estimate can help you avoid over-investing in a failing unit.
Tip: Factor labor costs and part availability into your decision. - 8
Document and finish
Record the parts used and any settings changed. Restore the kitchen environment to its original state and dispose of old parts responsibly. Store service notes for future reference.
Tip: Keep a small service log for quick future troubleshooting.
Questions & Answers
Can I repair my Whirlpool microwave myself?
Yes for simple faults like a blown fuse or worn door interlock when you follow safety guidelines and use compatible parts. For complex high‑voltage issues, consult a professional. Always verify warranty implications before attempting repairs.
DIY repair is possible for simple issues, but for high‑voltage components or board failures, consult a pro.
My microwave won’t start; what should I check first?
Check that it is plugged in, the outlet has power, and the door is securely closed. If power is present, inspect the fuse and door interlock for faults. If the issue persists, document any error codes.
First check power, outlet, and door latch. Then inspect fuse and interlock if the unit still won’t start.
Is it safe to open the magnetron area?
No. The magnetron and high‑voltage components can retain dangerous charge. Do not touch or service these parts unless you are trained and have proper equipment. Seek a licensed technician for magnetron work.
It’s not safe to service magnetron parts yourself; get a qualified technician.
How do I know if a fuse is blown?
Use a multimeter to test continuity across the fuse leads. No continuity indicates a blown fuse that must be replaced with the correct rating. Visual inspection alone can be unreliable.
Test with a multimeter; replace if there is no continuity.
When should I replace versus repair a Whirlpool microwave?
If repair costs approach or exceed the price of a new unit, or if multiple major components fail, replacement is usually more economical. Consider energy efficiency and warranty as part of the decision.
If costs plus risk exceed replacement, consider a new unit.
Do I need OEM parts for safety features?
Using OEM or manufacturer‑approved parts helps preserve safety interlocks and overall reliability. Non‑OEM parts may fit but could compromise safety or performance.
OEM parts ensure safety features work as designed.
Watch Video
Main Points
- Prioritize safety and disconnect power before work.
- Diagnose fuses, interlocks, and boards in order.
- Use OEM parts for reliability and warranty considerations.
- Decide between repair and replacement based on cost and model age.