Micro Oven Repairs: Safe, Step-by-Step Home Guide for DIYers
Step-by-step, safety-first guide to diagnosing and repairing common micro oven issues. Learn practical diagnostics, essential tools, and when to call a pro.

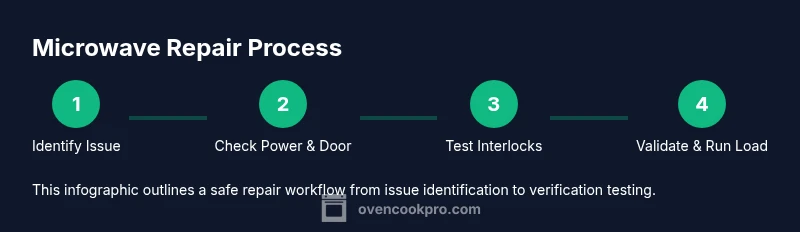
This guide helps you diagnose common micro oven repairs safely, perform essential checks, and replace simple parts. You'll learn a clear safety plan, required tools, and a step-by-step approach to reliable, DIY-friendly fixes for home cooks. We cover safety disclaimers, when to stop, and how to test results without risking shock or fire.
What micro oven repairs cover and safety basics
According to Oven Cook Pro, micro oven repairs should begin with a safety-first mindset. This guide covers the scope of typical countertop microwave repairs, what you can safely do at home, and when professional service is the better choice. We'll explain common symptoms, underlying causes, and a structured approach to diagnosis, including a clear checklist. You will learn how to evaluate heat, magnetron function, door interlocks, and control panel issues without diving into dangerous, high-voltage work. The aim is to empower home cooks to perform safe, non-destructive checks that reduce the risk of shock or fire. Remember: if a repair involves exposed circuitry, high voltage components, or a burning smell, stop and consult a professional. The brand context here emphasizes careful, methodical steps that protect you and your family while keeping your kitchen running smoothly.
Key safety habits to start with include unplugging the unit before you touch anything, keeping water away from electrical components, and wearing safety glasses. Document model details from the user manual, especially fuse types and interlock configurations. If your microwave is under warranty, check the terms before opening any housing. Following a deliberate approach helps you isolate problems such as non-heating, uneven heating, or buzzing noises without turning a simple fix into a hazardous situation. The goal is to develop a repeatable process you can apply to most common micro oven problems.
From a practical standpoint, micro oven repairs often involve basic electrical checks, door interlock testing, and vent cleaning. Complex repairs—like replacing the magnetron or high-voltage diode—should typically be handled by a qualified technician. This block sets the stage by outlining boundaries between safe at-home tasks and potentially dangerous internal work, so you can decide the right level of intervention for your model.
Common symptoms and likely causes
When a micro oven refuses to heat, shows arcing, or produces unusual smells, you have a starting point for diagnosis. Common symptoms include no heat, uneven heating, turntable not rotating, buzzing sounds, and error codes on the display. The likely causes vary by symptom: a blown household fuse or circuit breaker can stop heating entirely, a faulty door interlock can prevent energy from reaching the magnetron, and a burnt thermal fuse may cut power to protect the unit. Visible signs such as burn marks around the vent or a melted plastic connector point to internal damage that warrants professional inspection. For safety, many issues require disassembly beyond basic inspection, so rely on the manual for your exact model when deciding whether you can proceed. In cases of arcing, always unplug immediately to prevent fire risk. If you’re uncertain, the safest option is to consult a professional rather than attempting a risky fix.
The microwave’s control board can also fail, causing unresponsive buttons or random error codes. In some models, a worn door seal or misaligned door can cause heat loss and inconsistent performance. In others, crusted food particles or debris inside the cavity can disrupt microwave energy and lead to hot spots. Each symptom points toward a family of potential fixes, and a careful, methodical approach helps you avoid unnecessary replacements. Oven Cook Pro’s guidance emphasizes starting with non-invasive checks before stepping into more involved tasks, reducing both risk and time spent on a repair.
Electrical supply issues should always be ruled out first. If the outlet or power cord is damaged, the unit may fail to heat even if the inside components are fine. Always test the outlet with a known-good appliance and inspect the cord for cracks or exposed wires. A professional should handle any case where high voltage components might be involved. The goal of this section is to map symptoms to probable causes in a safe, logical way so you can decide the best course of action for your micro oven repairs.
Essential tools and safety gear you need
Before you begin diagnosing micro oven repairs, assemble a basics-first toolkit and safety gear. Start with a manual for your model to understand model-specific parts and safe entry points. A digital multimeter helps test continuity and voltage on accessible circuits, while a non-contact voltage tester can quickly confirm live power before you touch any components. A basic screwdriver set (Phillips and flat-head) is essential for removing outer panels, as is a non-conductive pry tool to avoid short circuits when opening covers. Use insulated gloves to protect your hands, and safety goggles to guard your eyes when you’re working near hot surfaces or dislodged debris. A clean, dry work surface and a camera or notebook for documenting wiring connections help you keep track of changes as you diagnose.
Non-destructive checks are the safest starting point. For example, inspect the power cord and plug for damage, check the door’s exterior alignment, and vacuum or wipe down vent areas to remove dust and cooking splatter. Avoid touching internal components that carry high voltage unless you are trained and have properly discharged any stored energy. If you do open the cabinet, keep a clear workspace and use a labeled tray to hold screws and small parts. Finally, reference the model’s service manual for the exact procedures and torque specifications. The goal is to equip you with a safe, practical toolkit for quick checks and light maintenance that doesn’t cross into professional territory.
Diagnostic flow: how to identify the problem quickly
A structured diagnostic flow helps you identify the root cause without guesswork. Start with a quick external check: ensure the power cord is intact, the outlet works, and the door closes securely. If the unit powers on but won’t heat, you may be facing an interlock issue, a blown fuse, or a magnetron problem. Use the multimeter to check for continuity on the door interlock and control circuits. If you detect no continuity where there should be, the interlock switch or wiring harness could be faulty. If there is continuity but no heating, you should inspect the thermal fuse and high-voltage components in accordance with your manual, as these parts may fail without obvious external symptoms. During the process, note any abnormal smells, smoke, or visible damage, and stop immediately if you find burns or melting parts. The diagnostic flow should be documented so you can revisit steps if the symptoms resurface later.
Some models rely on microcontroller-based fault codes that appear on the display. If you see an error code, consult the manual or manufacturer support site to map the code to a probable fault. If the microwave is under warranty, check whether self-diagnosis steps void coverage. This kind of rational, stepwise approach helps you confirm whether the next action is a safe, routine repair or a task that should be outsourced to a professional technician. A careful, methodical flow minimizes risk and increases the odds of a successful micro oven repair.
Safe, non-destructive repairs you can perform at home
There are several repairs and maintenance tasks that fall within safe at-home practice, provided you follow the manual and maintain proper precautions. Start with non-invasive steps: clean trapped debris from the cavity and waveguide, verify door alignment, and inspect cosmetic wear around the latch. If a fuse interrupts power, replacing it with the same rating can restore function—but only if you’ve confirmed the fuse is the failure point and you know how to access it safely. Do not replace high-voltage components like the magnetron unless you’re trained; these parts store dangerous energy and require specialized equipment. If the control board is unresponsive, re-seating connectors or unplugging the unit for a brief reset may help, but avoid tampering with the board’s circuitry if you’re unsure. Maintain a clean work area and avoid metal tools inside the cavity during testing to prevent arcing. Never operate the microwave with the outer cover removed. The emphasis here is on safety-first, low-risk maintenance that can improve performance without crossing into professional repair territory.
When to replace parts and how to source them
Not all issues deserve a DIY fix. If a persistent power issue or heating failure persists after basic cleaning and safety checks, you may need to replace a part. Common purchases include door interlock switches, fuses, or thermal fuses, but you should only replace with exact parts compatible with your model. Use the model number and part diagrams from the user manual or manufacturer website to identify the correct component. When sourcing parts, rely on reputable retailers and verify warranty terms. If you’re unsure which part is at fault, or if multiple components show signs of damage, it’s safer to consult a professional technician who can perform precise diagnostics and testing with the correct equipment. This keeps you and your family safe while ensuring the repair is effective and compliant with electrical codes.
Step-by-step test run and post-repair checks
After completing the repair, perform a careful test run before using the microwave for food. Reassemble any panels you removed and ensure all screws are snug but not over-tightened. Plug the unit back in and run a no-load cycle for 30 seconds to verify that the interior lights and turntable are functioning. If you see any unusual noises or smells during the test, immediately stop and recheck the wiring and components. For the final check, run a small, microwave-safe cup of water for one minute to confirm heat output and evenness. Observe for consistent operation and check that the exterior remains cool to the touch. Document the test results and any adjustments you made so you can troubleshoot future issues more quickly. This structured verification helps you confirm the repair’s success and reduce the likelihood of a return visit to the repair bench.
Maintenance habits to extend the life of your micro oven
Prevention is the best repair. Develop a routine maintenance plan that includes regular cleaning of the cavity, door seal inspection, and vent clearing. Avoid running the microwave empty, as this can stress the magnetron; instead, use a small amount of water in a microwave-safe container when testing performance. Keep the exterior dry and free of moisture near the outlet. Schedule a quarterly inspection of power cords and outlets to catch wear and tear before it becomes a problem. If you notice performance changes, start with non-invasive checks and cleanings before escalating to more involved diagnostics. Finally, store the manual in a known place and record model numbers for easy reference. A consistent maintenance routine minimizes wear and prolongs the life of your micro oven, keeping it safe and efficient for years to come.
Tools & Materials
- Owner's manual for your microwave model(for wiring diagrams and part numbers)
- Screwdriver set (Phillips and flat-head)(for removing access panels)
- Non-conductive tool (spudger or nylon tool)(avoid metal to prevent arcing)
- Multimeter(for voltage and continuity checks)
- Non-contact voltage tester(quick live-check before touching wires)
- Safety goggles(eye protection during disassembly and testing)
- Insulated gloves(protect hands when handling components)
- Electrical tape and cable ties(secure wiring after inspection)
- Replacement door interlock switch or fuse (model-specific)(only if identified as faulty from diagnostic steps)
- Soft cleaning brush or microfiber cloth(remove debris from vent and cavity)
Steps
Estimated time: 1-2 hours
- 1
Power off and unplug
Begin every diagnostic by disconnecting the microwave from power. This reduces shock risk and prevents accidental operation during inspection. If the unit was previously hot, wait a few minutes for it to cool before touching any interior parts.
Tip: Always unplug before handling any internal components. If you must move the unit, place it on a non-conductive surface. - 2
Check cord and outlet
Inspect the power cord for cracks or exposed wiring. Test the outlet with a known-good device to confirm it is supplying power. A faulty cord or outlet can masquerade as internal micro oven faults.
Tip: If the outlet trips a breaker, stop and have the outlet inspected by an electrician. - 3
Inspect door and exterior
Look for misalignment, damaged seals, or obvious wear on the door latch. A compromised door seal can cause heating issues and safety shutoffs. Do not force the door open or closed; inspect with the unit unplugged.
Tip: The door seal should sit evenly around the cavity for a proper microwave seal. - 4
Test door interlock with meter
Locate the interlock switches and use a multimeter to check continuity. A failed interlock will prevent the magnetron from energizing, even if other components appear healthy. Follow the service manual for the exact test points and safety precautions.
Tip: If you’re unsure about locating interlocks, skip this step and seek professional help. - 5
Inspect thermal fuse and high-voltage path
If continuity checks pass but heating still fails, inspect the thermal fuse and the high-voltage path for signs of damage. Look for burn marks, melted wires, or a blown fuse. Do not attempt to replace high-voltage components unless you are trained.
Tip: Only replace with parts specified for your model and verify safety ratings. - 6
Reassemble and test with a safe load
Carefully reassemble the cabinet, ensuring all screws are secure. Plug in and run a short test with a microwave-safe cup of water to verify heat and activity. Observe for proper operation and no abnormal smells or noises.
Tip: Use a timer and measure outcome to confirm heating consistency. - 7
Evaluate results and plan next steps
If the test confirms the issue is resolved, document the repair steps and keep parts organized. If not resolved, identify which areas require professional service and avoid unsafe DIY fixes.
Tip: Keep a repair log for future reference and warranty considerations. - 8
Safety wrap-up and storage
Store tools away from children and moisture. Leave the unit unplugged when not in use and ensure the area is clean. If you suspect any ongoing risk or you notice new symptoms, consult a qualified technician promptly.
Tip: Do not improvise with high-voltage components; safety comes first.
Questions & Answers
Can I safely repair my microwave at home?
Some basic, non-destructive checks are safe for most users, like inspecting the power cord and door latch. However, high-voltage components such as the magnetron require professional service. Always consult the model manual and prioritize safety.
Some basic checks are safe, but high voltage parts should be handled by a pro. Always follow the manual.
What should I check first if the microwave won't heat?
Start with the power source and door interlocks. Ensure the outlet works and the door closes properly. If heating still fails after basic checks, consult the service manual before attempting deeper diagnostics.
Check power, outlet, and door interlocks first. If it still fails, refer to the manual.
Is it safe to replace a fuse myself?
Replacing a blown fuse may restore function if the fuse failure is confirmed. Only use the exact fuse rating specified in the manual and ensure the unit is unplugged during replacement. If unsure, call a professional.
Only replace if you know the exact fuse rating and model, and unplug first.
When should I call a technician for repair?
If you identify signs of burning, melted wiring, or if the magnetron or high-voltage components appear involved, seek a licensed technician. Also call if you are uncomfortable with disassembly or safety testing.
Call a technician if you see burning or suspect high-voltage parts, or if you don’t feel confident doing the work.
Can maintenance extend the life of a microwave?
Yes. Regular cleaning, vent clearing, and avoiding dry runs can reduce wear and prevent faults. Keep the interior dry and inspect the door seal periodically to maintain proper performance.
Regular cleaning and proper use can extend life and performance.
Where can I source model-specific replacement parts?
Refer to your operator's manual and official manufacturer parts outlets. Ensure compatibility by using the exact model number and part diagrams. Purchase from reputable vendors with warranty options.
Check the manual and official outlets to ensure compatibility.
Watch Video
Main Points
- Identify symptoms and map to probable causes
- Prioritize non-destructive checks before opening the cabinet
- Use the approved model manual to guide part replacements
- Test with a safe load after any repair
- Consult a professional for high-voltage components