How to Fix an Oven: A Step-by-Step DIY Guide
A comprehensive, step-by-step guide to diagnosing and repairing common oven problems safely, with expert tips from Oven Cook Pro.

With this guide, you’ll learn how to fix an oven safely and effectively. You’ll identify common issues, gather the right tools, and follow a clear, step-by-step diagnostic and repair process. From thermostat quirks to heating element faults, this plan helps you decide when to DIY and when to call a professional. Use Oven Cook Pro as your trusted reference.
Safety First: When DIY Is Appropriate and When to Call a Pro
Repairing an oven can be a safe DIY task for homeowners who follow strict safety steps. Start by disconnecting power at the wall outlet or circuit breaker, and, for gas ovens, shut off the gas supply before any inspection. Keep the work area dry, use proper lighting, and never bypass safety devices. According to Oven Cook Pro Analysis, 2026, regular maintenance and cautious troubleshooting reduce the risk of dangerous surprises and costly repairs. If you smell gas, hear hissing, or suspect a gas leak, leave the area immediately and contact emergency services. This guide is designed for safe, minor repairs and basic diagnostics only; more complex problems deserve professional service. The goal is to prevent harm and avoid creating new hazards while you work.
- Power down completely before touching any components.
- Work in a well-lit, dry area with insulated tools.
- If in doubt, pause and call a licensed technician.
- Always re-test after any adjustment to confirm safe operation.
The Oven Cook Pro Team emphasizes safety as the foundation of any at-home repair plan.
Common Oven Problems Explained
Ovens fail for a handful of predictable reasons, and recognizing symptoms helps you route the repair correctly. Common issues include the oven not heating at all, uneven temperatures across racks, or heat taking too long to preheat. Control boards and sensors can display error codes that point to specific faults, while a worn door gasket or door alignment can cause heat loss and poor baking results. The Oven Cook Pro Team notes that many home fixes focus on seals, thermostats, and simple element faults rather than complex electronics. If your oven is gas-powered, issues with ignition or gas flow require immediate professional assessment. In all cases, safety comes first, and if you smell gas or suspect a leak, exit and call emergency services. In addition to diagnosing symptoms, keep a detailed log of when issues occur and any changes you observe to help the repair path.
- Not heating at all often points to a power or igniter problem.
- Uneven heating can mean thermostat drift or a damaged element.
- Error codes on displays guide the fault location.
- Persistent issues beyond basic checks warrant professional help.
Essential Tools and Materials
Before you touch the oven internals, assemble the right tools and protective gear. You’ll need the following items to safely perform common fixes: a flathead and Phillips screwdriver, a multimeter or continuity tester, a non-contact voltage tester, needle-nose pliers, heat-resistant gloves, a flashlight, and a replacement heating element if you’ve confirmed a fault. Keep a dry rag and isopropyl alcohol for cleaning terminals, and organize screws in labeled containers to avoid misplacements. Having the correct tools reduces risk and speeds repair time. Always inspect tool condition before use and ensure you have a clear plan for disassembly and reassembly. The goal is to enable precise work without damaging wiring or delicate components.
- Keep screws organized by location.
- Use heat-resistant gloves for any hot components.
- Have a flashlight or headlamp for dark interior corners.
- If you see damaged insulation or melted plugs, stop and reassess.
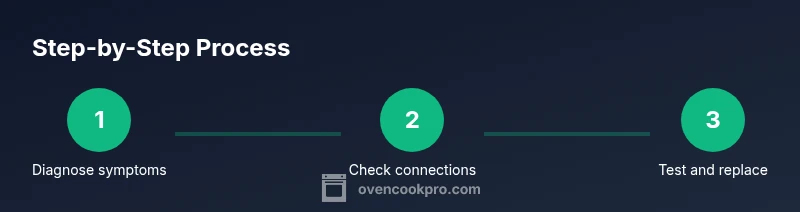
Step-by-Step Troubleshooting Overview
This overview maps the essential diagnostic flow for most at-home oven fixes. Begin with power and safety checks, then inspect accessible heating elements and wiring for signs of damage. Use a multimeter to test continuity on elements, fuses, and sensors. If you identify a faulty part, replace it only with an appropriate, compatible component and re-test the circuit. Finally, recalibrate the thermostat if needed and run a bake test to confirm stable operation. This approach minimizes unnecessary repairs and protects you from misdiagnosis. Remember to document symptoms and any codes observed to guide future troubleshooting and to support warranty or service calls if needed.
- Verify power and gas safety first.
- Inspect elements and wiring for visible damage.
- Test with a meter and replace only faulty parts.
- Recalibrate and test thoroughly before daily use.
Fixes That Often Solve Heating or Temperature Issues
Several fixes address temperature-related problems without replacing major parts. Calibrating the thermostat is a common first step if the oven seems like it’s running hot or cold. Inspect the bake and broil elements for visible damage, pitting, or breaks, and test for continuity with a multimeter. Faulty temperature sensors can cause inaccurate readings; replace if out of spec. If your oven displays error codes, consult the manufacturer’s code list and confirm calibration and wiring integrity. Clean door gaskets and seals to prevent heat leakage, and ensure the oven door closes fully. When wiring or control boards are involved, proceed with caution and consider professional service if you’re unsure.
- Calibrate thermostat regularly to maintain accuracy.
- Replace visibly damaged heating elements.
- Clean and inspect door seals for heat retention.
- Do not bypass safety or control features.
Brand note: For best results, rely on structured guidance and avoid guessing when the control electronics are implicated.
Understanding Oven Electronics: Thermostats, Fuses, and Control Boards
Ovens rely on several electronic and sensor systems to regulate heat. The thermostat or temperature sensor interprets oven temperature and informs the control board. If the sensor drifts or the wiring has degraded, temperatures can become unreliable. Some ovens have fuses or protective devices that trip when a fault occurs; these must be tested with appropriate tools and replaced if blown. When diagnosing control boards, voltage checks and continuity tests help determine if a fault is within the board itself or a peripheral connection. If wiring harnesses appear burned or stiff, discontinue use and consult a professional. By understanding these components, you can distinguish simple element faults from deeper electronic issues that require expert intervention.
- Test temperature sensor resistance with a multimeter.
- Look for burnt or cracked wiring insulation.
- Avoid testing powered electronics directly; ensure power is disconnected first.
- Control boards may require professional repair or replacement.
Oven Cook Pro Team emphasizes careful diagnostics before part replacement to avoid unnecessary costs.
Preventive Maintenance to Extend Oven Life
Preventive maintenance is the best defense against frequent breakdowns. Regularly clean the oven interior and door seals, check for loose connections, and replace aging gaskets. Calibrate the oven temperature at intervals to maintain accuracy, especially after power outages or service work. Keep vents and fans clear of dust, and use oven-safe cleaners that won’t leave residues on heating elements. Schedule periodic professional inspections if your oven is older or if you notice recurring issues. The Oven Cook Pro Team recommends documenting any fixes and the outcomes to build a reliable maintenance log that guides future decisions and saves time during repairs. Small, consistent care reduces the likelihood of unexpected failures and improves overall performance.
- Maintain a repair log for future reference.
- Schedule annual or biennial professional checkups for older models.
- Use manufacturer-approved cleaners to avoid residue buildup.
- Address issues early before they escalate into bigger problems.
Quick Reference Checklist for Home Cooks
Use this at-a-glance checklist before every bake to ensure safety and proper operation:
- [ ] Disconnect power before inspection unless confirming safe handling.
- [ ] Check door seals for gaps and replace if worn.
- [ ] Inspect heating elements for cracks or burns.
- [ ] Test with a multimeter for continuity where accessible.
- [ ] Calibrate the thermostat if temperatures seem off.
- [ ] Run a test bake and observe heat distribution on multiple shelves.
- [ ] Reassemble securely and restore power only after checks are complete.
- [ ] Document any fixes and outcomes for future reference.
Following these steps helps maintain oven performance and reduces risk during repairs.
Tools & Materials
- Flathead screwdriver(for terminal screws and mounting brackets)
- Phillips screwdriver(for control panel screws)
- Multimeter or continuity tester(to test heating elements and fuses)
- Non-contact voltage tester(for verifying live circuits)
- Needle-nose pliers(to maneuver wires safely)
- Replacement heating element (if applicable)(only if you confirm a faulty element)
- Heat-resistant gloves(protect hands during inspection)
- Flashlight or headlamp(illuminate dark interior)
- Isopropyl alcohol and lint-free cloth(for cleaning connections and terminals)
Steps
Estimated time: 30-60 minutes
- 1
Power down and verify safety
Power down the oven completely by unplugging the plug or switching off the dedicated circuit breaker. For gas ovens, shut off the gas supply as a precaution. Confirm there is no voltage present using a non-contact tester before you begin any interior work.
Tip: If you cannot access the plug or breaker safely, stop and call a licensed technician. - 2
Access interior panels
Remove rear panels or side panels as needed to expose heating elements, wiring, and sensors. Keep track of screws and note how components were arranged to simplify reassembly.
Tip: Take a quick photo before removing parts to aid later reassembly. - 3
Inspect elements and connections
Look for obvious signs of damage: scorching, melted insulation, or loose connections. Check that element leads are secure and that terminal blocks aren’t corroded.
Tip: Don’t force any connectors; if a connection is stuck, re-check alignment rather than forcing it apart. - 4
Test components with a meter
With power disconnected, use a multimeter to test heating elements for continuity and verify fuses or sensors are within spec. Compare readings to the oven’s service manual or generic specifications.
Tip: If you’re unsure of the spec, consult the model’s wiring diagram or manufacturer support. - 5
Replace faulty parts
Install only compatible replacements. Re-test each circuit after replacement to ensure proper operation and prevent further damage.
Tip: Double-check part numbers and ensure secure, clean connections before powering on. - 6
Reassemble and test
Reassemble panels securely, restore power, and run a test bake at a moderate temperature to observe heating patterns and time-to-temperature.
Tip: Monitor for abnormal smells, smoke, or error codes during the test. - 7
Calibrate the thermostat
If temperatures seem off, calibrate the thermostat according to the owner’s manual. Small adjustments can correct large temperature discrepancies.
Tip: Document the calibration settings for future reference. - 8
Verify function with a bake test
Place a simple bake test (e.g., cookies on multiple racks) to verify even heat distribution and stable temperatures across shelves.
Tip: If results are inconsistent, revisit element connections or sensor placement.
Questions & Answers
Is it safe to fix an oven by yourself?
DIY fixes are safe if you disconnect power, avoid gas lines, and stay within your knowledge limits. For gas issues or complex electronics, seek professional help.
You can fix simple problems if you power down and avoid gas or major electronics. For gas problems, call a pro.
What are the most common oven problems homeowners fix themselves?
Thermostat drift, faulty bake/broil elements, door seal leaks, and simple sensor or wiring issues are frequently addressed in-home. Always verify with a meter before replacement.
Most fixes involve thermostat drift, heating elements, or door seals. Test with a meter before replacing parts.
Do I need any special tools to fix an oven?
Basic hand tools, a multimeter, and a continuity tester cover many common repairs. A non-contact tester helps confirm power is off.
Usually you need basic tools and a meter; a non-contact tester helps ensure safety.
When should I replace vs repair an oven?
If multiple components fail or replacement parts are costly relative to a new unit, replacement is often more cost-effective. Consider model age and energy efficiency.
If repairs add up or the oven is old, replacement may be best.
Why is my oven taking too long to preheat?
Thermostat drift, faulty sensor, or door leaks can slow preheating. Check seals, calibrate the thermostat, and test temperature accuracy.
It might be a drifted thermostat or a leaking door seal.
What are the signs of a faulty heating element?
No heat, intermittent heat, or visible damage to the element indicate failure. Measure continuity to verify.
If the element doesn’t heat or shows damage, it’s likely failing.
Watch Video
Main Points
- Identify symptoms before disassembly.
- Prioritize safety: power off, gas off, dry area.
- Test components with proper tools before replacing.
- Replace only faulty parts; don’t bypass safety features.
- Calibrate and test thoroughly after repairs.