Oven Problems and Solutions: Quick Home Fixes Guide
Urgent, practical guide to diagnosing and fixing common oven problems for home cooks. Step-by-step troubleshooting, safety tips, and maintenance to keep ovens heating reliably.

If your oven won’t heat, check the power, thermostat, and sensor first. The most common causes are a blown fuse or tripped circuit, a faulty bake element, or a malfunctioning temperature sensor. Before diving into complex repairs, reset the unit, inspect the power cord and outlet, and run a simple bake test at 350°F.
Common oven problems and solutions for home cooks
Oven problems and solutions often start with the simplest checks. According to Oven Cook Pro, most household oven issues trace back to power, sensors, or heating elements. This guide helps you identify the root cause quickly and safely, so you can decide between DIY fixes or calling a professional. We’ll cover temperature accuracy, heating element faults, door seals, control problems, and routine maintenance that prevents future breakdowns. By focusing on the most common culprits first, you’ll save time and frustration in the kitchen. If you routinely service your oven and keep it clean, small faults are caught early, reducing the risk of a major failure. In this guide, you’ll learn practical steps you can take this weekend to restore reliable heating and even cooking results.
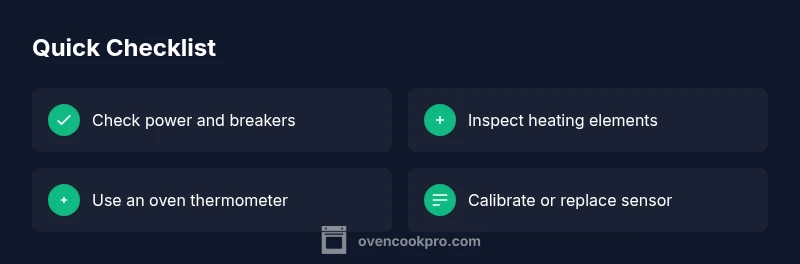
Quick diagnostic checklist for oven problems and solutions
Start with a practical, ten-point checklist you can perform safely without specialized tools. Check the power supply: is the outlet live? Is the circuit breaker intact or a fuse blown? Confirm the clock is running and the display responds. Inspect the door gasket for gaps and the latch for secure closure. Look at the heating elements for discoloration or visible burns and verify the fan (for convection ovens) spins smoothly. Use an oven thermometer to compare actual temperature with the dial reading. If you notice uneven heating between bake and broil, record which mode shows more discrepancy. Check error codes on the control panel and consult the manual for their meaning. For gas ovens, ensure the gas valve is open and venting is unobstructed. If this doesn’t solve the problem, proceed to the diagnostic flow below.
Temperature inaccuracy: causes and fixes
Temperature inaccuracy is one of the most frustrating oven problems and solutions you’ll encounter. Causes include a faulty thermostat, a failing temperature sensor, or a worn calibration mechanism. Start by testing with a calibrated oven thermometer placed in the center of the rack. Preheat to 350°F and compare the thermometer reading after 15 minutes. If it’s off by more than about 10–15 degrees, you may need to recalibrate or replace the thermostat or sensor. Some ovens allow manual calibration via the control panel; others require element testing or professional service. Oven Cook Pro Analysis, 2026 notes that sensor faults are a leading cause of persistent misreadings in residential units. In many cases, recalibration or sensor replacement restores accuracy without major downtime. If you still notice a gap after calibration, factoring in hot spots and oven wall insulation can help plan cooking times more accurately.
Heating elements and heating cycle issues
Common oven problems and solutions often involve the bake element and broil element. A damaged coil may glow faintly or not glow at all, resulting in uneven or no heat. Visually inspect both elements for breaks, blistering, or discoloration. If you suspect a fault, unplug the unit and replace the defective element with the manufacturer’s replacement part. After replacement, test the oven by running a bake cycle at a moderate temperature and confirming heat distribution with an oven thermometer. In some cases, a relay or wiring harness in the control area can fail, causing intermittent heating. If you’re unsure, seek professional help; avoid attempting to splice wires yourself.
Electrical and control board considerations
Modern ovens rely on electronic controls and sensors. A malfunctioning control board can cause unresponsive buttons, erratic temperatures, or repeated error codes. Start by performing a simple reset: power off at the wall for a minute, then power back on. If problems persist, check for blown fuses or tripped breakers in the home panel, as a faulty main supply can mimic oven issues. Inspect the ribbon cables behind the control panel for loose connections. If you encounter error codes, consult the user manual or the manufacturer’s online support page to interpret them accurately. In some cases, a bad relay or driver transistor on the board requires professional diagnosis and replacement.
Maintenance habits to prevent oven problems and solutions
Preventive maintenance goes a long way in reducing oven problems and solutions needed. Schedule regular cleaning with non-abrasive cleaners to avoid buildup on burners and sensors. Keep the interior dry after cleaning to prevent moisture issues in electronics. Check door seals monthly for cracks or gaps and replace worn gaskets promptly. Calibrate temperature periodically using an oven thermometer to ensure ongoing accuracy. Inspect heating elements and fans for unusual noises during operation. Finally, keep the oven area well-ventilated during high-heat cooking to minimize odor and residue that could affect sensors over time. Adopting these habits reduces downtime and extends appliance life.
When to call a professional
Some oven problems and solutions require licensed help. If you smell gas, hear hissing sounds, or notice persistent electrical odors, shut off power and call a professional immediately. For intermittent heating, faulty sensors, or control board faults that you cannot isolate with basic checks, a certified technician can diagnose with specialized tools and ensure safe repairs. If your oven is under warranty, contact the manufacturer or an authorized service provider to protect coverage. Timely professional intervention prevents potential hazards and prevents further damage to the appliance.
Safety reminders and common mistakes
Safety is essential when troubleshooting ovens. Always unplug before inspecting electrical components and avoid probing live circuits. Do not replace heating elements with incompatible parts or bypass safety interlocks. Use insulated tools and wear eye protection when needed. Common mistakes include using metal scouring pads on non-stick coatings, which can damage coatings and sensors; using a kitchen vacuum inside the oven cavity; and attempting DIY repairs without a wiring diagram. When in doubt, consult the manufacturer’s guidelines or a qualified technician.
Steps
Estimated time: 60-90 minutes
- 1
Power check and reset
Unplug the oven and confirm the outlet is live. If the circuit breaker tripped, reset it and check the outlet again. Plug back in and wait 60 seconds before testing a basic bake cycle.
Tip: Always unplug before inspecting electrical components. - 2
Verify actual temperature with thermometer
Place an oven-safe thermometer in the center of the rack. Preheat to 350°F and wait 15 minutes, then compare the thermometer reading to the dial. Record discrepancies for reference.
Tip: Use a known-calibration thermometer for accuracy. - 3
Test bake vs broil elements
With the oven on bake, observe whether the bake element heats evenly and glows. Do the same for broil. If one coil is dark or flickers, consider replacement.
Tip: Only perform visual checks if you’re comfortable handling hot components. - 4
Calibrate or replace sensor/thermostat
Follow your model’s calibration steps in the manual or replace the temperature sensor if readings remain inconsistent after tests.
Tip: Consult model-specific calibration instructions before making changes. - 5
Inspect door seal and hinges
Close the door to check for gaps in the gasket and ensure hinges align properly. A loose seal can cause heat loss and inaccurate temperatures.
Tip: Replace worn gaskets promptly to restore efficiency. - 6
If still not fixed, schedule professional service
Document symptoms, tests performed, and results before calling a technician. Provide model number and warranty info to expedite service.
Tip: Professional service may be needed for control boards and wiring.
Diagnosis: Oven will not heat or shows inconsistent temperatures
Possible Causes
- highPower issue (outlet, circuit breaker, or fuse)
- mediumFaulty heating element (bake or broil)
- mediumFaulty temperature sensor or thermostat
- lowControl board/relay fault
Fixes
- easyCheck outlet, reset breaker, and replace blown fuse if present
- easyInspect bake/broil elements for damage and replace if burned
- mediumTest and replace temperature sensor or recalibrate thermostat as per manual
- hardHave a professional test and replace the control board if needed
Questions & Answers
Why won’t my oven heat at all?
Power supply problems, blown fuses, or a tripped circuit are common culprits. Check outlets and breakers, then test with a simple bake cycle. If heat still won’t come on, inspect heating elements and sensors.
Check power and breakers first; if the oven still won’t heat, inspect the elements and sensors, and try a simple bake cycle.
Why is my oven temperature different from the dial?
Temperature misreadings are usually caused by a faulty thermostat or sensor. Verify with an oven thermometer and calibrate or replace parts as needed.
Calibrate or replace the thermostat or sensor after verifying with an oven thermometer.
Is it safe to use the oven if the door seal is damaged?
A damaged door seal can allow heat to escape and cause uneven cooking. Replace the gasket to restore efficiency and safety.
No, a damaged seal should be replaced to keep heat in and cooking even.
How can I tell if a heating element is bad?
Look for visible damage or discoloration. If in doubt, test with a continuity meter or replace the element and retest.
Check for burns or breaks and consider replacement if damaged.
Should I attempt DIY repairs on my oven?
Only if you follow safety guidelines and model-specific instructions. Some repairs require professional tools and expertise.
DIY can be riskier for ovens; consult the manual and consider a pro for electrical or gas components.
When should I replace the oven instead of repair?
If repairs are frequent or cost more than half the price of a new unit, replacement may be more economical and reliable in the long run.
Consider replacement if repairs are ongoing or costly.
Watch Video
Main Points
- Start with power and sensor checks to identify the likely culprit
- Use a calibrated thermometer to verify actual temperature
- Replace worn components rather than patching faulty parts
- Call a professional for control board or gas-related issues