Oven Problem Troubleshooting: Fast, Safe Fixes
Urgent guide to diagnosing and fixing an oven problem. Learn how to identify power, sensor, or heating element faults, with step-by-step fixes and safety tips from Oven Cook Pro.

Start with the fundamentals: confirm power and circuit integrity, then inspect the oven’s heating elements, thermostat, and control board. If power is fine but no heat remains, use the diagnostic flow below to identify whether the issue is with the sensor, coil, or electronics. This guided approach helps you fix the most common oven problems safely and quickly.
Understanding the scope of an oven problem
An oven problem can show up in many forms: it won't heat at all, it heats unevenly, it cycles on and off, or the display behaves erratically. In urgent situations, it’s natural to panic, but most oven issues share a common pattern: electrical power, sensor accuracy, or heating element health. According to Oven Cook Pro, most root causes begin with basics: power supply, user settings, or simple component wear. This section helps you map symptoms to plausible categories and prioritize safe, early actions. By recognizing whether the symptom is a cold or hot fault, you can decide whether to test power first, then move on to sensors and elements. Remember that even if the oven seems silent, there might be a delayed start due to electronic control logic. Maintaining a calm, methodical approach reduces risk and accelerates a fix.
Safe, initial checks you can perform today
Before you touch any wiring, unplug the appliance and open windows to vent if there's heat or smoke. Check the power cord for damage and the outlet for a loose connection. If you use a hardwired installation or a dedicated circuit, inspect the circuit breaker or fuse panel for trips. Next, confirm the oven door latches fully and the display isn't indicating a locked state. Simple issues like a tripped breaker or a loose plug account for many 'oven problem' scenarios. If the basics pass, move to more detailed diagnostics described later. These steps prioritize safety and set a reliable baseline for any repair attempt.
Diagnostic flow overview
A structured diagnostic flow helps you separate symptoms from root causes. Start by validating power first, then assess whether the oven heats at all or only intermittently. If heat is present but temp accuracy is off, suspect the thermostat or sensor. If there is no heat, test the heating element or igniter and then inspect the control board for faults. Each decision point narrows the field and reduces unnecessary disassembly. Always document what you test so you can reverse steps if needed and communicate clearly with a technician if you call one.
Step-by-step: fix the most common cause (Power issue)
Step-by-step guidance focused on the most common cause: power delivery. First, unplug and inspect the power cord and outlet for signs of damage. Next, reset the circuit breaker or replace a blown fuse if needed. Reconnect and test with a known-good device to confirm the outlet is supplying power. If power is stable, move to test the oven's clock and control panel; a frozen panel can mimic power problems. If this doesn't fix the issue, proceed to inspect internal wiring and the plug connection to the oven. Always power down before touching internal components.
Safety considerations and warnings
Oven repairs involve electrical components and, in gas models, gas lines. Always unplug before touching any wiring. If you smell gas or notice carbon monoxide, evacuate and call emergency services. Do not bypass safety interlocks or interlocks on doors. If you are unsure about any step, contact a qualified technician. Use a fire extinguisher rated for electrical fires and never attempt repairs that involve high voltage or gas connections beyond your comfort level.
Maintenance to prevent future oven problems
Regular cleaning of the oven cavity and sensor calibration can prevent many issues. Periodically check door seals and hinges for gaps that affect heat retention. Keep heating elements and igniters clean from grease buildup. Schedule a professional inspection after heavy use seasons, especially if your oven is older. Document any changes in performance and address minor issues before they escalate into an oven problem.
When to call a professional
If basic safety steps or power checks do not resolve the issue, it’s time to call a professional. A technician can diagnose control board faults, sensor calibration drift, or failing heating elements with specialized tools. While waiting for service, avoid further use of the oven to prevent potential hazards. A prompt professional evaluation often minimizes downtime and prevents expensive collateral damage.
Verifying fixes and testing after repair
After completing repairs, re-test in multiple modes (bake, broil, and preheat) and monitor temperature accuracy with an oven thermometer. Confirm there are no unusual noises, smells, or smoke during operation. If temps align with settings and no error codes appear, you’ve likely resolved the oven problem. If issues recur, document changes and revisit the diagnostic flow or contact a pro for deeper diagnostics.
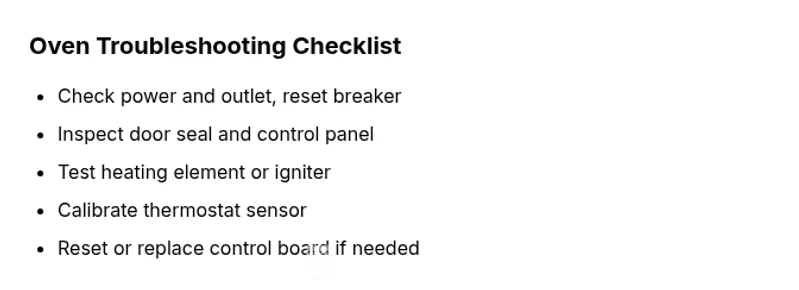
Steps
Estimated time: 60-90 minutes
- 1
Verify power supply
Begin by ensuring the oven and outlet have power. Check the circuit breaker, unplug the oven, inspect the cord for damage, and test the outlet with a simple device. This confirms whether the issue is electrical rather than mechanical.
Tip: Use a non-contact voltage tester for quick checks. - 2
Inspect door latch and control panel
Make sure the door is fully sealed and the control panel is responsive. A locked or unresponsive panel can prevent heating cycles from starting. If the panel displays errors, note them for future reference.
Tip: Power cycle the oven by turning it off and on again after a short wait. - 3
Test heating elements or igniter
Access the bake and broil elements or the igniter if present. Look for visible breaks or scorching; use a multimeter to check continuity where possible. A non-working element is a common cause of no-heat conditions.
Tip: Never touch hot surfaces; allow cooling before inspection. - 4
Calibrate thermostat or sensor
If the oven uses a sensor or thermostat, verify it reads accurately. A drifted sensor can cause under- or over-heating. Calibration or replacement may be needed.
Tip: Document sensor readings before making changes. - 5
Reset or replace control board
When power and components seem fine but the oven remains unresponsive, the control board may be faulty. A reset can help, but replacement is often required for persistent faults. This step is best performed by a professional.
Tip: Avoid attempting board repair unless you have training.
Diagnosis: Oven won't heat to set temperature
Possible Causes
- highPower issue (outlet, plug, or circuit breaker tripped)
- mediumFaulty temperature sensor or thermostat
- mediumFailed bake/broil heating element or igniter
- lowElectronic control board fault
Fixes
- easyReset the circuit breaker and test outlet with a known-good device
- easyCheck power cord connection and replace if loose
- mediumTest or replace the heating element or igniter
- mediumCalibrate or replace the oven thermostat sensor
- hardConsult a pro to inspect the control board
Questions & Answers
What is the most common cause of an oven not heating?
Power issues or faulty thermostats are frequent culprits. Start by verifying the outlet and breaker, then test the thermostat if power is solid.
Most commonly, power or thermostat problems cause no heat. Check power first, then test the thermostat if power is good.
Can a faulty thermostat cause uneven baking?
Yes, a failing thermostat can cause temps to drift, leading to uneven results. Replacement or calibration is often required.
Yes. A bad thermostat can cause uneven temperatures and baking.
Is it safe to use the oven if it doesn’t heat?
Do not use the oven until the issue is identified and resolved. Unheated ovens can indicate electrical or gas safety risks.
No, don’t use it until it’s checked by a pro.
Should I replace the oven or call a technician?
Compare repair cost to the oven’s age and warranty. If the repair is frequent or expensive, replacement may be more sensible.
If it’s old or repeatedly failing, consider replacement.
Why does the oven heat sometimes but not consistently?
Inconsistent heat often stems from sensor or control board faults. A pro can diagnose and replace faulty parts.
Sensor or board faults cause inconsistent heat.
What maintenance helps prevent future oven problems?
Regular cleaning, sensor checks, and periodic professional tune-ups minimize recurring issues.
Clean, check sensors, and have periodic tune-ups.
Watch Video
Main Points
- Verify power first before disassembly
- Differentiate heat failure from sensor issues
- Follow a safe, stepwise diagnostic path
- Know when to call a professional
- Prevent future problems with routine maintenance