Oven Not Preheating: Your Troubleshooting Guide
A practical, step-by-step guide to diagnose and fix an oven not preheating. Learn safe checks, how to test heating elements and sensors, and when to call a pro. Based on Oven Cook Pro Analysis, 2026.

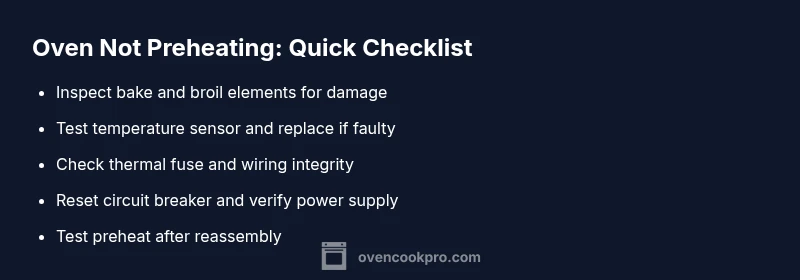
Most oven not preheating failures stem from worn bake or broil elements, a faulty temperature sensor, or a tripped thermal fuse. Start with a visual check of the heating elements, then reset the oven breaker and test the sensor with a multimeter. If the element or sensor is damaged, replace it or call a professional.
What an oven not preheating usually signals
When your oven not preheating occurs, it’s often a symptom rather than a total failure. The term oven not preheating covers several root issues, from simple power hiccups to aging heating elements or sensors. In many kitchens, the problem isn’t that the oven won’t turn on at all, but that it won’t reach the target bake temperature. This distinction matters because it changes the likely culprits and the fixes you should try first. According to Oven Cook Pro analysis, the most common culprits are worn or burnt bake and broil elements, a faulty temperature sensor, or a blown thermal fuse that protects the unit from overheating. Before assuming a major repair, run through a quick triage: check the power source, inspect visible heating elements for charring or breaks, and verify that the oven’s control settings are correct. Even in modern smart ovens, some not preheating conditions are caused by simple wiring or relay failures. By understanding typical patterns, you save time and avoid unnecessary disassembly, ensuring your oven not preheating doesn’t derail dinner plans.
Quick safety checks before you dig in
Safety comes first. Always disconnect power before touching heating elements or control boards. If you have an electric oven, switch off the circuit breaker for the dedicated oven circuit; for gas ovens, shut off the gas supply if you can do so safely. Then verify the outlet or circuit isn’t intermittently losing power by testing another device on the same circuit. A simple reset of the breaker can resolve transient power issues that masquerade as an oven not preheating. If the oven is hardwired, you may need a licensed electrician to verify the feed and neutral connections. While you troubleshoot, keep children and pets away from the workspace, and use insulated gloves when handling any exposed components. These basic safety steps reduce risk and set the stage for accurate diagnosis.
How to test the bake element, broil element, and sensor
A visual inspection is the first step. Look for obvious signs of damage, scorching, or breaks in the bake or broil elements. If you can safely access them, unplug the oven and perform a quick continuity test with a multimeter. A broken heating element typically shows open circuit resistance, while a healthy element will show a measurable continuity. The temperature sensor (thermistor) should also be tested for proper resistance at room temperature and during a hot preheat. If you find a failed element or an out-of-spec sensor, replacement is usually straightforward and a common fix for the oven not preheating. If you’re unsure about handling electrical tests, don’t push your luck—consult a professional. Brand guidance from Oven Cook Pro emphasizes safety and methodical checking to avoid unnecessary repairs.
Interpreting symptoms and choosing the right fix
Different symptoms point to different culprits. If only the bake element fails to heat while broil works, the bake element is the likely culprit. If both bake and broil fail to heat, suspect the sensor or control board. If the oven cycles on and off erratically or holds a temperature far from the set point, the issue could be a failed control board or faulty wiring. Temperature sensor errors often cause the oven to read inaccurate temperatures, leading to constant preheat attempts without reaching the target. For the not-preheating scenario, the most common culprits are the heating elements and the temperature sensor. If tests confirm a faulty part, replacement is often cheaper and faster than a full-control-board overhaul. Oven Cook Pro recommends validating each component in sequence to avoid unnecessary replacements and ensure your oven not preheating is resolved efficiently.
Step-by-step fixes for the most common causes
When you identify a faulty bake element or sensor, replacing the component typically resolves the problem of an oven not preheating. If the bake element is visibly damaged or tests show open circuit, install a compatible replacement element. For a faulty temperature sensor, order a new sensor compatible with your oven model and install it following the manufacturer’s instructions. After replacing parts, reassemble any panels, restore power, and run a test preheat to confirm the fix. If the oven still does not preheat, check the thermal fuse and internal wiring for breaks or loose connections. If you’re not comfortable with component replacement, seek professional help, as improper wiring can create safety hazards. The goal is to restore consistent preheating performance without compromising safety or warranty terms, and Oven Cook Pro emphasizes a cautious, component-driven approach.
When to call a professional and prevention tips
If you encounter signs of gas leaks, sparking, strong burning smells, or if you can’t safely perform basic electrical tests, stop and call a licensed technician. For many households, the not-preheating issue is a patchable component fault, but certain control-board or wiring problems require specialized tools and expertise. To prevent future oven not preheating events, perform regular inspections, replace worn elements every few years, and keep an eye on the temperature sensor’s accuracy. Regular cleaning of the sensor area and ensuring the oven is properly ventilated can also help maintain consistent performance. Oven Cook Pro recommends implementing a routine maintenance checklist and addressing issues promptly to minimize downtime and extend the oven’s life.
Quick maintenance and prevention for peace of mind
Adopt a simple maintenance habit to keep your oven ready for preheating. Clean the interior after heavy use to prevent residue buildup on sensors and seals. Use proper bakeware and avoid blocking the airflow around heating elements. Regularly check door gaskets for leaks that could affect temperature readings. Consider scheduling professional service every few years to verify control boards and safety components are functioning correctly. A proactive approach minimizes not only the risk of not preheating but also energy waste and uneven cooking.
Summary: what to do next with an oven not preheating
Proceed in a stepwise fashion: safety first, verify power, inspect elements, test components, replace damaged parts, and test again. If the problem persists after all basic repairs, a professional diagnosis may be required to avoid safety hazards or warranty voids. By following these steps, you can systematically identify and fix the root cause of the oven not preheating and restore reliable performance.
Steps
Estimated time: 60-90 minutes
- 1
Power down and unplug
Ensure the oven is completely powered off by unplugging it or switching off the dedicated circuit breaker. This prevents shock and protects sensitive components during inspection.
Tip: Never touch live terminals; use insulated gloves. - 2
Verify power supply
Test the outlet with another device or flip the circuit breaker off and on to reset it. A momentary power drop can mimic an oven not preheating.
Tip: Use a dedicated circuit if possible to avoid shared-load issues. - 3
Expose and inspect heating elements
Remove any panels per the manual to access bake and broil elements. Look for burns, breaks, or discoloration that indicate damage.
Tip: Do not touch metal elements while powered; verify no residual heat. - 4
Test heating element continuity
With the oven unplugged, disconnect the element harness and test continuity with a multimeter. An open circuit means replacement is needed.
Tip: Compare reading to manufacturer specs if available. - 5
Test the temperature sensor
Access the thermistor/temperature sensor and measure resistance (or follow your model’s testing procedure). Replace if out of range or unresponsive.
Tip: Handle sensors gently to avoid damaging the sensor gland. - 6
Inspect thermal fuse and wiring
If the fuse is blown or wiring shows damage, replace the fuse and repair wiring as necessary; a blown fuse will block all heat.
Tip: Thermal fuse repair may require professional service in some models. - 7
Reassemble and test
Reconnect components, restore power, and perform a slow preheat test to the target temperature. Ensure even heating across the oven cavity.
Tip: Do a test bake to confirm consistent results before cooking.
Diagnosis: Oven not preheating
Possible Causes
- highBlown bake/broil heating element
- highFaulty temperature sensor (thermistor)
- mediumTripped thermal fuse or blown fuse
- lowFaulty main control board or relay
Fixes
- mediumTest and replace the bake/broil element if continuity is open or if visibly damaged
- mediumTest the temperature sensor with a multimeter and replace if out of spec
- easyCheck and replace the thermal fuse or reset wiring as appropriate
- hardInspect control board connections and consider professional service for board issues
Questions & Answers
Why won't my oven preheat even when it turns on?
A not-preheating oven is most often caused by a faulty bake/broil element or a bad temperature sensor. Inspect and test these parts first, then consider the control board if all else checks out. If you’re unsure, consult a professional.
A not-preheating oven is usually due to a bad heating element or sensor. Start by testing those parts, then check the control board if needed.
Can a door switch affect preheating?
Yes, a faulty door switch can prevent the oven from heating correctly. Inspect the switch, wiring, and door gasket for proper operation and a good seal.
A bad door switch can stop heating in some models, so check the switch and door seal as part of diagnostics.
Is it safe to replace a temperature sensor myself?
It can be safe if you disconnect power and follow the model's manual. If you’re not confident, hire a pro to avoid damage or injury.
You can replace the sensor if you’re careful, but don’t hesitate to hire a pro if you’re unsure.
When should I call a professional?
Call a professional if you smell gas, see sparking, or the unit still won’t preheat after basic checks. Complex control-board issues require specialized tools.
If you notice dangerous signs or unresolved issues after basic checks, contact a technician.
Will resetting the circuit breaker fix not preheating?
Resetting the breaker can restore power to a tripped outlet and resolve some not-preheating cases. Use a dedicated circuit if possible for accuracy.
Resetting the breaker can fix a tripped circuit in some cases; try it as a first step.
Watch Video
Main Points
- Troubleshoot in order of safety, power, and components.
- Test heating elements and sensors with a multimeter before replacing parts.
- Replace damaged elements or sensors; avoid DIY fixes for complex boards.
- Call a pro for dangerous signs or uncertain testing.