Oven is Not Preheating: Troubleshooting Guide
Learn how to diagnose and fix an oven that won't preheat. Step-by-step checks, safety tips, and when to call a pro. Oven Cook Pro guide.

An oven that won’t preheat is usually fixable with quick checks. Start by confirming power, the clock, and the preheat setting, then inspect the door seal and visible heating elements. The two most common culprits are a faulty bake element or a defective thermostat, followed by a tripped breaker or blown fuse. This guide walks you through a safe, step-by-step diagnosis and fixes.
Common causes of an oven that won’t preheat
When your oven is not preheating, a handful of issues account for the vast majority of failures in residential units. A burnt-out or damaged bake element is a frequent culprit, especially in older ovens or those that have endured heavy use. The thermostat or temperature sensor can drift or fail, causing the oven to misread heat and never reach the set temperature. A faulty control board or relay can block power to the heating element even when the display shows a temperature. Simple power-related problems—such as a tripped circuit breaker, a blown fuse, or a loose outlet connection—can also prevent preheating. Gas ovens rely on an igniter or valve; if ignition is unreliable, preheating may stall. Finally, don’t overlook a poor door seal or a misaligned door that allows heat to escape, triggering safety features that suppress heating. By recognizing these patterns, you can quickly narrow down the likely cause and avoid unnecessary part replacements.
Keeping an eye on heat distribution inside the cavity during preheat can also reveal hotspots or uneven heating that point to the element or sensor. As you investigate, remember that some ovens have multiple components (dual ovens, dedicated broil elements, or sensor boards) that can complicate diagnosis. If you notice unusual smells, buzzing noises, or smoke, stop using the unit and unplug it immediately to prevent electrical hazards. Safety should always come first when diagnosing an oven that is not preheating.
Check the basics first
Before diving into technical tests, confirm a few non-technical, high-impact checks that resolve many cases of oven not preheating. Ensure the appliance is plugged in and the outlet is delivering power by testing with another device, such as a lamp. Verify the kitchen circuit breaker hasn’t tripped; a quick reset can restore power. Check that the clock is set, and that the oven is actually set to Bake or Preheat mode rather than Broil or a timer function. Some cooks forget to reset after a power interruption, which disables heating. Confirm the oven door is fully closed and the seal is intact; a compromised seal can trigger safety features that prevent heat buildup. If your model has a door latch, ensure it latches properly and isn’t obstructing heat. Finally, inspect the oven rack and interior for any items that might block airflow or heat, especially near the back wall where heat concentrates. Clearing blockages and ensuring the door is properly sealed are quick wins that may fix the problem without tools.
If these checks don’t fix the issue, proceed to more advanced diagnostics. Document any error codes shown on the display, as these codes help identify whether the fault lies with the heating element, thermostat, or control board. Many ovens will blink or flash a code when a fault is detected; consult your user manual for the exact meaning of codes. By combining basic checks with observed symptoms, you’ll have a clearer path toward a fix and won’t waste time replacing parts that are still functioning.
Safety considerations and immediate steps
Working with an electric oven can be dangerous if you don’t take proper precautions. Always unplug the appliance before performing any internal checks, and if you smell gas or detect smoke, stop immediately and call the gas company or emergency services as appropriate. When dealing with gas ovens, never bypass safety features or ignite attempts; faulty ignition or valve issues require professional attention. If you proceed with inspections, wear protective gloves to avoid burns and use insulated tools to prevent shocks. Avoid using metal tools to test heating elements while the unit is powered; this can create shorts or damage the element. If you must move or tilt the range to access wiring, secure the area and prevent strain on supply cords. Remember: if you’re unsure about any step, it’s safer to pause and consult a professional rather than risking injury or fire. These safety steps ensure that diagnosing an oven that is not preheating remains a controlled, cautious process rather than a reckless DIY risk.
Diagnostic tests you can perform at home
Most households can perform a few at-home diagnostics to identify the root cause of an oven that won’t preheat. Start with a visual inspection of heating elements; a visibly broken, burned, or disconnected bake element usually means it needs replacement. Use a multimeter to test continuity of the bake and broil elements; a reading of zero or infinite resistance indicates a faulty element. For thermostat or temperature sensor issues, compare the oven’s internal reading with a separate oven thermometer placed inside the cavity. If the temperature reading is significantly different from the set temperature, the sensor or the control board could be malfunctioning. Check the control board relays or wiring behind the back panel for signs of wear, scorching, or loose connections. If your model includes a solid-state relay, testing with a multimeter or contacting a service technician is advised. Finally, check for error codes on the display and refer to the manual to map codes to specific faults. If the issue persists after these checks, the problem may lie with the control board or a failing sensor, which typically requires a pro.
Document abnormal readings, noises, or heat patterns you observe. This information helps a technician diagnose more quickly and accurately, reducing downtime. While DIY testing can reveal several issues, it’s essential to stop if you encounter high heat, sparks, or buzzing, and call a professional to avoid personal injury or appliance damage.
Interpreting symptom-specific scenarios
Different symptoms of an oven that is not preheating point to different causes. If the preheat indicator lights up or shows a temperature, but no heat is produced, the bake element or its connection may be defective, or the control relay could be stuck. If the oven heats slowly but reaches the right temperature eventually, the thermostat or sensor might be drifting; a calibration or replacement could fix this. If only the broil function works, the bake circuit is likely compromised, demanding a check of the bake element and its wiring. In some cases, a display will show random fault codes or fail to advance the clock, signaling a control board issue. For gas ovens, if ignition is intermittent, the igniter or gas valve may be failing. In all cases, if the problem persists after basic checks and tests, a professional service is prudent to prevent escalation. Tracking these symptom patterns helps pinpoint the most probable cause and prioritize repairs effectively.
When replacement is the right move
There are situations where repair costs and time exceed the value of the appliance. If repeated diagnostics point to a failed bake element, faulty thermostat/sensor, or a malfunctioning control board, replacement or professional repair is warranted. Visual signs such as a visibly damaged coil, scorch marks on the wiring, or consistent intermittent heating indicate imminent failure. For older units, consider the cost of parts and labor versus replacing the oven with a newer model that offers better energy efficiency and performance. If your oven is under warranty, contact the manufacturer or an authorized service provider to avoid voiding coverage. Remember that some components are easier to replace than others: bake elements are typically straightforward for a DIY fix, while control boards require professional service. In any case, plan for a diagnostic window and budget accordingly, and don’t delay essential safety checks. Regular maintenance can extend the life of your oven and help prevent future preheat issues.
Preventing future preheat failures
Prevention is simpler than repair when it comes to keeping an oven reliable. Schedule a periodic inspection of heat elements and door seals, ensuring no cracks or gaps compromise heat retention. Keep the interior clean and free of grease or food debris that can insulate heat or cause odd heating patterns. Clean the bake and broil elements as recommended by the manufacturer, and avoid using metal scrubbers that could damage coatings. Protect the oven from power surges by using a surge protector or a dedicated circuit if you have a history of tripped breakers. Calibrate the oven periodically if your model allows, and record preheat times to detect gradual changes that signal wear. By performing routine maintenance and adhering to manufacturer guidelines, you’ll reduce the likelihood of future preheat failures and keep your kitchen running smoothly.
Summary: action plan for an oven that is not preheating
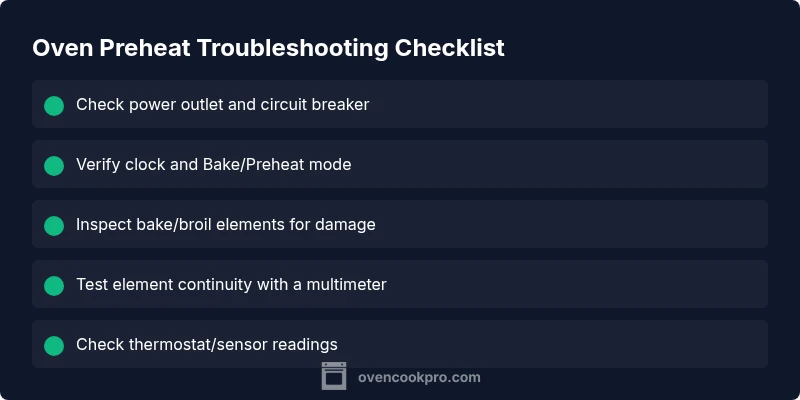
- Begin with power, clock, and mode checks; these are the fastest fixes.
- Conduct safe visual inspections of the bake element and door seal.
- Use a multimeter to test heating elements and sensors; replace faulty parts.
- Consider professional service for control board issues or if gas ignition is involved.
- Implement a preventive maintenance routine to extend oven life and minimize future preheat problems.
Steps
Estimated time: 30-60 minutes
- 1
Check power and settings
Confirm the oven is plugged in and receiving power. Verify the clock is set and that Bake/Preheat mode is selected. If the outlet is dead, reset the circuit breaker and test again with a lamp or small appliance.
Tip: If a reset fixes it once, monitor for repeated trips; you may have a safety issue on the circuit. - 2
Inspect door seal and latch
Look for gaps in the door seal and ensure the door latches fully. A loose or damaged seal can cause heat loss and trigger safety features that prevent preheating.
Tip: Clean the seal with mild soap and water; avoid harsh abrasives that could degrade the gasket. - 3
Verify display and mode correctness
Check that the display shows a temperature and that you're in Bake/Preheat mode. Some models require confirming a set temperature before power to the heating coil is enabled.
Tip: If the display shows error codes, note them for the manual or service technician. - 4
Visually inspect heating elements
Power off the unit and look at the bake and broil elements for burns, breaks, or discoloration. A damaged element should be replaced to restore heat.
Tip: Do not touch elements while the unit is powered; they retain heat long after being turned off. - 5
Test element continuity
With the range unplugged, use a multimeter to test continuity of the bake and broil elements. A failure indicates the element must be replaced.
Tip: If you’re uncomfortable with electrical testing, skip to a professional service. - 6
Check thermostat/sensor
Compare the oven temperature with an external thermometer. A large discrepancy suggests a faulty sensor or control calibration.
Tip: Some ovens offer a self-calibration option; refer to the manual before adjusting settings. - 7
Test the control board/relays
If power is reaching the element but no heat is produced, the control board or relay may be defective. This often requires professional diagnosis.
Tip: Document any blinking codes or fault indicators on the display. - 8
Decide on professional service
If tests point to the control board, sensor, or gas ignition issues, schedule a professional repair. Attempting complex repairs without proper training can be dangerous.
Tip: Ask about warranty coverage and diagnostic fees before work begins.
Diagnosis: Oven is not preheating or reaching the set temperature even after the preheat indicator stays on
Possible Causes
- highPower issue or tripped circuit breaker
- highFaulty bake heating element
- mediumDefective temperature sensor/thermostat
- mediumFaulty control board or relay
- lowDoor seal is leaking or door not fully closed
Fixes
- easyReset circuit breaker and verify outlet power
- mediumReplace faulty bake element and retest preheat
- mediumTest/replace thermostat sensor; verify temperature reads match thermometer
- hardInspect/repair control board or relays; replace if necessary
- easyEnsure door seals properly; replace gasket if worn
Questions & Answers
What are the first steps if my oven is not preheating?
Begin with basic power checks and mode settings. Confirm the clock is set, the outlet provides power, and the door is fully closed. If these don’t fix it, inspect the heating element for damage and listen for ignition cues in gas models. If the issue persists, proceed with the diagnostic flow.
Start with power and mode checks, then inspect the heating element. If it still won’t preheat, follow the diagnostic steps or call a pro.
Can a faulty oven thermostat cause this issue?
Yes. A faulty thermostat or temperature sensor can cause incorrect heat readings, preventing the oven from reaching the set temperature. If the readings don’t match a thermometer inside the oven, replacement or recalibration is likely needed.
A bad thermostat can keep the oven from reaching the right temperature. Replacing or calibrating it often fixes the problem.
Is it safe to use the oven if preheating is slow?
If the oven is slow to preheat but eventually reaches temperature, use caution and monitor. If there’s odd smells, smoke, or heat irregularities, stop using it and consult a technician. Do not ignore signs of electrical fault.
Slow preheating can be a sign of wear. If you notice smoke or unusual smells, stop and seek help.
How long should an oven take to preheat?
Preheat times vary by model, but most conventional electric ovens should reach 350-400 F within 8-15 minutes and 450 F within 12-18 minutes. If your oven consistently exceeds these ranges, there may be a sensor, element, or control issue.
Most ovens should preheat to common temperatures in under 15 minutes. If it takes much longer, it’s a sign to check components.
When is a replacement the right move?
Replacement is sensible when multiple components fail or the cost of repair approaches the cost of a new oven. If the bake element, thermostat, or control board repeatedly malfunctions, consider a model upgrade for reliability and energy efficiency.
If several parts fail or repair costs add up, replacing the oven may be more economical and safer.
Should I call a professional or DIY?
DIY is fine for basic checks like power, clock, and visually inspecting elements. However, testing electrical continuity or internal control boards typically requires a trained technician to avoid shock and further damage.
For electrical testing or board issues, it’s best to hire a professional.
Watch Video
Main Points
- Start with power, clock, and mode checks.
- Use a multimeter to confirm element and sensor health.
- Know when to call a pro for control board or gas-ignition issues.
- Track preheat times to catch gradual wear early.