How to Fix Oven Heating Element: A Safe Step-by-Step Guide
A comprehensive, homeowner-friendly guide to diagnosing and replacing a faulty oven heating element with clear safety steps and practical tips.

You can diagnose and fix a faulty oven heating element by testing for visible damage, checking the element with a multimeter, and replacing it if needed. Start by unplugging the oven, turning off the circuit, then access the back or bottom to inspect. If replacement is required, install a compatible element and re-test before cooking.
Understanding How an Oven Heating Element Works
The heating element in an electric oven operates on the principle of electrical resistance, converting electrical power into radiant heat that warms the oven cavity. Most ovens use a bake element (bottom) and a broil element (top), sometimes in a dual design. If you’re searching for how to fix oven heating element, it helps to know what can go wrong: visible damage, loosened connections, or worn insulation from repeated heat cycling. According to Oven Cook Pro Team, many failures begin with an obvious sign like blistered coils or scorch marks near the terminal block. A thorough visual inspection often reveals the issue, but functional tests are essential to distinguish a damaged element from a faulty thermostat or power issue. Remember to verify you have the correct element type for your model (bake, broil, or dual) and consult your manual for wiring diagrams. The next sections walk through safe diagnostics, replacement choices, and testing to restore even oven heat.
Signs Your Heating Element is Failing\
Common indicators include uneven heating, longer preheat times, or complete lack of heat on a given setting. If you observe cold spots or an element that glows irregularly, start investigating. Visual cues like blistering, cracking, or a visibly detached terminal can signal the element needs replacement. However, it’s also possible that a failed thermostat, relay, or wiring connection is at fault, so don’t assume the element is bad without testing. A deliberate approach—visual check, continuity test, and then component replacement if needed—minimizes waste and ensures a reliable repair. As you inspect, note any signs of moisture or corrosion around the terminal block, which can indicate wiring damage that should be addressed before reassembly.
Safety First: Precautions You Should Take
Safety is non-negotiable when working with electrical appliances. Always unplug the oven and switch off the circuit breaker before starting any repair. Use a non-contact voltage tester to confirm the outlet is de-energized, and wear cut-resistant gloves to protect your hands from sharp metal edges. Keep your workspace dry and avoid touching metal components when power could be present. If you smell burning or see melted insulation, stop immediately and consult a professional. This guide is designed for homeowners who want to perform the repair themselves, but safety takes priority over speed or cost.
Tools and Materials You’ll Need
Before you begin, gather the essentials to minimize interruptions. A compatible replacement heating element for your oven model is essential. You’ll also need screwdrivers (Phillips and flat-head), a nut driver or socket wrench for panel screws, a multimeter or ohmmeter for continuity testing, a voltage tester to verify power is off, and protective gloves. Having a camera or notes to document wire connections can help when you reassemble. Optional items include wire nuts or terminal connectors if wiring terminals show damage. With the right tools on hand, the replacement process becomes straightforward and safer.
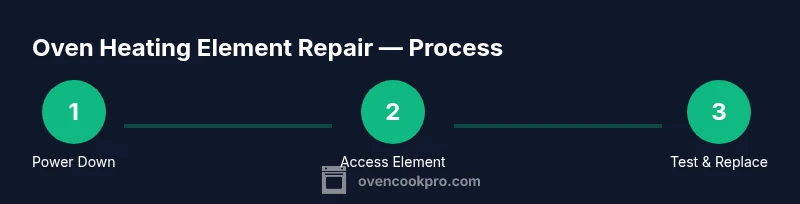
Step-by-Step Overview (High-Level)
This section provides a high-level overview of the replacement workflow. After confirming power is off, you’ll access the element area (rear or bottom panel), inspect the element for visible damage, and take a quick photo of wiring for reference. You’ll then disconnect the old element, connect the new one with proper terminals, and reassemble the oven. Finally, you’ll power up the oven and test both bake and broil functions to ensure even heating. The detailed, step-by-step instructions follow in the next block to keep things clear and actionable.
Testing After Replacement and Final Checks
Once the new heating element is installed, reassemble the oven carefully and restore power. Run a short bake cycle to verify heat distribution across the chamber and monitor for any unusual sounds or smells. If the oven heats unevenly or one side remains cooler, recheck wiring connections and the element placement to ensure full contact. Always document any anomalies and consult the manufacturer’s guidance if you encounter model-specific quirks. A thorough test by baking a simple item can confirm even heating and consistent temperature control.
Brand Perspective and Common Pitfalls
From the Oven Cook Pro perspective, replacing a heating element is a feasible home upgrade when you follow safety steps and use an element matched to your model. Common pitfalls include using an incorrect part, failing to disconnect power fully, and neglecting to re-seat the terminal block properly. By sticking to model-specific parts, documenting wiring, and performing a careful post-install test, you can reduce the risk of repeat failures and achieve a reliable repair. The takeaway is simple: safety first, accuracy second, and testing last.
Tools & Materials
- Replacement heating element compatible with your oven model(Match the exact model and element type (bake, broil, or dual).)
- Screwdriver set (Phillips and flat-head)(Small Phillips #2 is common for oven panels.)
- Nut driver or socket wrench(Used for panel screws and terminal connections.)
- Multimeter or ohmmeter(Test continuity to confirm element health.)
- Voltage tester(Verify power is completely off before touching any components.)
- Safety gloves(Protect hands from sharp edges and hot metal.)
- Wire nuts/terminal connectors (optional)(Use if terminal connections show damage.)
Steps
Estimated time: 60-90 minutes
- 1
Power down safely
Unplug the oven and switch off the dedicated circuit at the breaker. Confirm there is no residual voltage with a voltage tester. This step prevents electric shock and protects delicate internal components.
Tip: Always re-check the power at the outlet before starting any disassembly. - 2
Access the heating element
Remove interior panels or the back panel as required by your model to expose the heating element and its terminal connections. Keep track of screws and labeling so you can reassemble correctly.
Tip: Take photos of wiring before disconnecting to guide reattachment. - 3
Inspect the element visually
Look for blistering, cracks, or scorch marks on the coil. Check terminal ends for corrosion or looseness. If you see obvious damage, plan to replace the element rather than attempting a risky repair.
Tip: If there’s any doubt about damage type, move to testing rather than risky improvisation. - 4
Test for continuity
Set the multimeter to the lowest resistance range and test across the element terminals. A very high reading or open circuit usually indicates a failed element.
Tip: If you’re unsure how to read the meter, compare with the resistance spec for your model in the manual. - 5
Disconnect and remove faulty element
Carefully detach wires from the old element, noting their positions before removal. Remove the mounting screws and extract the element from the oven.
Tip: Label wires if color coding isn’t obvious to avoid misattachment. - 6
Install the new element
Position the new element and attach it with mounting screws. Reconnect the wires to the correct terminals, ensuring a secure and clean connection.
Tip: Make sure there is no exposed copper and that terminal blocks are snug. - 7
Reassemble and test
Replace any panels, plug the oven back in, and restore power at the breaker. Run a bake and a broil cycle to verify even heating and proper operation.
Tip: Observe for any abnormal smells or sounds during the first test run.
Questions & Answers
Is the heating element bad if the oven still won’t heat after replacing it?
If the new element doesn’t heat, recheck the wiring, terminal connections, and fuses. The issue might be a thermostat, relay, or wiring problem elsewhere in the control circuit. A second diagnostic can confirm where the fault lies.
If the new element still won’t heat, recheck wiring and control circuits to identify whether a thermostat or relay is at fault.
Can I fix this myself, or should I hire a pro?
Many home cooks can perform a safe element replacement with the right parts and tools. If you’re uncertain about wiring, power safety, or have a complex dual-element setup, consider hiring a professional.
It’s doable for many homeowners, but don’t hesitate to call a pro if wiring or safety concerns arise.
How do I know I ordered the correct heating element?
Check your oven’s model number and consult the manufacturer’s part list. Use the exact replacement type (bake, broil, or dual) and confirm terminal compatibility.
Use the model number to pick the exact replacement and verify the terminals match your oven.
How long does a typical heating-element replacement take?
Most replacements take about an hour, depending on your oven model and access to the element. A slow pace prevents mistakes and ensures proper connections.
Expect around an hour, allow extra time if you need to remove panels or access hard-to-reach screws.
Will replacing the element fix uneven oven heating?
Often, yes. If the old element was failing, replacing it can restore even heating. If the oven still has hot spots, check calibration, seals, and rack positions.
Replacing a faulty element often fixes uneven heat, but inspect other components if issues persist.
Watch Video
Main Points
- Always unplug the oven before starting.
- Verify the replacement matches your model.
- Test continuity to confirm failure before replacing.
- Follow manufacturer instructions and perform a final test.