Broken Oven Element Troubleshooting: Quick Learn-and-Fix Guide
Urgent, step-by-step troubleshooting for a broken oven element. Learn how to diagnose, replace, and prevent element failures with safety-first guidance from Oven Cook Pro.

Most likely, a broken oven element is the culprit when your oven won’t heat or heats unevenly. The quick fix is to safely power down the unit, remove the access panel, and inspect the bake and broil coils for burns or breaks. Replace the faulty element with a compatible model, or call a professional if you’re unsure.
Understanding the broken oven element and why it matters
A broken oven element is a common reason your oven fails to reach the set temperature or delivers uneven heat. In many homes, the bake element provides most of the heat for standard baking, while the broil element handles top heat for finishing dishes. When either coil is damaged, you’ll notice cold spots, inconsistent browning, or no heat at all. According to Oven Cook Pro, heating elements are among the parts most prone to wear over years of use, especially in ovens that see heavy baking or frequent self-cleaning cycles. If you’re troubleshooting a broken oven element, you’re not alone: a failed coil is a solvable issue when approached with care.
This guide uses practical steps, safety precautions, and supplier-agnostic guidance to help homeowners understand what to check, what to replace, and how to prevent future failures. Remember: a broken oven element doesn’t always mean total replacement—many times a simple coil swap brings back reliable performance. The Oven Cook Pro team emphasizes careful diagnosis and proper part pairing to avoid future cost and hassle.
Common symptoms that point to a broken oven element
Symptoms of a broken oven element can mimic other oven problems, so start with the most obvious cues. If the oven fails to heat at all, or if only one heating mode (bake or broil) works intermittently, the element is a prime suspect. Uneven cooking, with hot spots or splotchy browning, often signals an open or shorted coil. You might also notice physical signs like blistering, burn marks, melted insulation, or a distinct burnt smell when the oven is in operation. A multimeter test is a reliable way to confirm resistance values, but only after basic safety steps are completed. Based on Oven Cook Pro research, element failures remain a leading cause of oven performance issues, particularly in older units.
Keep an eye out for a tripped breaker or blown fuse when the oven attempts to heat, which could indicate a short in the element or wiring. In some cases, the control board may display error codes related to temperature readings; these codes can point you toward sensor or element faults that require replacement.
Safety and preparation before you work on an oven element
Working with electrical components in your kitchen requires strict safety discipline. Always unplug the oven and, if possible, switch off the circuit breaker to ensure no power reaches the unit. Wait for the element to cool completely before you touch anything. Gather tools: a screwdriver set, a multimeter, a flashlight, and the correct replacement element matched to your oven model. Have a fire extinguisher within reach and avoid wearing loose clothing or jewelry that could snag on panels.
Document the wiring arrangement before disconnecting anything—photos or labeled notes prevent miswiring during reassembly. If your oven has a dual element system (bake and broil), confirm which coil is failing by testing each path, but do not attempt live electrical testing without proper training. If you are unsure at any point, consult a licensed technician. The goal is a safe and accurate diagnosis, not a rushed repair.
Non-invasive checks you can perform to diagnose the issue
Before you remove any panels, verify power and basic operation. Check the clock and any digital display for signs of power; if the display is dark, you may have a simple power issue rather than a faulty coil. For ovens with fussy temperature sensing, perform a quick preheat to see whether the unit reaches target temperatures within a reasonable range. Check the door latch and switch; a faulty door switch can mimic heat issues by preventing the oven from running correctly. Inspect the visible portions of the bake and broil coils for obvious damage and ensure there are no frayed wires at the terminal block. If you notice any signs of damage, this is a strong indicator you’ll need to replace the element. Remember: even if the coil looks intact, a resistance test with a multimeter is a more definitive diagnostic step once safety checks are completed.
Step-by-step replacement guide for a broken oven element
When the coils are visibly damaged or resistance testing confirms a fault, replacing the broken oven element is the most reliable fix. Start by disconnecting power and removing the oven’s back panel or bottom plate, depending on the model. Carefully locate the bake and/or broil element and detach the wiring harnesses. Take a photo or label each wire to ensure correct reattachment to the new element. Install the new coil, reattach all terminals securely, and reassemble the panels. Restore power and perform a controlled preheat to verify proper operation. If the oven still won’t heat after replacement, double-check wiring and consult a professional. Replacement parts should be sourced to match your exact oven model to avoid compatibility issues.
Costs, timelines, and what happens after replacement
Replacing a broken oven element is typically faster and less costly than most appliance repairs. Parts for common residential ovens often fall within a wide price range, with the element itself usually priced to fit a DIY-friendly budget. Labor costs vary if you hire a technician, and these can depend on your location and the oven model. Expect the process to take around 45 minutes to 90 minutes if you are comfortable with basic disassembly and reassembly. If you’re hiring a pro, schedule a service window and ensure the replacement element is in stock before the appointment. The overall takeaway: a reliable replacement coil restores performance and often extends the oven’s life, reducing the risk of further damage.
Quick maintenance to extend oven element life
Post-repair, adopt a few habits to extend the life of your oven element. Avoid heavy self-clean cycles right after replacement, as high heat and harsh residues can degrade coils over time. Regularly inspect wiring connections once a year for signs of loosening or corrosion. Keep the oven clean and free of food debris that could trap heat or cause arching near the element. If you notice any performance dips, address them promptly rather than letting them linger, which can compound damage and lead to early element failure. By staying proactive, you’ll keep your oven element working reliably for years to come.
Steps
Estimated time: 45-90 minutes
- 1
Power down and unplug
Begin by unplugging the oven or switching off the circuit breaker. Wait for the unit to cool completely before touching any components. This initial safety step protects you from electrical shock while you inspect the element.
Tip: If the outlet shares a circuit with other devices, turn off the entire circuit to avoid accidental re-energizing. - 2
Access the heating element
Remove any oven racks and locate the back panel or bottom plate depending on your model. Unscrew the panel to reveal the bake and/or broil element with its wiring harnesses.
Tip: Keep screws organized and take a photo of the wiring layout before disconnecting anything. - 3
Disconnect and inspect
Carefully disconnect the wires from the element terminals. Visually inspect the element for burns, cracks, or blisters. If you see obvious damage, the element likely needs replacement.
Tip: Use insulated tools and avoid touching metal parts with bare hands. - 4
Test with a multimeter
With the oven unplugged, test the element’s resistance according to your multimeter’s manual. An open circuit or a reading far from the manufacturer's specification indicates a faulty element.
Tip: If you’re unsure about resistance specs, consult the oven’s service manual or a technician. - 5
Install the new element
Connect the wires to the new element terminals, ensuring a snug fit and correct polarity if applicable. Reinstall the back/bottom panel and secure all screws.
Tip: Double-check wire placement against your initial photos to prevent miswiring. - 6
Test the oven
Restore power and run a short preheat cycle to verify the element heats evenly and consistently. Look for abnormal smells, smoke, or tripping breakers during the test.
Tip: If the unit faults again, power down immediately and recheck connections or call a pro. - 7
Recalibrate if needed
Some ovens require re-calibration after replacing heat elements. Follow your user manual to adjust oven temperature readouts if you notice persistent under- or over-baking.
Tip: Document calibration results for future reference. - 8
Final safety and prevention
Keep the interior clean, avoid moisture near electrical components, and schedule annual inspections if your oven sees heavy use. Keep a spare element on hand if you rely on your oven daily.
Tip: Store the spare element in a dry location with easy access for quick future replacements.
Diagnosis: Oven won’t heat or heats unevenly
Possible Causes
- highBroken bake or broil heating element (open circuit or short)
Fixes
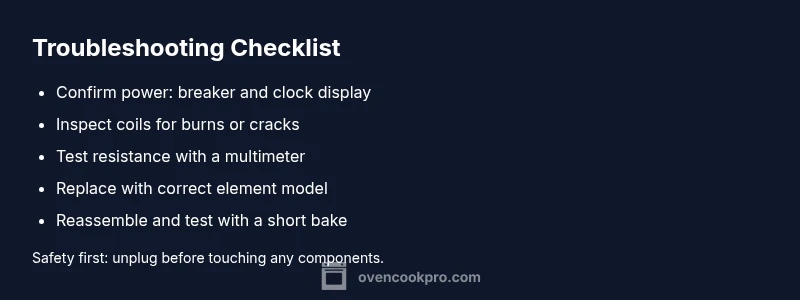
- easyPower down and verify power supply to the oven (breaker, outlet, clock display) and reset as needed
- easyVisually inspect the coils for burns, blistering, or melted insulation
- mediumTest element resistance with a multimeter and replace if open/shorted
- mediumReplace with a compatible oven element and reassemble
- easyIf unsure or uncomfortable with electrical work, contact a licensed appliance technician
Questions & Answers
What is a broken oven element?
A broken oven element is a damaged bake or broil coil that no longer conducts electricity properly, causing heat loss or uneven temperatures. Visual damage or failed resistance tests typically indicate replacement is needed.
A broken oven element is a damaged heating coil that stops working or heats unevenly.
Can I repair a broken oven element myself?
DIY replacement is possible if you have electrical safety knowledge, the right tools, and the correct replacement part. If you’re unsure, contact a licensed technician to avoid shocks or fire hazards.
DIY replacement is possible if you’re comfortable with electrical work; otherwise, hire a pro.
How long does replacement take?
A typical element replacement can take 30 to 90 minutes, depending on model and your comfort with disassembly. Labor, if hired, adds to the total time.
Usually about 30 to 90 minutes to replace, plus any labor time.
Will replacing the element fix temperature accuracy?
Replacing a faulty element often resolves heat-related issues, but some ovens require calibration after replacement to restore accurate temperature readings.
Replacing the element can fix heat problems, but you may need to calibrate afterward.
What safety precautions should I take?
Always unplug and wait for cooling, avoid touching live terminals, and use insulated tools. If you smell burning or see smoke, stop and call a professional.
Unplug first, wear protection, and avoid live wiring.
Is it safe to continue using the oven with a faulty element?
No. A faulty element can cause electrical shorts or fire. Replace the element promptly and test the oven after installation.
Not safe to keep using it. Replace the element and test before cooking again.
Do I need to replace both bake and broil elements at the same time?
Only replace the faulty element. Replacing both is unnecessary unless both are visibly damaged or test poorly.
Only replace the one that’s faulty unless both are damaged.
Watch Video
Main Points
- Identify heating element failure early to prevent further damage
- Use safe, controlled steps to test and replace a broken oven element
- Document wiring and model numbers for accurate replacement
- Consider professional help for complex electrical work
- Prevent future issues with regular maintenance and safe operation