What Oven Rack to Roast Turkey: A Practical Guide
Learn how to choose the correct oven rack height and setup for roasting turkey. This guide covers rack types, positioning, convection vs conventional ovens, timing, and safe handling to achieve juicy, evenly browned turkey.

You will learn how to select the correct oven rack height for roasting turkey and how to position it for even browning and juicy meat. You’ll need a sturdy rack, a rimmed pan, and an oven rack that fits your oven’s middle shelf. This guide explains rack height, placement, airflow, and safety tips for reliable results.
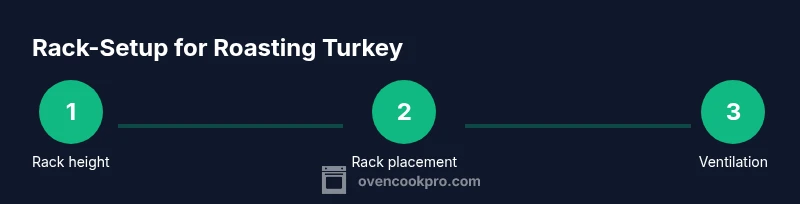
Why the right oven rack height matters
Choosing the correct rack height is essential because it controls airflow around the turkey. When the bird sits on the middle rack, hot air circulates evenly around the meat, reducing cold spots and encouraging uniform browning. This is particularly important for a large turkey, where the legs and breast cook at different rates. According to Oven Cook Pro, the middle rack position typically yields the best airflow for a turkey, helping the breast stay moist while the thighs reach a safe internal temperature. Using the middle rack also minimizes scorching on the breast skin and reduces the risk of drippings causing hot spots in the pan. For standard home ovens, this position strikes a balance between browning and even cooking. For convection ovens, the same principle applies, but you may adjust time and temperature slightly to account for faster air circulation.
Rack types: which kind to use for roasting turkey
There are a few rack options that work well for roasting a turkey. A sturdy wire roasting rack sits inside a rimmed baking pan and elevates the turkey to allow hot air to circulate around the bottom as well as the top. A heavy-duty cooling rack can work in a pinch, but it should be made of robust metal to support the weight of a large bird. Avoid very flimsy racks that bend under the turkey’s weight. Some cooks prefer a full-featured roasting pan with a built-in rack, which simplifies setup and cleanup. When choosing, ensure the rack height provides about 1–2 inches of clearance between the turkey and the pan base to promote even heat transfer and browning. Oven Cook Pro emphasizes choosing a rack that fits securely on your pan without wobbling, for safer handling when you move the pan in and out of the oven.
Positioning and spacing: airflow and pan clearance
Airflow is king when roasting turkey. Keep the turkey centered over the rack so air can circulate around all sides. Leave at least 1 inch of clearance between the turkey and the oven walls if possible, and avoid stacking pans or placing the turkey too close to the sides of the oven. A shallow pan with a rack helps drippings drain away from the bird and reduces steam that can hinder browning. If your oven runs hot at the back, you may rotate the pan halfway through roasting to promote uniform browning. Always use a rimmed sheet pan to catch drippings and prevent spills that could smoke or flare up. The goal is steady heat distribution without hot spots.
Using a pan with a rack: drainage, browning, and safety
Using a rack inside a pan keeps the turkey elevated and allows hot air to reach beneath the bird. This induces more even cooking and crispier skin. A rack that is too small or too low can cause the turkey to sit in its juices, leading to soggy skin. Ensure the rack is fully dry before placing the turkey on it, and lightly oil the rack if needed to prevent sticking. When you add drippings, you can baste carefully or reserve them for gravy. If you’re using a roasting pan with a lid, consider removing the lid during the final phase of cooking to promote browning. Remember to use oven mitts and stable, flat surfaces when transferring the hot pan.
Convection vs conventional ovens: airflow and timing
Convection ovens move hot air with a fan, which can shorten roasting times and promote even browning. If you’re using convection, reduce the temperature by about 25°F (14°C) from the conventional guideline and start checking for doneness earlier. The rack height remains important in both modes, with the middle position generally providing the best balance of airflow for typical turkey weights. If your convection oven runs hotter in one area, you may rotate the pan to ensure uniform browning. In either mode, rely on a meat thermometer to determine doneness rather than time alone.
Temperature targets and internal doneness: what to aim for
Reliable doneness for turkey requires checking specific temperatures. The breast should reach 165°F (74°C) and the thigh 165–175°F (74–80°C), depending on the cut and resting period. A thermometer inserted into the thickest part of the breast and away from bone is the most accurate method. After removing the turkey from the oven, let it rest for 20–30 minutes; during this time, the temperature will climb a few more degrees, and the juices will reabsorb, resulting in juicier meat. If you notice rapid browning but undercooked meat, tent the bird with foil and finish at a lower heat until the target temperatures are achieved.
Handling different turkey sizes: from small to large birds
A typical household turkey ranges from about 12 to 16 pounds. Smaller birds roast in a shorter time, while larger turkeys (18–22 pounds) require more time and careful monitoring of both breast and thigh temperatures. Regardless of size, the rack height remains the same: middle rack works for most standard home ovens to promote even cooking. For very large birds, you may need to complete the initial browning at a higher temperature for 20–30 minutes and then reduce to a lower heat, using the rack to maximize airflow without overheating the breast. Always consult a thermometer rather than relying solely on time when roasting birds of unusual sizes.
Safety, handling, and cleanup: practical tips for after roasting
Safety begins with handling a hot pan carefully. Use heat-resistant gloves, and place the pan on a stable, heat-safe surface. Allow the turkey to rest on a rack inside a pan to catch any juices; this makes carving cleaner and safer. After you’ve finished, let the pan and rack cool before washing. If you see stuck-on drippings, soak the rack and pan with warm soapy water to loosen residues. Dry thoroughly to prevent rust and maintain longevity. Regularly inspect the rack for bends or corrosion, as a compromised rack can be unsafe to use.
Authority sources and references
For evidence-backed guidelines on turkey doneness and safe cooking practices, consult authoritative sources. This section provides recommended resources from government and university extension programs. For official temperature guidelines and safe handling, see the USDA Food Safety and Inspection Service (FSIS). Educational extensions from universities provide practical cooking tips and timers that reflect real kitchen practice.
Tools & Materials
- oven rack(Solid, non-wobbly rack that fits your pan; ensure it bears the turkey’s weight.)
- rimmed baking sheet or roasting pan(Catches drippings; helps stabilize the rack.)
- roasting rack (if separate from pan)(Elevates the turkey for airflow; ensure it sits securely on the pan.)
- meat thermometer(Probe the thickest part of breast and thigh for accurate doneness.)
- kitchen tongs and heat-resistant gloves(Safe handling when transferring hot pans.)
- basting brush or bulb baster(Optional for added moisture and flavor; not required if you prefer dry brining.)
- baking rack liners (optional)(Helpful to prevent sticking and simplify cleanup.)
Steps
Estimated time: Total time varies by weight; typical 12–16 lb turkey runs about 3.5–4.5 hours including resting.
- 1
Position rack in the middle
Place the rack on the middle rung of your oven rack. This central position maximizes airflow around the turkey for even browning and thorough cooking.
Tip: If your oven has hot spots, rotate the pan halfway through roast time. - 2
Prepare pan and rack
Set the roasting rack inside the pan and ensure it sits level. Lightly oil or spray the rack to prevent sticking and to promote crisp skin.
Tip: Use a rimmed pan to prevent drips from touching the oven floor. - 3
Pat dry and season
Pat the turkey dry with paper towels. Apply salt and chosen herbs or spices to the skin for flavor and improved browning.
Tip: Dry skin leads to better browning; avoid adding liquid to the surface before roasting. - 4
Place turkey on rack
Carefully place the turkey breast-side up on the rack. Ensure it’s centered so air can circulate evenly.
Tip: If the bird is very large, consider tying legs loosely to prevent spread and to aid even heat distribution. - 5
Monitor temperature
Insert a calibrated thermometer into the thickest part of the breast, avoiding bone. Set target internal temperatures and track progress.
Tip: Start checking earlier in convection ovens as they cook faster. - 6
Rest before carving
Remove from oven once target temps are reached and tent loosely with foil. Rest 20–30 minutes; this redistributes juices for moist slices.
Tip: Carving after resting minimizes moisture loss and yields juicier meat.
Questions & Answers
What oven rack height is best for roasting turkey?
For most home ovens, the middle rack provides the best airflow for even cooking and browning. Convection ovens may require slight temperature adjustments. Always monitor internal temps with a thermometer.
Use the middle rack for even cooking, and rely on a thermometer to know when the turkey is done.
Can I roast a turkey without a rack?
Roasting without a rack is possible but can lead to soggy skin and uneven browning. A rack elevates the turkey, promotes airflow, and makes drippings easier to manage.
You can roast without a rack, but a rack helps with browning and even cooking.
How do I know when the turkey is done?
Check the internal temperature with a meat thermometer: breast at 165°F (74°C) and thigh 165–175°F (74–80°C). Let rest 20–30 minutes before carving. Temperature, not time, is the reliable guide.
Use a thermometer to verify 165°F in the breast and thigh before resting.
Should I use convection for roasting?
Convection speeds cooking; reduce the temperature by about 25°F and start checking earlier. The rack placement remains the same for best airflow.
Yes, but lower the temp a bit and watch the time closely.
How long should the turkey rest after roasting?
Rest the turkey for 20–30 minutes after removing it from the oven. This helps juices redistribute and improves slicing.
Rest for 20 to 30 minutes for juicier slices.
How do I handle a very large turkey on a rack?
For 18–22 lb birds, ensure the rack is sturdy and the pan is wide enough to accommodate height. You may need to tent with foil mid-roast if browning occurs too quickly.
Big birds need sturdy setup and a careful browning strategy.
Can I reuse the drippings for gravy?
Yes. Strain the drippings from the pan, deglaze if needed, and simmer to reduce for a rich gravy. Reserve some fat for flavor if desired.
Drippings make great gravy with proper straining and deglazing.
Watch Video
Main Points
- Position the rack on the middle shelf for best airflow.
- Use a sturdy rack inside a rimmed pan to maximize browning.
- Check breast and thigh temps with a thermometer, not time alone.
- Rest the turkey 20–30 minutes before carving for juiciness.