Roast in Oven Recipe: Master Juicy, Evenly-Cooked Roasts
Master a reliable roast-in-oven method for beef, chicken, pork, turkey, and vegetables. This step-by-step guide covers prep, searing, roasting temps, doneness checks, and resting techniques, plus common mistakes to avoid. Includes tools, tips, safety notes, and practical variants from Oven Cook Pro.

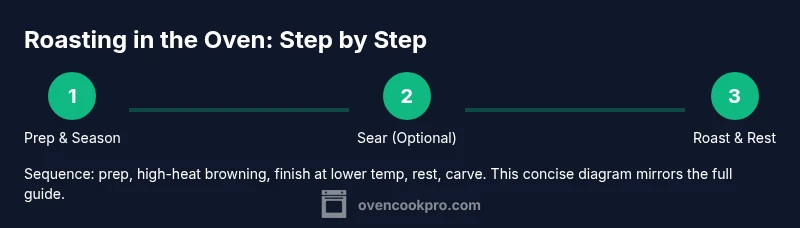
You’ll learn a clear, repeatable method to roast in the oven for juicy, evenly browned meat and vegetables. Start with dry surfaces, prepare a simple seasoning, decide on optional searing, roast at a steady temperature, verify doneness with a thermometer, and rest before carving for maximum juiciness and flavor.
Why roast in the oven produces juicy, even results
Roasting in the oven uses dry, controlled heat to brown the surface while gently carrying heat to the center. This method concentrates flavor, builds a crust, and keeps meat or vegetables from stewing in their own juices. By establishing a consistent temperature, you minimize uneven doneness and moisture loss. According to Oven Cook Pro, the secret is starting with a dry surface, a preheated oven, and a deliberate rest after cooking. With practice, you’ll learn to judge color, aroma, and texture to know when the roast is ready. This section lays the foundation for reliable, tasty roasts every time. In addition, choosing the right cut or vegetables matters: lean roasts benefit from a brief, hot initial sear to seal juices; tougher cuts respond to lower, steady heat and longer roasting to break connective tissue.
Choosing cuts and ingredients for roast
Selecting the right cut guides flavor, texture, and cooking time. For beef, popular roasts include rib, sirloin, and chuck, each offering a different balance of tenderness and richness. Poultry roasts like whole chickens or turkeys benefit from even sizing and optional aromatics such as garlic, lemon, and herbs. For vegetables, consider root vegetables (potatoes, carrots) or sturdy greens that hold up to heat. Salt, pepper, olive oil, and fresh herbs are your foundational flavor trio. If you’re new to oven roasting, start with a simple beef rib roast or a whole chicken to learn the rhythm of heat, timing, and resting. You can scale up to mixed roasts as you gain confidence. Remember: room-temperature meat roasts more evenly than cold from the fridge.
Tools and setup you’ll need
A well-prepared roasting station makes all the difference. You’ll want a roasting pan with a rack to elevate the meat, a reliable meat thermometer for accuracy, a sharp carving knife, and heat-safe tongs. Keep an extra layer of protection handy with oven mitts or heat-resistant gloves. Aluminum foil is useful for tenting during resting, while parchment paper keeps vegetables from sticking and makes cleanup easier. If you’re roasting multiple items, a separate rack for vegetables prevents crowding. Finally, preheat your oven to ensure the initial browning has immediate, even heat rather than a gradual climb.
Prep steps: dry, season, and rest
Begin by patting the roast dry with paper towels to promote browning. Salt generously and apply a light coat of olive oil, then add pepper and herbs. If time allows, let the seasoned roast sit at room temperature for 20–40 minutes to reduce cold spots. Resting after salting helps flavor penetration and moisture retention. For garlic lovers, mince garlic and combine with herbs to create a flavorful rub. A dry surface plus proper seasoning is essential for a good crust and robust aroma.
The roasting process: temperature trajectory and searing options
Start with a hot initial phase to develop crust, then reduce to a gentler temperature to finish cooking through without drying out. Seared roasts develop deep color and complex flavor; this step is optional for smaller roasts or very tender cuts. If you skip searing, rely on a steady roasting temperature and a thermometer to guide doneness. Throughout the roast, use the rack to ensure air circulation around the meat. For vegetables, toss them in a light coating of oil and salt and place them in the pan so they caramelize alongside the meat. This approach yields a harmonious plate with evenly roasted edges and a fragrant kitchen.
Doneness, safety, and resting for maximum juiciness
The only safe way to ensure doneness is to use a thermometer and monitor target internal temps for each protein. After reaching the target, remove the roast and tent loosely with foil for 10–20 minutes. Resting redistributes juices, making slices more tender and flavorful. If juices pool on the cutting board, resist the urge to carve immediately—time is your friend here. For poultry, ensure the thickest part reaches the recommended safe temperature. For beef and pork, carryover cooking will continue for several minutes after removing it from the oven.
Variations: beef, poultry, pork, turkey, and vegetables
Beef roasts shine with simple herb rubs and optional garlic. Poultry responds well to lemon, thyme, and garlic, which brighten the meat without overpowering it. Pork roasts appreciate apples, onions, and sage. Turkey benefits from aromatics like rosemary and citrus. Vegetables can be roasted alongside meat or separately with a crisp, caramelized exterior. When cooking combinations, size your vegetables to ensure uniform doneness and account for any extra time the meat requires. Always adjust the pan arrangement to prevent crowding, which can compromise browning.
Troubleshooting common issues during roasting
If you notice uneven browning, rotate the pan midway through cooking to address hot spots. If the crust forms too slowly, increase the initial sear time or raise the oven temperature briefly, then lower it again. A pan with insufficient drainage can cause the roast to steam rather than brown; lift it for better air circulation. If the meat seems dry, verify doneness with a thermometer and give it extra resting time for juices to reabsorb. Finally, if you smell smoke or see excessive splatter, reduce temperature and use a splatter guard to protect the oven and your kitchen.
Resting, carving, and plating the roasted dish
Resting continues to work during carving, so plan ahead and cut after the rest period is complete. Use a sharp carving knife to create clean, even slices. For presentation, consider placing vegetables around the meat for a rustic look and effortless serving. A light drizzle of the roast juices or a simple pan sauce adds moisture and depth. Pair with a starch, a green vegetable, and a bright sauce to balance the plate. The aroma of garlic, herbs, and roasted meat should greet guests as you plate. A well-rested roast is the mark of a confident home cook.
blockData-otherNotesNotUsedForThisPromptOnly":null],
toolsMaterials
Tools & Materials
- Roasting pan with rack(Heavy-gauge metal, fits your oven, with a rack to lift meat above drippings)
- Meat thermometer or instant-read thermometer(Probe-style for accurate internal temperature)
- Oven-safe carving knife(Sharp blade, long enough to slice comfortably)
- Oven mitts or heat-resistant gloves(For safe handling of hot pans)
- Tongs or a meat fork(For turning and lifting without piercing the meat)
- Aluminum foil(For tenting during resting (optional))
- Parchment paper(For vegetables and simple pans to prevent sticking)
- Salt and pepper(To taste; coarse salt preferred for crust formation)
- Olive oil(Helps browning and flavor; use extra-virgin if possible)
- Fresh garlic and herbs(Optional aromatics to boost flavor)
Steps
Estimated time: 90-120 minutes
- 1
Pat roast dry and bring to room temperature
Pat the roast dry with paper towels to promote browning. Salt generously and rub with olive oil and any chosen herbs. If time allows, let the meat sit at room temperature for 20–40 minutes to reduce temperature differentials and improve even cooking.
Tip: Dry surface + consistent spacing in the pan = better crust and more even doneness. - 2
Preheat oven and prepare roasting setup
Preheat the oven to a high initial temperature to start browning, then plan to reduce it for finishing. Place the rack in the center of the pan to ensure air flow around the roast. Have your thermometer ready and ensure you have enough headspace around the meat for heat circulation.
Tip: A preheated oven prevents slow start and uneven crust development. - 3
Season and rub for flavor deep penetration
Season generously with salt, pepper, and herbs. For added depth, rub with crushed garlic and a light coat of olive oil. The seasoning helps lock in moisture and forms a flavorful crust as the roast browns.
Tip: Score lightly if you want the rub to penetrate deeper without tearing the surface. - 4
Optional sear for crust and aroma
If you’re using a stovetop sear, heat a heavy skillet with a thin oil layer and sear the roast on all sides for 1–2 minutes per side until a rich crust forms.
Tip: Searing is optional but yields a deeper crust and richer aroma. - 5
Roast with temperature trajectory
Roast the meat at a high initial temperature for 15–20 minutes, then reduce to a steady, moderate heat until the thermometer reaches the target doneness. Use a rack to prevent soggy bottoms and ensure even browning.
Tip: Keep the oven door closed to avoid temperature fluctuations. - 6
Check doneness with a thermometer
Insert the thermometer into the thickest part of the roast, avoiding bone. Rely on internal temperature rather than time alone. Remember carryover cooking will raise the temperature a few degrees after removal.
Tip: Aim for the target range, then let carryover cook finish the job. - 7
Rest before carving
Transfer to a cutting board and tent loosely with foil for 10–20 minutes. Resting redistributes juices and makes for easier carving with juicier slices.
Tip: Rest time is key to tenderness and flavor retention. - 8
Carve and serve
Carve across the grain for tenderness and plate with roasted vegetables or a simple pan sauce. A final drizzle of juices enhances moisture and flavor perception.
Tip: Slice thick or thin based on preference and meat type.
Questions & Answers
What is the best oven temperature for roasting different meats?
Roasting temperatures vary by meat and cut. A common approach is to start with a high heat to brown, then reduce for finishing. Always use a meat thermometer to reach the target internal temperature for doneness.
Use a thermometer to guide doneness, not guesswork based on time.
Should I sear the meat before roasting?
Searing adds crust and flavor but is not strictly required for all roasts. It’s beneficial for larger cuts or when you want a deeper crust; otherwise, you can skip it and rely on a steady roast.
Searing is optional but effective for color and aroma.
How long should a roast rest after cooking?
Resting allows juices to redistribute, improving tenderness. Plan for 10–20 minutes, loosely tented with foil, depending on roast size.
Rest for a short period so juices redistribute before carving.
Can I roast vegetables and meat together?
Yes. Place vegetables around the meat or roast separately if they require different timings. Cut vegetables uniformly for even cooking.
You can cook them together for convenience, just mind the timing.
Is convection baking better for roasting?
Convection helps browning and reduces hot spots by circulating air. If using it, lower the oven temperature by about 25°F and monitor doneness closely.
Convection speeds browning; remember to adjust heat accordingly.
What safety precautions should I take when roasting?
Use oven mitts, keep the work area clear, and work with a stable pan. Be careful with hot oils and avoid sudden movements around a hot oven.
Take standard kitchen safety seriously to prevent burns.
Watch Video
Main Points
- Rest meat before carving to lock in juices
- Use a thermometer, not time alone, to judge doneness
- Dry surface and proper seasoning create a flavorful crust
- Searing is optional but adds color and aroma
- Let roasting temps do the work—avoid excess opening of the oven