Ribs Low and Slow in the Oven: A Complete How-To Guide
Master rib cooking with a reliable, step-by-step method for ribs low and slow in the oven. Learn prep, timing, temperatures, and finishing ideas for tender, flavorful results.

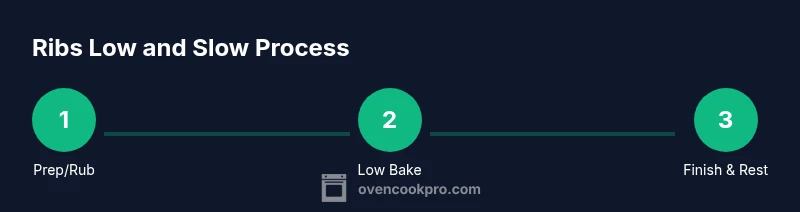
Ribs low and slow in the oven deliver fall-off-the-bone tenderness with deep flavor. You’ll learn a reliable method that uses a simple dry rub, a rack on a sheet pan, and low heat for several hours, plus a final rest. Plan for roughly 2.5–4 hours at 225–275°F, plus 10–20 minutes to rest before serving.
Why Ribs Benefit from Low and Slow Oven Cooking
According to Oven Cook Pro, ribs low and slow in the oven maximize tenderness by breaking down collagen and connective tissue without drying out the meat. This method creates a tender interior while allowing surface flavors to develop via a bark-like crust. The key is sustained low heat, controlled moisture, and patient timing. When you cook ribs slowly, you give fat and connective tissue time to render gently, producing juicy, pull-apart meat with a flavorful exterior. If you’re new to this approach, think of it as a long, gentle braise that happens to be oven-baked instead of simmered on the stove. The result is predictable texture and a robust flavor profile that can be tailored to your preferred rubs and sauces.
Choosing the Right Ribs and Trim
Ribs come in several cuts, with baby back (short loin) and spare ribs being the most common for oven cooking. Baby backs are leaner and cook a bit faster, while spare ribs are meatier with more connective tissue that benefits from longer, slower cooking. Whichever you pick, trim excess fat sparingly and remove the membrane on the bone side to improve rub penetration and tenderness. If you’re short on time, baby backs produce quicker results, but spare ribs offer better bang for long, slow cooks. Aim for 2–2.5 pounds per rack for home cooking and plan for a total of 1–2 racks for a family meal.
Flavor Foundations: Rubs, Marinades, and Finishing Sauces
A good dry rub is the backbone of flavor in this technique. A simple balance of salt, sugar, paprika, garlic, and chili powder provides a versatile base, with optional cumin or mustard powder for depth. Rub the meat evenly, then let it rest for at least 30 minutes to bloom. If you prefer a glaze, consider finishing with a light sauce or a glaze that complements the rub. For extra aroma, add minced garlic, brown sugar, and a touch of liquid smoke for a more intense profile. Remember, the goal is to build flavor on the surface during the long cook so each bite carries a rich crust and juicy interior.
Equipment and Prep: Tools, Racks, and Surfaces
Set up a rimmed baking sheet with a wire rack to lift the ribs above any rendered fat. Use heavy-duty aluminum foil to wrap or tent the ribs during the main cook if you follow the wrapped-braise method. Sanitize your cutting board and knife, and gather a meat thermometer to verify doneness. Parchment paper can protect your workspace, and a silicone brush or small spoon helps apply rubs and glaze evenly. Keeping your workspace organized reduces cooking time and errors, especially when working with long cooks.
Temperature and Timing Overview
Low and slow cooking typically runs in the range of 225–275°F (107–135°C). The goal is to maintain a gentle simmer of tenderization rather than a rapid boil of moisture loss. Most rib recipes require 2.5–4 hours total, sometimes longer for larger racks. Starting with a bare bake or a wrap stage can shift timing by 30–60 minutes. Use a thermometer to monitor internal temperature in the thickest part of the meat; target is approximately 190–203°F (88–95°C) for tender, pull-apart ribs. Allow for a 10–20 minute rest after cooking so juices redistribute.
Prepping the Ribs: Membrane, Trimming, and Rub Application
Before the oven hits 225–250°F, prep is critical. Remove the thin membrane on the bone side to improve rub penetration and tenderness. Trim excess fat if it’s thick, and pat the ribs dry to help rub adhesion. Apply the rub generously and evenly, massaging it into the meat for several minutes. For best results, wrap and refrigerate the rub-coated ribs for at least 30 minutes if you have time. If you’re using a glaze, you’ll apply it later in the cook for a shiny finish.
The Oven-Cook Timeline: Wrapping, Baking, and Unwrapping
Many cooks opt for a two-stage approach: cook low until the meat is tender, then unwrap for a glaze or bark development. Start by placing the ribs on a rack and baking at 225–250°F (107–121°C) for 2–3 hours, or longer if you’re using larger racks. When the meat passes the “probe tender” test, unwrap and brush with glaze, returning to oven for 15–30 minutes to set the finish. If you prefer to retain more moisture, use a light tablespoon of reserved rub liquid or water to create steam inside the wrap during the braise.
Resting, Glazing, and Serving Ribs
Resting is critical after this long bake. Cover loosely with foil and allow the meat to rest for 10–15 minutes to redistribute juices. Slice between the bones or follow natural separation lines to maintain moisture. If you’ve glazed, rewarm briefly before serving for a glossy finish. Fresh herbs or citrus zest can brighten the final plating, and a small side of coleslaw or pickles adds contrast to the rich meat.
Troubleshooting Common Issues
If the exterior looks dry or the bark isn’t forming, adjust rub composition, use a touch more sugar in the rub for caramelization, or shorten the dry-cook window and finish with a glaze. For a too-tough texture, extend the initial cook time slightly and consider a tighter wrap to trap moisture. Conversely, if the ribs appear to be overcooking, reduce the oven temperature by 10–15°F (5–8°C) and check frequently in the final hour. Remember, practice makes perfect with rib techniques.
Safety, Storage, and Leftovers
Cooked ribs should be cooled to room temperature only briefly, then refrigerated within two hours. Wrap tightly and store in the fridge for 3–4 days or freeze for longer storage. Reheat gently in the oven or on the grill to avoid drying out. When handling hot meat, use heat-resistant gloves and tongs to prevent burns. Cleaning up after a rib cook involves discarding foil, wiping surfaces, and sanitizing knives and boards to avoid cross-contamination.
Tools & Materials
- Rib rack or elevated baking rack(Keeps meat lifted for even heating; avoid sitting in pan juices)
- Rimmed sheet pan(Catch drips; prevents soggy crust)
- Heavy-duty aluminum foil(Wrap to trap moisture during braise stage)
- Meat thermometer(Check internal temp; target ~190–203°F)
- Silicone brush or spoon(Apply rubs or glaze evenly)
- Chef’s knife and cutting board(For trimming and slicing)
- Parchment paper(Line surfaces for easier cleanup)
- Oven-safe timer(Helps manage long cook sessions)
Steps
Estimated time: 2.5-4 hours
- 1
Gather ingredients and equipment
Collect the ribs, rub ingredients, foil, and the tools you’ll need. Pre-measure spices and prepare the rack so you can focus on the cooking process once the oven heats.
Tip: Having everything ready before you start reduces delays and heat loss. - 2
Prepare the ribs and apply rub
Pat ribs dry, remove membrane if present, trim excess fat, then rub evenly with your chosen spice blend. Let the rub bloom for at least 30 minutes for deeper flavor.
Tip: Massaging rub into the meat improves penetration and crust. - 3
Preheat oven and set up the rack
Preheat to 225–250°F (107–121°C). Place the rack on the sheet pan so air can circulate beneath the ribs for even cooking.
Tip: A properly spaced rack prevents soggy bottoms and promotes bark formation. - 4
Bake low and slow (covered or wrapped)
Bake for 2.5–3.5 hours depending on rack size, until the meat is probe-tender. If using wrapped method, seal the package with foil to trap moisture.
Tip: Wrapping speeds tenderness but can soften crust; plan accordingly. - 5
Uncover, glaze, and finish
Unwrap, brush with glaze or apply a finishing rub, and bake 15–30 minutes more to set the crust. Keep an eye on color to avoid burning.
Tip: A quick glaze at the end builds a glossy surface and depth of flavor. - 6
Rest and slice for service
Let the ribs rest 10–15 minutes before slicing between bones for juicy servings. Slice along the bone lines to maximize tenderness.
Tip: Resting redistributes juices for a moist bite.
Questions & Answers
What temperature is best for ribs low and slow in the oven?
Most cooks aim for 225–250°F (107–121°C) to balance tenderness and moisture. Use a thermometer to check doneness; the meat should be tender and pull-away ready around 190–203°F (88–95°C).
Aim for around two twenty-five to two twenty-five degrees and check tenderness with a thermometer.
Should I wrap the ribs during cooking?
Wrapping can trap moisture and tenderize the meat. Use foil or butcher paper for a braise-like effect, then unwrap for a final glaze if you want a crust.
Yes, wrapping helps tenderize; unwrap later if you want a glaze and crust.
Can I cook beef ribs the same way?
Beef ribs respond to low-and-slow methods as well, but plan longer times for larger, tougher cuts. Monitor tenderness with a probe and adjust time accordingly.
Beef ribs work, but expect longer cooking and watch tenderness carefully.
How long should ribs rest after cooking?
Rest ribs for 10–15 minutes before slicing to redistribute juices and improve texture.
Rest for about 10 to 15 minutes before cutting.
What’s the best finishing method for flavor?
Finish with a glaze or finishing rub during the last 15–30 minutes to build a glossy crust and deepen flavor.
Finish with a glaze in the last 15–30 minutes for a glossy crust.
Watch Video
Main Points
- Plan for a long, gentle cook and rest.
- Choose the right rib cut for your timeline.
- A good rub is the foundation of flavor.
- Wrapping moistens and speeds tenderness if desired.
- Resting before slicing preserves juiciness.