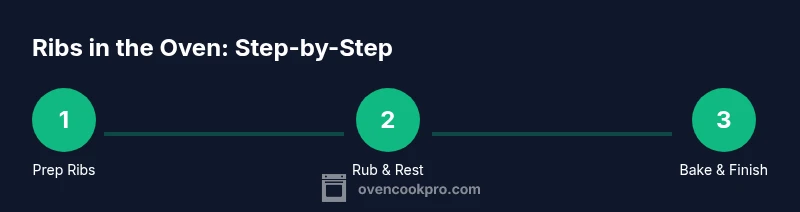
How to Make Ribs in the Oven: A Step-by-Step Guide
Learn how to make ribs in the oven with a reliable, step-by-step method. This guide covers prep, rubs, low-and-slow baking, and finishing glaze for juicy, flavorful ribs. Perfect for home cooks seeking consistent, restaurant-quality results in their own kitchen.

According to Oven Cook Pro, you can make tender, flavorful ribs in the oven by starting with a simple dry rub, removing the membrane, and slow-baking at a low temperature before finishing under high heat to caramelize. Wrap the ribs in foil for moisture, rest before slicing, and allow a glaze to set for a glossy finish. Preheat for consistency.
Why Oven-Cooked Ribs Work
Oven-cooked ribs deliver consistent tenderness and flavor with less hands-on time than grilling. A controlled oven environment yields even heat across the meat, helping render fat without drying the rib meat. The bone acts as a natural heat sink, letting the meat cook gently while the exterior browns to a rich crust. By avoiding direct flame, you reduce the risk of scorching and charring, which can create bitter flavors. When you pair a purpose-built dry rub with mindful moisture management, the rib meat reaches a balance of juicy interior and flavorful surface.
According to Oven Cook Pro, a steady low-temperature approach produces uniform tenderness on bone-in racks when moisture is managed properly. Wrapping the ribs in foil during a portion of the bake traps steam, which helps keep the meat moist and allows the rub to form a tacky, glossy crust rather than a dry, crumbly bark. Finishing under a higher heat for the last phase tightens the surface and seals in juices. With the right timing, you can achieve rib meat that falls gently from the bone without becoming mushy. The approach is versatile for different rib cuts and meal sizes, and it scales well from weeknight dinners to weekend gatherings.
Essential Ingredients and Substitutions
Ribs: Start with two types of pork ribs — baby back ribs for leaner, quicker results or spare ribs for more meat and flavor. Rubs set the tone for flavor development and aroma. A simple dry rub can be created with a balanced mix of sweet, smoky, salty, and a touch of heat. For moisture, you can use a splash of apple cider vinegar or water in the pan during baking to help steam the meat without diluting the rub.
Core ingredients include:
- Racks of pork ribs (baby back or spare)
- Dry rub components (see below) to coat the surface evenly
- Aluminum foil for moisture retention during the middle of the bake
- An oven-safe rack and a rimmed sheet pan to keep the ribs elevated and allow air circulation
- A meat thermometer to monitor tenderness and avoid overcooking
- Optional glaze or barbecue sauce for the final finish
If you don’t have one spice on hand, substitute with a similar flavor profile, but try to preserve the balance of sweet, salty, and smoky notes. For vegetarian-friendly menus, swap the meat with a plant-based rib substitute and follow the same roasting technique. The exact quantities aren’t the point—consistency and proper technique are.
Temperature, Time, and Moisture Management
The key to reliable oven ribs is controlling heat and moisture. Start by preheating the oven to a low range so fat renders gently and meat fibers relax. In practice, many home cooks find success with a target range around two hundred fifty to two hundred seventy-five degrees Fahrenheit (120–135°C). Bake the ribs low and slow for an extended period, then switch to a higher heat to caramelize the surface and set the glaze.
During the middle stage, wrapping the ribs in foil traps moisture and steam, which helps keep the meat juicy. Plan for several hours of cooking time depending on rack size and whether you use baby backs or spare ribs. After the middle stage, uncover and finish at a higher temperature to form a glossy crust. Always use a thermometer to verify doneness and ensure you achieve probe-tender meat. A final rest helps the juices redistribute for easier slicing and better flavor distribution.
Dry Rubs and Flavor Building
A well-crafted dry rub is the cornerstone of oven-baked ribs. Aim for a balanced mix of sweetness, salt, paprika for color, garlic and onion notes, and a touch of heat. A simple, effective rub can be built from pantry staples:
- Brown sugar for caramelization and a hint of sweetness
- Paprika for color and a smoky backdrop
- Salt and black pepper to enhance overall flavor
- Garlic powder and onion powder for depth
- Optional cayenne or chili powder for heat
Apply the rub evenly across all surfaces, and gently press it into the meat so it adheres during the long bake. If you have time, let the rubbed ribs rest in the refrigerator for 30–60 minutes to deepen the flavor penetration. You can augment flavor with a binder, such as a light spread of mustard, which helps the rub stick without imparting a strong flavor of its own.
Finishing Methods: Glaze, Rest, and Caramelization
The final finish should deliver a glossy surface and a balanced bite. After the initial long bake and moisture-retention phase, unwrap the ribs, brush on a glaze or barbecue sauce, and return them to the oven at a higher temperature for a short period. This high-heat finish allows sugars to caramelize and the surface to form a crust that crunches slightly when you bite into it.
Let the ribs rest briefly after cooking. Resting helps reabsorb juices and keeps the meat moist when sliced. Slice between the bones and serve with extra glaze on the side. If you prefer extra chew, you can apply another thin glaze layer after slicing and broil for a minute or two to intensify the glaze’s shine.
Troubleshooting and Common Mistakes
Troubleshooting is part of home cooking, and oven ribs are no exception. Common mistakes include cooking at too high a temperature, which dries the meat and burns the glaze, and neglecting to remove the membrane, which can hinder texture and tenderness. Another frequent pitfall is not letting the rub sit long enough; flavor compounds need time to penetrate. If ribs come out dry, consider adding a small amount of liquid (like stock or water) to the pan, ensuring you don’t flood the meat. If the glaze doesn’t set, the surface may be too wet; pat the ribs dry briefly and reapply a lighter coat of glaze before finishing at high heat. Finally, avoid overcrowding the pan to ensure even heat exposure across all surfaces.
Tools & Materials
- Racks of pork ribs (baby back or spare)(1–2 racks depending on servings)
- Dry rub ingredients (balanced mix of sweet, salty, smoky)(Adjust to taste)
- Aluminum foil(Heavy-duty preferred for moisture retention)
- Baking sheet with a rack(Prevents direct contact with pan and promotes airflow)
- Meat thermometer(Monitor tenderness and doneness)
- Barbecue sauce or glaze (optional)(Brush during the final finish)
Steps
Estimated time: Total time: about 3 hours 45 minutes to 4 hours
- 1
Choose and prep ribs
Select pork ribs and pat dry. Trim away excess fat and any hanging membranes to ensure even cooking. This preparation sets the stage for uniform flavor distribution.
Tip: Pat dry to help the rub form a crust and stick better. - 2
Remove the membrane
Slide a dull knife under the silverskin on the bone side, then grip with a paper towel to pull it away in one motion. Removing this membrane improves rub penetration and tenderness.
Tip: A quick pull with a towel helps grip slippery membrane. - 3
Apply the dry rub
Evenly coat all surfaces with your rub. Press gently so it adheres, and consider refrigerating for 30–60 minutes to deepen flavor penetration.
Tip: Binder like a thin layer of mustard helps the rub stick without affecting flavor. - 4
Preheat oven and set up
Preheat to the low range, about 250–275°F (120–135°C). Place ribs on a rack over a sheet to promote airflow and even cooking.
Tip: Low, steady heat yields the best texture and juiciness. - 5
Bake covered for moisture
Tightly wrap the ribs in foil to trap moisture and steam. Bake for roughly 2.5–3 hours until the meat is tender but still intact at the bone.
Tip: Foil keeps moisture close and prevents surface from drying out. - 6
Uncover and glaze
Remove foil, brush with glaze or sauce, and return to the oven at a higher heat (around 400°F/200°C) for 10–15 minutes to caramelize the surface.
Tip: Keep an eye on the glaze to avoid scorching the sugars. - 7
Check tenderness
Gently twist a bone or probe near the bone with a thermometer. Ideal tenderness slips slightly when the bone is pulled, but the meat should still cling to the bone.
Tip: Probe tender, not mushy—you want some bite left to enjoy. - 8
Rest and slice
Let the ribs rest 10–15 minutes before slicing between bones. Resting redistributes juices for juicier slices and easier serving.
Tip: Slice after resting, and serve with extra glaze on the side.
Questions & Answers
Can I cook ribs in the oven from frozen?
Cooking from frozen is possible but not ideal. Thawing in the refrigerator before cooking ensures even heat penetration and more predictable results.
Cooking from frozen is possible, but thawing first gives you more even cooking and tenderness.
Is removing the membrane necessary?
Yes. Removing the membrane allows rub flavors to penetrate and makes the meat more tender. Use a paper towel to grip and pull it away in one motion.
Yes. Removing the membrane helps with tenderness and flavor absorption.
What temperature should I bake ribs at?
Bake at a low temperature, typically around 250–275°F, to render fat gently and keep the meat moist. Finish with a higher heat to caramelize the exterior.
Bake low and slow at about 250 to 275 degrees, then finish hot.
Should I baste or glaze during cooking?
Glaze during the final finish for a glossy crust. Basting with pan juices can add moisture but isn’t required if you’ve wrapped the ribs properly.
Glaze toward the end for shine; basting can help moisture if you skip the wrap.
How long should ribs rest after cooking?
Rest the ribs for 10–15 minutes before slicing. Resting helps juices redistribute and improves bite and juiciness.
Rest for 10 to 15 minutes before slicing.
Can I use honey or fruit-based glazes?
Yes. Honey or fruit-based glazes work well, but monitor sugars to prevent burning at high heat.
Yes, but watch the sugar level so it doesn't burn.
Watch Video
Main Points
- Season evenly for uniform flavor.
- Low-and-slow baking yields tender meat.
- Finish with a glaze for shine and crust.
- Rest before slicing to retain juices.
- A thermometer guides tenderness and doneness.