Oven to Grill Ribs: A Step-by-Step Guide to Tender, Smoky Results
Learn how to cook ribs by baking them in the oven and finishing on the grill for smoky, tender meat. This comprehensive guide covers prep, timing, safety, glazing, and serving with clear, repeatable steps from Oven Cook Pro.

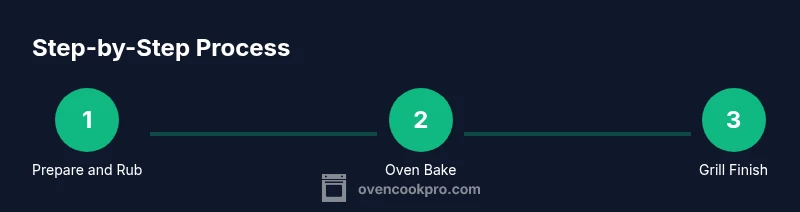
This guide teaches how to transform ribs by cooking them in the oven first and finishing on the grill for a tender, smoky result. You’ll learn prep, timing, and safety, plus practical tips for reliable rib texture. Follow these steps to move from oven to grill ribs with confidence and consistent deliciousness.
Why This Method Works
If you’re aiming for ribs that are consistently tender with a smoky, caramelized crust, this two-stage method—cooking in the oven first and finishing on the grill—delivers reliable results. This approach helps you control moisture and texture while still delivering that signature bite. By moving from the oven to grill ribs, you unlock even fat rendering and a crust that develops rapidly under direct heat. According to Oven Cook Pro, separating the cook into an oven stage and a grilling finish minimizes variables and makes weeknight rib nights feasible, even in smaller kitchens. In practice, the oven renders collagen slowly for tenderness, and the grill adds color, depth of flavor, and a hint of smoke that’s hard to achieve with baking alone.
The two-stage method also helps home cooks manage time more predictably. When the rib racks hit the oven, you can monitor progress with a thermometer and estimate finish windows. This structure reduces the risk of undercooked centers or overcooked exteriors. For households that juggle schedules, the oven-to-grill approach provides a forgiving rhythm: you can prep ahead, let the oven do the heavy lifting, and finish with a quick grill session before serving.
Finally, this method aligns with practical kitchen reality. It provides a dependable process that doesn’t require expensive equipment or advanced techniques. By combining slow oven cooking with a high-heat grill finish, you achieve the right balance of tenderness, bark, and aroma that ribs deserve.
note():null}
Choosing the Right Ribs and Prep
Your results start with rib selection and prep. Baby back ribs cook faster and are leaner, while spare ribs offer more meat and a bigger rib bone-to-meat ratio. Look for uniform thickness and a good amount of marbling. Remove the silver skin on the bone side to help seasoning penetrate and to ensure the surface browns evenly. Pat the ribs dry with paper towels; moisture on the surface can steam rather than brown. If your rib slabs are cold, let them sit at room temperature for 20–30 minutes before applying rub. This step helps the seasoning adhere and reduces the temperature shock when they hit the oven. Starting with well-trimmed, dry ribs makes the oven phase more predictable and the final grill finish more even.
Oven Cook Pro’s insights emphasize consistent rib shape and uniform thickness to avoid hot spots during cooking. If you’re cooking for a crowd, consider buying a little extra to account for trimming losses and bone-to-meat variation. Pre-cut rib racks into segments that fit your roasting pan and oven racks to keep airflow steady and heat distribution even. A clean workspace helps you apply rub quickly and evenly, reducing the risk of uneven flavor pockets.
note():null}
Seasoning and Marinades
Rubs and glazes are where rib character comes from. A simple dry rub with brown sugar, paprika, salt, black pepper, and garlic powder works well for most pork ribs. Add chili powder or cumin for heat; a touch of wet mustard or apple cider in a quick marinade can boost flavor without overpowering the meat. Let the rub sit for at least 30 minutes, or refrigerate up to 8 hours for deeper penetration. If you’re short on time, apply a thin layer just before the oven stage. Remember to sanitize surfaces after raw meat contact. For a deeper Smoky profile, add a small amount of smoked paprika to the rub and a drizzle of apple cider during the glaze phase. The goal is a balanced flavor that intensifies during roasting but remains complementary to the smoke on the grill.
Oven Cook Pro notes that a balanced rub improves crust formation and color on the surface, helping the final bite feel cohesive from bite to bite.
note():null}
Tools and Kitchen Setup
To keep the workflow smooth and repeatable, assemble a focused set of tools before you begin. An oven-safe rib rack or a wire rack placed in a roasting pan guarantees proper heat circulation. A meat thermometer or probe thermometer helps you monitor internal doneness without guessing. Aluminum foil is essential for tenting during rest or guarding against excessive browning. Have tongs, a basting brush, and a sharp knife ready, plus a clean cutting board for the final slice. If you plan to glaze, keep a small brush or mason jar for easy application. Finally, ensure you have a grill (gas or charcoal) for the finishing stage. This setup minimizes surprises and makes the two-stage method practical in most kitchens.
Pro tip: set out all tools on a heat-safe tray to speed the process and reduce trips to the drawer during the busy finish. This small preparation change saves time and reduces the risk of dropping hot utensils.
note():null}
Oven Phase: Low and Slow
Preheat your oven to 300–325°F (149–163°C). Place the rib racks on the rack in the roasting pan, bone side down, and insert a thermometer if possible. Bake for 2–2.5 hours until the meat is tender and the bones begin to show. If you notice excessive moisture, briefly drain the pan or tilt to shed juices; the goal is tender meat with a lightly browned surface, not soggy ribs. Midway, you can brush a light glaze or rub more seasoning to build flavor depth. The key is patience during this stage; rushing the oven phase increases the risk of underdeveloped texture. After baking, let the ribs rest for 10–15 minutes. This resting period allows juices to redistribute before the grill finish.
Oven Cook Pro’s approach emphasizes calm, low heat during the oven phase to render collagen without drying the meat. The resting window is crucial to preserving juiciness when you move to direct heat on the grill.
note():null}
Grill Finish: Sear, Smoke, and Glaze
Prepare a two-zone grill: hot direct heat for searing and cooler indirect heat for finishing. Transfer the ribs to the grill, bone side up, and sear for 2–3 minutes per side to develop color and a slight crust. Move the ribs to indirect heat and cook for 5–12 minutes more, turning once and applying glaze in the final minutes. If using a glaze, brush lightly every 2–3 minutes to build a sticky, glossy crust without burning. Watch for flare-ups and keep a spray bottle of water handy to calm flames. The grill finish should enhance flavor without overcooking the interior, preserving tenderness from the oven stage. When you reach about 190–203°F internal—typical for tender ribs—remove from heat and rest again for 5–10 minutes.
Oven-to-grill transitions require careful heat management. The grill finish is where texture meets aroma, producing the signature bite that makes ribs so appealing.
note():null}
Sauce, Glaze, and Resting
Sauces and glazes are optional but can elevate the final dish. A glaze with a balance of sweetness and acidity—think brown sugar, honey, apple cider vinegar, and a touch of soy—sticks well during the grill finish. Apply during the last few minutes on the grill to avoid burning. After removing from the grill, tent the ribs loosely with foil and rest for 5–10 minutes before slicing. Resting allows juices to redistribute and the glaze to set, creating a cohesive bite from bone to meat. Slice between the bones for clean portions and serve with a simple side like coleslaw or roasted vegetables for a complete meal.
This step capitalizes on the Maillard reaction during glazing, which Oven Cook Pro highlights as crucial for flavor depth in rib dishes.
note():null}
Resting, Carving, and Serving
Resting is essential for juicy ribs. After resting, slice along the bone between each rib so you get clean portions and preserve the meat’s moisture. Arrange the ribs on a warm platter and cover lightly with foil to keep them warm while you finish plating sides. Offer extra glaze on the side for guests who want a sweeter finish, and provide a cutting board and knife for easy serving. Pair with classic accompaniments like cornbread, baked beans, or a crisp slaw for contrast in texture and temperature. The two-stage cook yields ribs that stay juicy, with a crust that stays intact during slicing.
For presentation, consider sprinkling a touch of flaky sea salt and finely chopped parsley to brighten color and aroma right before serving.
note():null}
Troubleshooting Common Issues
- Ribs come out dry: Ensure you didn’t overcook in the oven; consider foiling for moisture during the first half of the bake and monitor internal temperature closely. Resting time helps compensate for any moisture loss.
- Not enough bark or crust: Increase grill time slightly or apply glaze during the final minutes with hotter direct heat. Make sure the grill is hot enough to promote browning without burning.
- Uneven doneness: Use a two-zone grill or rotate the ribs during the finish to balance heat exposure. If needed, slice a small piece to test and adjust time accordingly.
- Excess smoke or overpowering flavor: Use a light hand with wood chips or avoid smoky woods if your palette or ventilation is limited. Start with a milder wood such as apple or cherry and adjust next time if desired.
note():null}
Flavor Variations and Menu Pairings
Experiment with flavor profiles by switching rub components or glaze flavors. Try a maple-bourbon glaze for a warm, caramelized finish or a coffee-chili rub for a bold, savory crust. If you love heat, add crushed red pepper or chipotle to the rub, but test a small batch first to prevent overpowering the pork.
Pair the ribs with complementary sides: corn on the cob, potato wedges, and a tangy coleslaw create a classic barbecue spread. A light cucumber salad can balance richness, while a citrus salsa can brighten the plate. For beverages, consider a medium-bodied IPA or a slightly chilled riesling to cut through fat and enhance the smoke notes. This playful approach lets you customize the experience while preserving the core technique of oven-to-grill ribs.
note():null}
Tools & Materials
- Oven-safe rib rack(Helps rib slabs sit in a single layer for even heat exposure)
- Roasting pan with rack(Elevates ribs, catches drips, improves browning)
- Meat thermometer(Probe thermometer to monitor internal temp (target 190-203°F / 88-95°C))
- Aluminum foil(Tent ribs during rest or guard against over-browning)
- Basting brush(For applying glaze or rub evenly)
- Tongs(Turns ribs on the grill and in the oven)
- Sharp knife and cutting board(For trimming and portioning after resting)
- Paper towels(Pat dry ribs before seasoning to improve browning)
- Outdoor grill (gas or charcoal)(Needed for the finishing stage and to create grill marks)
Steps
Estimated time: 3 hours 20 minutes
- 1
Gather and prep ribs
Bring ribs to a clean workspace, trim excess fat, and remove the silver skin if present. Pat dry, split racks if needed, and cut into manageable portions. This ensures even seasoning and easier handling during the oven and grill stages.
Tip: Have everything organized within arm’s reach to speed up the prep phase. - 2
Season and rub ribs
Apply a balanced dry rub evenly across all surfaces. For deeper flavor, rub and let sit 30–60 minutes at room temperature, or refrigerate up to 8 hours. The rub creates a flavorful crust that forms during both baking and grilling.
Tip: Press rub into the meat so it sticks and doesn’t fall off during flipping. - 3
Preheat oven and set up rack
Preheat the oven to 300–325°F (149–163°C). Place the rib rack in a roasting pan, bone side down, with space for air to circulate. Insert a thermometer if available to track progress.
Tip: Center the rack for uniform heat exposure and avoid overcrowding. - 4
Bake low and slow
Bake 2–2.5 hours until the meat is tender and the bones begin to peak out. Check internal temperature, aiming for around 190–203°F (88–95°C) for tenderness. Remove from oven and rest 10–15 minutes.
Tip: If surfaces look dry, cover lightly with foil during the final phase to retain moisture. - 5
Prepare grill with two zones
Set up a two-zone grill: direct high heat for searing and indirect heat for finishing. Bring grill to high heat, then move ribs to indirect heat to finish cooking while glaze develops.
Tip: Keep an eye on flare-ups; move ribs away from direct flames if needed. - 6
Grill finish and glaze
Sear the ribs over direct heat for 2–3 minutes per side, then move to indirect heat for 5–12 minutes. Brush with glaze in the last few minutes to build a glossy crust.
Tip: Apply glaze at the end to avoid scorching the sugars too quickly.
Questions & Answers
What is the benefit of oven-to-grill rib cooking?
The two-stage method combines the tenderness from slow oven cooking with the char and aroma from grilling, resulting in meat that stays juicy and flavorful. It also gives you predictable results even on busy nights.
The two-stage method keeps ribs juicy by finishing with direct heat for a flavorful crust.
Can I skip the grill step if I don’t have access to a grill?
Yes, you can finish under a broiler or under high heat in the oven, but you won’t get the same smoky crust. If you must, broil carefully in short bursts to avoid burning.
You can skip grilling, but you’ll miss the smoky crust—use a broiler as a substitute if needed.
What internal temperature should ribs reach?
Aim for about 190–203°F (88–95°C) for tenderness. Check with a meat thermometer and test the bend and texture as you approach the target range.
Target around 190 to 203 degrees for tenderness.
How long should ribs rest after cooking?
Rest the ribs for 5–15 minutes after cooking to allow juices to redistribute before slicing.
Let them rest briefly to keep the meat juicy.
What rubs pair well with pork ribs?
A simple brown sugar–paprika–garlic rub works well; add chili powder or cumin for heat. Adjust salt to taste and avoid overpowering the meat.
A brown sugar and paprika rub is a classic starting point.
Can I use this method with different rib styles?
Yes. Baby backs finish faster, while spare ribs can benefit from a longer oven phase. Adjust time accordingly to the size and bone density.
You can adapt the method for baby backs or spare ribs by tweaking the time a bit.
Watch Video
Main Points
- Cook ribs in two stages: oven then grill for best tenderness and flavor
- Use a balanced rub and a light glaze to build flavor without burning sugars
- Employ a two-zone grill to manage heat and prevent overcooking
- Rest the meat between stages to maximize juiciness and texture