Oven Made Ribs: The Ultimate Step-by-Step Oven Rib Guide
Master juicy ribs cooked entirely in the oven. Learn rib selection, dry rubs, slow baking, glaze finishes, and tips for consistently delicious results.

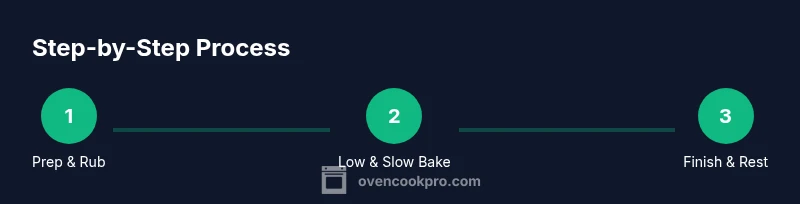
Goal: cook ribs entirely in the oven until tender, juicy, and deeply flavorful. You’ll start with prep and a flavorful rub or marinade, then bake low and slow on a rack, finish with a glaze under high heat, and rest before slicing. This method emphasizes even moisture and crust without grilling.
Why Oven-Made Ribs Deliver Consistent Texture
Whether you’re new to ribs or a seasoned home cook, oven-made ribs deliver consistent texture and reliable flavor. According to Oven Cook Pro, the secret to success is controlling moisture and heat inside a closed environment. The oven traps moisture and concentrates aromatics, while the rib bones provide structure that helps the meat stay tender as it cooks. This approach reduces the guesswork common with outdoor grilling and smoking, especially on busy weeknights or in small kitchens.
In practice, the oven acts like a controlled smokehouse—without the smoke. The key is to balance heat, humidity, and time so collagen breaks down slowly rather than seizing up or drying out. You’ll notice a more pronounced bark when the surface caramelizes, followed by a tender interior. The difference isn’t only texture; it’s also flavor retention. By keeping moisture close to the meat, you preserve the pork’s natural sweetness and the spices from your rub.
That reliability shines when you’re cooking for a crowd. In a home oven, you can set up a gentle bake that sears the surface gradually while the inside remains juicy. The result is rib meat that stays moist, is easy to slice, and carries your chosen spice blend with clarity. When you rest the meat briefly after cooking, the juices redistribute, producing slices that are forgiving and satisfying. If you’re new to this method, start with a standard rack setup and a simple rub to learn how the oven’s climate affects texture before you experiment with more aggressive flavors.
Selecting and Preparing Ribs
The first step to great oven-made ribs is choosing the right cut and prepping it properly. Baby back ribs are leaner and cook a bit faster, while spare ribs tend to be meatier with more chew. Decide based on your timeline and preferred texture. Regardless of cut, look for bright meat, firm bone structure, and minimal excess fat. Ask your butcher for slabs with uniform thickness to ensure even cooking.
Next, prep the ribs for the oven by removing the thin silvery membrane on the bone side. This step helps the rub penetrate and prevents a leathery bite. Pat the surface dry with paper towels; moisture on the surface can hinder browning. If you’re trimming excess fat, do it now so the rub can adhere more evenly. Finally, cut the rack into manageable portions if you’re cooking in a small oven or need to fit a pan. This creates more surface area for seasoning and makes serving easier for guests or family.
Dry Rubs and Flavor Building
A great dry rub becomes the backbone of oven-made ribs. It builds flavor, creates a barrier that locks moisture, and forms a beautiful crust as the meat bakes. A balanced rub typically starts with a base of sweet brown sugar, followed by smoked paprika, garlic powder, onion powder, salt, and pepper. Add a pinch of chili powder or cumin for warmth, and consider a touch of mustard powder or ground coriander for subtle complexity. Mix thoroughly so the spices are evenly distributed.
If you prefer, you can apply a light marinade instead of a dry rub. A simple blend of olive oil, soy sauce, and minced garlic can tenderize slightly while infusing umami. For best results, apply the rub or marinade at least 30 minutes before baking; a longer window—up to overnight in the fridge—improves penetration. Remember, the goal is to flavor the meat without masking its natural pork sweetness. Place the ribs on a wire rack over a rimmed sheet pan to promote air circulation and even browning.
The Low-and-Slow Oven Method
Low-and-slow is the backbone of fork-tender tenderness in oven-made ribs. Preheat the oven to a moderate range (commonly around 275–300°F or 135–150°C). Arrange the rib portions on a rack set over a rimmed sheet pan to keep them elevated and away from pooled juices. Bake, undisturbed, for roughly 2.5–3 hours, depending on cut and thickness. The goal is to render collagen gradually, so the meat becomes tender but still holds its shape.
During the bake, you may notice juices bubbling and a rich aroma filling the kitchen. If your rib slabs are particularly thick, consider rotating the pan halfway through to promote uniform heat exposure. To keep the surface from drying, you can mist the ribs with a light spritz of water, apple cider vinegar, or broth every 60 minutes. Avoid opening the oven too often—each opening cools the chamber and extends cooking time.
Finishing Techniques: Glaze, Rest, and Slice
As the ribs near tenderness, it’s time to finish with a glaze and a brief high-heat finish to create a glossy crust. Brush a barbecue glaze or a homemade honey–soy glaze onto the meat, then return to the oven at a higher heat (or switch to broil) for 5–7 minutes to set the glaze. The glaze should be thick enough to coat a spoon, not runny. If your glaze thickens too much, warm it slightly to make brushing easier.
Once finished, remove the ribs and loosely tent with foil. Resting for 10–15 minutes lets the juices redistribute, making slicing cleaner and the meat more moist. Cut between bones into individual ribs and arrange on a serving platter. A final light sprinkle of flaky salt or chopped herbs can elevate the presentation and brightness of flavors.
Authority Sources
For reliability, rely on evidence-based guidance from trusted institutions. The following sources provide general guidelines about meat handling, safe temperatures, and cooking methods that complement the oven-made rib approach. Food safety practices are foundational to any rib recipe. Always cross-check with updated recommendations.
- https://www.fsis.usda.gov/food-safety
- https://extension.illinois.edu/foodsafety
- https://www.fda.gov/food
Tools & Materials
- Rib rack or elevated baking rack(Place ribs on rack over a rimmed sheet pan for air circulation)
- Heavy rimmed sheet pan(Catches drippings; line with foil for easy cleanup)
- Aluminum foil(Helpful for tenting and wrapping during finish)
- Meat thermometer / instant-read(Checks tenderness; avoid overcooking)
- Tongs(Handling hot ribs safely)
- Dry rub ingredients (brown sugar, paprika, garlic powder, onion powder, salt, pepper, chili powder)(Assemble and mix evenly)
- Barbecue glaze or sauce(Optional finishing glaze)
- Spritz (apple cider vinegar or broth) for moisture(Used during bake to maintain moisture)
Steps
Estimated time: Total time: 3 hours 30 minutes
- 1
Prepare the ribs
Remove the membrane from the bone side, pat dry, and trim excess fat. This helps the rub penetrate and prevents a leathery bite. If the meat seems too thick on one end, slice to even thickness for uniform cooking.
Tip: Removing the membrane early ensures rubs stick and flavors penetrate fully. - 2
Apply rub or marinade
Coat the ribs evenly with your chosen rub or marinade. Massage the spices into the meat so every surface is seasoned. For deeper flavor, wrap and refrigerate for 30 minutes to overnight.
Tip: Even pressure helps rub adhere; longer marination boosts depth of flavor. - 3
Preheat oven and set up
Preheat to 275–300°F (135–150°C). Place ribs on a rack over a rimmed sheet pan to collect drippings and promote even browning. Line the pan with foil for easier cleanup.
Tip: Use a rack to maximize air circulation beneath the meat. - 4
Bake low and slow
Bake undisturbed for about 2.5–3 hours until the meat is tender and pulling away from the bones. If your ribs are very thick, allow extra time and consider rotating the pan halfway through.
Tip: Avoid opening the oven frequently to maintain consistent temperature. - 5
Test tenderness and spritz
Check tenderness by inserting a bend test with tongs or a probe. Spritz with a light mist of water or cider every 60 minutes if desired to maintain moisture.
Tip: Tenderness should feel pliable, not mushy. - 6
Finish with glaze and high heat
Brush on glaze and return to a hot setting or broil for 5–7 minutes to set the glaze and develop a glossy crust. If too thick, warm the glaze for easy application.
Tip: A final quick bake enhances crust without drying the meat. - 7
Rest and slice
Tent with foil and let rest 10–15 minutes. Slice between bones for clean portions and serve immediately.
Tip: Resting redistributes juices for juicier slices.
Questions & Answers
What is the best cut for oven-made ribs?
Baby back ribs are leaner and cook faster, while spare ribs offer more meat and chew. Choose based on your timeline and texture preference, then adapt rubs and bake time accordingly.
Baby backs cook faster and are leaner; spare ribs are meatier. Pick based on your timeline and texture favor.
Should I wrap ribs during baking?
Wrapping can retain moisture, but is optional. Some cooks wrap to finish with a softer bark, others bake uncovered to develop crust. Choose based on your preferred texture.
Wrapping is optional. It affects moisture and crust; decide based on texture you want.
Can I use a convection oven for this?
Convection can speed cooking and promote browning, but you may need to reduce heat by about 25°F and monitor time closely to avoid drying.
Yes, convection works, but reduce heat and watch time to prevent drying.
How can I tell when ribs are tender?
Ribs are tender when the meat yields to slight pressure and the bones begin to show a little pull-away. Use a fork or tongs for the bend test, then rest briefly.
Tender ribs yield to gentle pressure and pull away a bit from the bone.
How long will leftovers last?
Refrigerate promptly and store in an airtight container for 3–4 days. For longer storage, freeze rib portions and reheat slowly to preserve moisture.
Leftovers last a few days in the fridge; freeze for longer storage and reheat gently.
What sides pair best with oven-made ribs?
Classic accompaniments are creamy coleslaw, cornbread, baked beans, and roasted vegetables. A tangy sauce or pickles can add a bright contrast.
Try coleslaw, cornbread, beans, and roasted veggies for balance.
Watch Video
Main Points
- Plan for a long, gentle bake to maximize tenderness.
- Use a rack to promote even heat and browning.
- Finish with glaze and rest before slicing.
- Check tenderness, not just internal temperature.
- Rest for 10–15 minutes to improve juiciness and slicing.