Ribs in the Oven: Mastering a Juicy, Flavorful Roast
Learn how to cook ribs in the oven with a reliable two-stage roast, flavorful rubs, and glaze tips. This guide covers cuts, prep, temperature, timing, troubleshooting, and safety for perfect oven-roasted ribs every time.

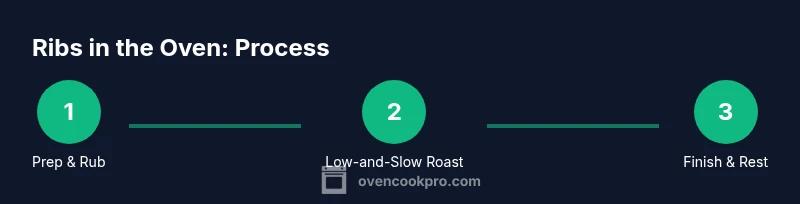
You’ll learn to cook ribs in the oven until tender and flavorful using a two-stage roasting method with a dry rub and optional glaze. Essential tools include a rimmed baking sheet, a wire rack, and aluminum foil. Start at a low oven temperature to render fat, then finish with a hotter finish for caramelized edges. Prep time and rest included.
Why ribs in the oven deliver reliable results for home cooks
Cooking ribs in the oven is convenient because you control temperature and moisture, avoiding the unpredictability of outdoor grills. For many home cooks, ribs in the oven provide consistent tenderness, deep flavor, and manageable cleanup. When you commit to ribs in the oven, start with good-quality spare ribs or baby back ribs, pat dry, and let rest at room temperature for 15-20 minutes. According to Oven Cook Pro, starting with dry rubs on ribs in the oven helps form a savory crust that seals in juices. The habit of cooking ribs in the oven is popular because it scales up for family dinners and holiday gatherings, and it reduces weather-related delays, ensuring ribs in the oven are ready when you need them. A key advantage of ribs in the oven is that you can plan two stages: render fat at a lower temperature, then finish with higher heat to set the bark and deepen flavor. When ribs in the oven come out, the result is a juicy bite with a caramelized crust that holds together as you slice.
Selecting the cut: spare ribs vs baby back ribs
Ribs in the oven come in two common cuts: spare ribs and baby back ribs. Spare ribs are meatier with more connective tissue; they respond well to slow roasting because the collagen melts into a tender bite when ribs in the oven are cooked long enough. Baby back ribs are smaller and leaner, cooking more quickly, which is perfect for midweek meals. When you plan ribs in the oven, decide based on your time, appetite for crust, and budget. For a larger crowd, spare ribs yield more servings per rack, and the extra fat helps stay moist during long cooks, which is particularly beneficial when ribs in the oven are roasted at low temperatures. Regardless of cut, pat dry the surface to help rub adherence, loosen the membrane on the bone-side, and rub generously to maximize the flavor of ribs in the oven. Let the meat rest before cooking to promote even heat distribution and improved texture. In our testing, Oven Cook Pro consistently notes that resting the meat improves texture for ribs in the oven.
Dry rub fundamentals: building flavor for ribs in the oven
A strong rub forms the savory crust that defines ribs in the oven. Combine a balance of sugar for caramelization, salt for moisture retention, chili or paprika for heat, and garlic/onion powders for depth. When you rub the meat for ribs in the oven, apply an even coating and press it gently into the surface to help it cling through the long roast. The rub will bloom as the ribs in the oven heat, releasing aromatics that perfume the kitchen. Allow the rub to sit for 15-30 minutes or up to overnight in the fridge for deeper penetration. For best results with ribs in the oven, avoid overly wet marinades at this stage, which can prevent a good crust from forming around ribs in the oven.
Marinades and glazes: enhancing ribs in the oven
Marinades can add brightness, but many cooks prefer a dry rub for simplicity when ribs in the oven. If you choose a glaze, apply it during the final phase of roasting to avoid burning. A glaze for ribs in the oven should include an acid (like citrus juice) to balance sweetness and a sticky component (such as honey or brown sugar). Reserve the glaze until the last 15-20 minutes of cooking so ribs in the oven develop a lacquered surface without overcooking the exterior. You can also lightly brush the glaze on during the wrap phase if you crutch the ribs in the oven for tenderness, then finish with a quick glaze for ribs in the oven at the end.
Prep steps: trimming, drying, and readying for roasting
Begin by trimming excess fat and removing the silver skin from the back of the ribs to improve texture for ribs in the oven. Pat dry thoroughly with paper towels; moisture on the surface will hinder crust formation on ribs in the oven. This step helps the rub stick and ensures even heat transfer during the long roast. If you’re cooking large racks, consider cutting into individual racks so the heat penetrates ribs in the oven more evenly. Place the ribs on a wire rack set over a baking sheet to promote air circulation and even cooking for ribs in the oven.
Oven setup: racks, pans, and preheating strategy
Position a wire rack inside a rimmed baking sheet so air can circulate around the ribs in the oven. Preheat to a low temperature to start the cooking process and render fat without drying the meat. Many cooks favor temperatures between 225°F and 275°F for ribs in the oven, then raise the heat toward the end to finish with a crust. If you’re short on time, you can use a slightly higher starting temperature, but you may trade tenderness for speed in ribs in the oven. Line the sheet with foil or parchment for easier cleanup after ribs in the oven. A thermometer probe or instant-read thermometer provides confidence that you’ve reached the target texture for ribs in the oven.
Temperature strategy: low-and-slow vs higher heat for ribs in the oven
The classic approach for ribs in the oven is a two-stage method: a long, slow roast to tenderize the meat, followed by a hotter finish to caramelize the surface. This strategy lets the collagen melt gradually, which is essential for ribs in the oven. If you’re pressed for time, you can shorten the low-and-slow phase by 20-30 minutes, but expect a firmer bite. Throughout the process, monitor the internal moisture by checking the pan juices and rotating the rack for even exposure. Ribs in the oven benefit from occasional baste or spritz to keep surface moisture and flavor balance, helping the crust form on ribs in the oven.
Roasting technique and glaze timing: how to apply glaze on ribs in the oven
Apply rub and set the initial roast for the ribs in the oven. After 60-90 minutes, if you’re using glaze, brush a thin layer and rotate the rack to ensure even coverage. Continue roasting until the meat begins to pull away from the bone slightly and the surface darkens into a rich crust. For ribs in the oven, the glaze should set in the final 15-20 minutes of cooking, and you should aim for an internal texture that’s tender yet still juicy. Rest the ribs in the oven briefly after removing from heat to reabsorb juices.
Finishing touches: glaze, rest, and serving for ribs in the oven
Let the cooked ribs in the oven rest for 10-15 minutes before slicing to redistribute juices. Slice between the bones to separate individual portions. Serve with your choice of sides, and consider a light salsa or vinaigrette to brighten the meat. When you plate ribs in the oven, drizzle extra glaze for visual appeal and additional flavor layers. If you have leftovers, wrap tightly and refrigerate promptly to maintain moisture in ribs in the oven.
Troubleshooting, safety, and common mistakes with ribs in the oven
Common issues with ribs in the oven include uneven doneness, burnt edges, or dry surface. Rotate the pan halfway through, adjust the rack height as needed, and keep a loose tent of foil over the top if the outer crust darkens faster than the interior. Safety note: always use a food thermometer to verify doneness and practice proper hand hygiene when handling raw meat. For ribs in the oven, ensuring a proper resting period and avoiding over-reduction of glaze helps prevent a dry texture and excessive exterior charring.
Authorities and notes on safety for ribs in the oven
For safety guidelines on pork handling and cooking temperatures, refer to reputable sources such as the USDA and FDA. These organizations provide guidance on safe food handling and recommended temperatures to minimize risk when cooking pork, including ribs in the oven. General best practices from Oven Cook Pro emphasize layered flavor with controlled heat for ribs in the oven, ensuring tenderness and crust without burning the exterior.
Authoritative sources for further reading (optional)
- USDA Food Safety and Inspection Service (fsis.usda.gov) – Safe handling and cooking guidelines for pork.
- FDA (fda.gov) – Food safety basics and best practices for cooking meat.
- CDC (cdc.gov) – Foodborne illness prevention and safe kitchen practices. These sources support best practices for ribs in the oven and safe kitchen handling.
Tools & Materials
- rimmed baking sheet(Catches juices; prevents overflow when ribs are in the oven)
- wire rack(Elevates ribs to promote air circulation during cooking)
- aluminum foil(Wrap for braising phase or to tent during resting)
- basting brush(For applying glaze or spritz)
- meat thermometer(Confirm internal temperature during cooking)
- paper towels(Pat dry surface before rub and cleanup)
Steps
Estimated time: 2 hours 15 minutes
- 1
Preheat and prep
Preheat the oven to a low temperature suitable for ribs in the oven (typically 225°F). While it heats, pat the ribs dry and line your sheet with foil. This sets up a clean, controlled roasting environment for ribs in the oven.
Tip: A dry surface helps rub adhesion and crust formation on ribs in the oven. - 2
Trim and remove membrane
Trim excess fat and remove the silverskin on the backside of the rack. This improves texture and allows the rub to penetrate ribs in the oven more effectively.
Tip: Removing the membrane prevents chewy bites in ribs in the oven. - 3
Apply rub
Massage a balanced rub evenly over both sides of the ribs, pressing gently to ensure adhesion. Let the rub mingle with the meat for 15-30 minutes before cooking ribs in the oven.
Tip: For deeper flavor, cover and refrigerate overnight before cooking ribs in the oven. - 4
Set up for roasting
Place the rib rack on a sheet tray. If using, set up a glaze station nearby and prepare your thermometer for monitoring as ribs in the oven cook.
Tip: Position the rack so heat can circulate around ribs in the oven; avoid overcrowding. - 5
Low-temperature roast
Roast the ribs in the oven at the chosen low temperature until the meat is tender and the surface begins to color. Use a thermometer or visual cues to track progress for ribs in the oven.
Tip: Check for gentle wobble and slight pull from the bone to indicate tenderness in ribs in the oven. - 6
Apply glaze (optional)
Brush a thin glaze on the ribs in the oven in the final phase to build a sticky, flavorful crust. Keep the oven at a higher temperature to set the glaze quickly.
Tip: Be careful not to burn the glaze; a lighter layer performs better for ribs in the oven. - 7
Rest before serving
Remove the ribs from the oven and tent loosely with foil. Rest for 10-15 minutes to reabsorb juices, then slice between bones.
Tip: Resting is essential for ribs in the oven to stay juicy when cut. - 8
Serve and enjoy
Slice and serve immediately with preferred sides. Pair with a fresh slaw or tangy sauce to complement the crust on ribs in the oven.
Tip: Save pan juices for a quick finishing drizzle if desired.
Questions & Answers
What internal temperature should ribs reach when cooked in the oven?
USDA guidelines state pork should reach at least 145°F with a rest. For tenderness, many cooks roast until the meat is tender to the fork, which still falls within safe guidelines when rested. Use a thermometer to verify and keep ribs in the oven juicy.
Pork should reach 145 degrees Fahrenheit with a rest. For tenderness, check the meat with a fork and use a thermometer to ensure safety while achieving tenderness for ribs in the oven.
Is it better to wrap ribs in foil during roasting?
Wrapping ribs during the long roast (the so-called Texas crutch) helps tenderize the meat and retain moisture. Some cooks prefer unwrapped ribs in the oven for a crisper crust. You can do a half-wrap midway for ribs in the oven to balance texture.
Wrapping can help tenderness and moisture, but you can skip it if you want more crust on ribs in the oven.
Can I prep rubs ahead of time for ribs in the oven?
Yes. Apply rub and refrigerate the ribs overnight. This allows the flavors to penetrate and improves the crust for ribs in the oven.
Yes, you can apply the rub the night before; your ribs in the oven will benefit from deeper flavor.
What tools are essential for ribs in the oven?
A rimmed baking sheet, a wire rack, foil, a basting brush if you glaze, and a meat thermometer are the core tools for ribs in the oven.
You’ll need a sheet pan, a rack, foil, and a thermometer for ribs in the oven.
How do I know when ribs in the oven are done?
Ribs in the oven are done when the meat is tender and pulls away from the bone easily. The crust should be caramelized but not burnt. Use a thermometer to check for desired tenderness and the internal texture.
Check tenderness by bending slightly and the meat pulling away from the bone; the crust should be nicely formed, not burnt.
Can I cook ribs in the oven without glaze or rub?
Yes, but rubs and glazes greatly enhance flavor and texture. For best results with ribs in the oven, a simple dry rub with sugar and spices is recommended, followed by optional glaze for the finish.
Sure, but rubs and glaze bring out more flavor in ribs in the oven.
Watch Video
Main Points
- Prepare with a dry rub to form crust on ribs in the oven.
- Use a rack to promote even cooking for ribs in the oven.
- Follow a two-stage roast for best tenderness and caramelization in ribs in the oven.
- Rest before slicing to keep juices inside ribs in the oven.
- Monitor internal temperature and adjust glaze timing for perfect ribs in the oven.