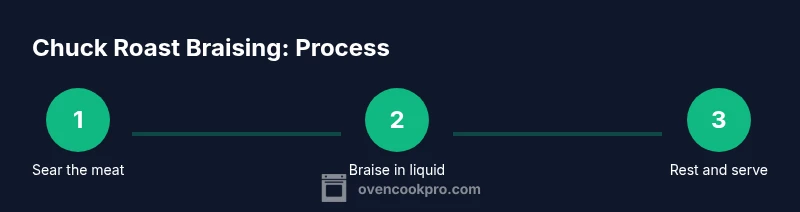
How to Make Chuck Roast in the Oven
Learn how to braise a chuck roast in the oven for fork-tender results. This step-by-step guide covers searing, aromatics, braising liquid, timing, and serving with rich pan gravy.

You will braise a 3-4 pound chuck roast in a heavy pan or Dutch oven, searing first for flavor, then slow-braising with aromatics until fork-tender. Key requirements include a Dutch oven, oven-safe thermometer, beef stock, onions, garlic, carrots, herbs, and time for a thorough braise (about 3 hours).
Why oven braising is ideal for chuck roast
Chuck roast is a well-marbled, tough cut that responds beautifully to slow, moist heat. An oven braise uses a tightly covered pan to trap moisture, allowing collagen to melt and flavors to concentrate. When we sear first, we develop a rich crust that acts like a flavor seal, then the braising liquid carries that crust into a luscious sauce. According to Oven Cook Pro, this approach yields consistent tenderness with minimal effort, making it approachable for home cooks. The oven creates uniform heat, so you avoid hot spots that can dry out the meat while still keeping the surface caramelized. In practice, braising in a moderate oven for 2.5–3.5 hours will produce slices that cut with a fork and cap a deeply flavored gravy.
Choosing the right chuck roast and pantry staples
Look for a boneless chuck roast labeled for slow cooking, about 3–4 pounds for a standard family meal. The roast should have even marbling throughout and a modest fat cap; a heavy piece with visible connective tissue will benefit most from long braising. You'll also want pantry staples: salt, black pepper, onion, garlic, carrots, celery, fresh herbs (thyme or rosemary), bay leaves, and olive oil. For the braising liquid, choose beef stock as a base; red wine or tomato paste can add depth if you like, but are optional. Having all ingredients measured and ready (mise en place) avoids delays once the pan goes on the stove.
Prepping the meat: trimming, seasoning, and browning
Pat the roast dry with paper towels and trim excess fat to a moderate layer (about 1/4 inch). Lightly salt and pepper all sides, then let it rest 15–20 minutes to enhance surface seasoning. Heat a heavy skillet or your Dutch oven on medium-high and add a thin layer of oil. Sear the roast 3–4 minutes per side until a deep brown crust forms. For best results, resist moving it too soon; the crust will release naturally when it’s ready. Remove the meat and let it rest briefly while you prepare aromatics.
Building flavor: aromatics and braising liquid
In the same pot, sauté aromatics: onions, carrots, celery, and garlic until softened and lightly browned. Deglaze with a small amount of beef stock to lift browned bits from the bottom. Add herbs, bay leaf, and the rest of the stock until the roast is nearly covered. If you’re using wine, add a splash now and allow it to reduce. This mixture becomes the base for your braising liquid, which should shimmer gently but not boil during the oven braise.
The braising method: oven temperature and timing
Preheat the oven to 325°F (163°C). Return the roast to the pot, nestling it into the braising liquid with the aromatics. Cover tightly with a lid or heavy-duty foil to trap moisture. Transfer to a rack or direct-heat safe placement in the oven and braise for about 2.5–3.5 hours, depending on roast size. The goal is fork-tender meat; you’ll know it’s ready when a fork slides through with little resistance. Check one hour before the end to decide if you need to add more liquid.
Finishing the sauce and resting the meat
Carefully remove the roast and tent with foil to rest 15–20 minutes before slicing. Meanwhile, simmer the braising liquid on the stovetop to reduce slightly; skim fat off the top. If you want a smoother gravy, whisk in a slurry of cornstarch and cold water or a dusting of flour. Slice the roast against the grain and spoon hot sauce over the slices for serving.
Slicing, serving, and gravy ideas
Carve slices about 1/2 inch thick for tenderness. Arrange on a warm platter and drizzle with the pan gravy. Classic sides include mashed potatoes, roasted root vegetables, or buttered greens. For extra richness, spoon some reduced braising liquid over the meat, or mix a portion of the gravy back into the pan with a little of the roast drippings to intensify the flavor.
Leftovers, storage, and reheating
Cool any leftovers to room temperature, then refrigerate in airtight containers within two hours. Reheat gently in a covered pan with a splash of beef stock or ice-cold gravy, or reheat in the oven at 325°F until warmed through. Chuck roast keeps well and tastes even better after sitting, so you can repurpose it in soups, sandwiches, or burritos.
Authority sources and troubleshooting
To deepen trust, consult established sources on beef cooking and safe handling. For safety guidelines and cooking temps, visit the USDA FSIS site: https://www.fsis.usda.gov/. Extension services from universities such as Cornell and Oregon State provide practical braising tips: https://extension.osu.edu/ and https://extension.oregonstate.edu/. If you’d like a broader culinary perspective on braising, see reputable cooking publications that emphasize low and slow braising techniques. Troubleshooting: if the meat is tough, extend braise by 15–30 minutes; if the liquid seems too thick, add more stock; if there’s too much fat, skim and reduce to concentrate flavor.
Tools & Materials
- Chuck roast (3-4 lb, boneless)(Choose a uniform weight with even marbling)
- Kosher salt(For even seasoning on all sides)
- Black pepper(Freshly ground preferred)
- Olive oil(For browning the surface)
- Dutch oven or heavy-bottom pot with lid(Heat-safe and wide for browning)
- Beef stock(About 2-3 cups; more as needed for liquid level)
- Onions(2 medium, sliced)
- Garlic(4-6 cloves, minced)
- Carrots(2-3, cut into chunks)
- Celery(2 stalks, chopped)
- Fresh thyme or rosemary(A few sprigs or 1 tsp dried)
- Bay leaves(2 leaves)
- Red wine (optional)(Adds depth if used)
- Cornstarch or all-purpose flour(For thickening gravy)
- Aluminum foil(If not using a lid)
- Meat thermometer(For precise doneness)
- Timer or clock(To track braise time)
Steps
Estimated time: 3-4 hours
- 1
Gather and preheat
Collect all ingredients and preheat the oven to 325°F (163°C). This ensures an even, controlled braise from the start.
Tip: Mise en place saves time and prevents missed ingredients. - 2
Pat roast dry and season
Pat the meat dry, salt and pepper generously on all sides, and let rest 15–20 minutes to enhance surface seasoning.
Tip: A dry surface promotes better browning. - 3
Sear the roast
Heat oil in a heavy pot and sear the roast 3–4 minutes per side until deeply browned. This builds flavor and color.
Tip: Avoid moving the roast too soon; release occurs when a crust forms. - 4
Sauté aromatics
In the same pot, cook onions, carrots, and celery until softened and lightly caramelized to deepen flavor.
Tip: Deglaze with a splash of stock to lift browned bits. - 5
Add braising liquid
Return the roast to the pot; add garlic, herbs, bay leaves, and enough stock to come halfway up the meat. Optional wine can be added and reduced.
Tip: Keep the liquid at a gentle simmer—not a vigorous boil. - 6
Braise in oven
Cover tightly and braise in the oven for 2.5–3.5 hours, checking for tenderness with a fork.
Tip: If the roast feels stiff, continue braising in 15-minute increments. - 7
Rest and finish gravy
Rest meat 15–20 minutes, then reduce the braising liquid on the stove and thicken as desired.
Tip: Skim fat for a cleaner gravy. - 8
Slice and serve
Slice against the grain and serve with pan gravy and preferred sides such as mashed potatoes.
Tip: Pour hot gravy over sliced meat to keep it moist.
Questions & Answers
What cut is chuck roast best for oven braising?
Chuck roast is ideal for oven braising due to its marbling and connective tissue, which break down with long, moist heat to create tenderness and depth of flavor.
Chuck roast is perfect for oven braising because its marbling breaks down with slow heat, producing tenderness and rich flavor.
Can I use a slow cooker instead of the oven?
Yes. Brown the meat first, then transfer to a slow cooker with braising liquid and aromatics. Cook on low for 8–10 hours until fork-tender.
You can use a slow cooker after browning. Cook on low until tender, usually 8 to 10 hours.
Do I need to trim fat before braising?
Trim excess fat to about 1/4 inch so the meat browns evenly and the braising liquid isn't overwhelmed by too much fat.
Trim excess fat so browning is even and the liquid stays balanced.
How can I tell when the roast is tender?
Fork-tender means a fork slides through the meat with little resistance. If it’s still stiff, braise longer in 15-minute increments.
When a fork goes in easily and the meat parts with little effort, it’s tender.
What should I do with the leftovers?
Store in airtight containers in the fridge for 3–4 days or freeze for longer. Use the meat in stews, sandwiches, or shredded toppings.
Leftovers refrigerate well and are great in stews or sandwiches.
Watch Video
Main Points
- Sear first to deepen flavor.
- Low, slow oven braise yields tender slices.
- Rest before slicing to retain juices.
- Pan gravy elevates the final dish.