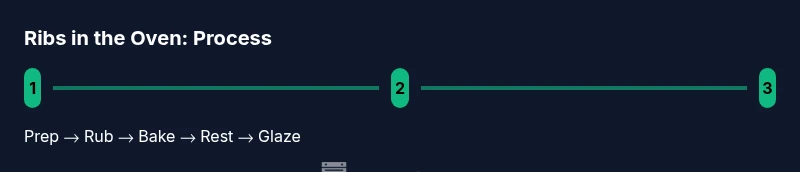
Fall Off the Bone Ribs in the Oven: Step-by-Step Guide
Learn how to cook fall off the bone ribs in the oven with a reliable, step-by-step method. From selecting the cut to seasoning, slow-roasting, and saucing, master tender ribs every time for crowd-pleasing results.

With patience, you can achieve fall off the bone ribs in the oven. Start by drying the surface, applying a balanced dry rub, and cooking low and slow until the meat releases cleanly from the bone. Finish with a glaze under high heat for a glossy, sticky crust.
What "fall off the bone ribs in the oven" really means
For many home cooks, the phrase describes ribs cooked until the meat is so tender that it separates from the bone with a gentle pull. Achieving this texture requires a controlled, low-heat environment and careful handling of moisture and surface texture. Oven Cook Pro's approach emphasizes even heat, minimal moisture loss, and a flavorful crust that enhances tenderness rather than hiding it. By combining a dry rub, a slow bake, and a smart finishing step, you can consistently reproduce restaurant-quality tenderness in your own kitchen.
The foundations: quality ribs, prep, and pat-dry technique
Choose well-marbled racks with a clean, white surface and a good amount of meat on the bone. Trim any excess fat and pat dry with paper towels to remove surface moisture. Moisture on the surface can steam the ribs rather than render fat and develop a crust. The initial dry phase helps the rub adhere and sets up a more even cook.
Flavor foundations: rubs, marinades, and glaze paths
A well-balanced rub combines salt, sweetener, and spices to create layered flavor. You can apply a straightforward dry rub or marinate briefly to deepen taste. For gloss and stickiness at the end, a glaze or sauce can be brushed on during the last phase of cooking. The goal is to layer flavor without washing away the rub during the long bake.
Low-and-slow roasting: oven setup and temperature strategy
Preheat to a moderate oven and aim for low, steady heat. The goal is gradual collagen breakdown so connective tissue loosens without drying out the meat. Position ribs on a rack over a sheet pan to allow hot air to circulate and catch drips. If your oven runs hot, consider covering the rack loosely with foil after the first portion of cooking to prevent surface scorching.
The Texas Crutch and the finish: tenderizing through moisture management
Many cooks use a foil-wrapped phase (the “Texas Crutch”) to trap moisture and speed tenderness. Wrap the rib racks in foil with a small amount of liquid to braise gently, then finish uncovered to re-crisp the crust. The exact timing depends on rib thickness and your oven, but the wrap usually occurs midway through the bake. This technique helps force moisture into the meat while the exterior softens.
Unwrapping, glazing, and final bake for a lacquered crust
After unraveling the foil, brush on your glaze or sauce and return the ribs to the oven uncovered for a final glaze-brown phase. This yields a glossy, sticky surface and a deeper flavor from caramelization. Let the ribs rest briefly after the bake to redistribute juices and improve slicing.
Resting, slicing, and serving: getting it right
Resting for about 10–15 minutes lets juices redistribute and makes cutting easier. Slice between the bones for neat portions and serve with a tangy sauce or side dishes like roasted vegetables or cornbread. A squeeze of fresh citrus or finishing spices can brighten the plate. The goal is to preserve tenderness while offering crisp, flavorful edges.
Troubleshooting common issues and quick fixes
If the ribs feel tough, they likely need more low-and-slow time or a longer rest. If the surface appears dry but the inside is underdone, check oven temperature accuracy with an external thermometer and consider wrapping sooner next time. For overly soft ribs, reduce cooking time slightly or shorten the foil phase. Adjustments are common and part of mastering your oven.
Resting and plating: best practices for juiciness
Always rest the ribs after coming out of the oven. Resting reduces carryover cooking and helps juices reabsorb, resulting in juicier slices. Plate with complementary sides that balance sweetness and acidity to cut through the richness. A final pinch of finishing salt or a citrus zest can elevate the overall flavor profile.
Tools & Materials
- Rib racks or metal baking sheet with a rack(Elevates air circulation; prevents sizzling and allows even cooking.)
- Sharp kitchen shears or knife(Trim fat and remove membranes easily.)
- Paper towels(Pat ribs dry to promote rub adherence and crust formation.)
- Mixing bowls(For rubs and marinades, large enough to coat racks evenly.)
- Meat thermometer (instant-read)(Not strictly required but helpful to gauge doneness.)
- Aluminum foil(Used for the foil wrap phase (Texas Crutch) and for catching drips.)
- Basting brush or silicone brush(For applying glaze in the final stage.)
- Whisk(Mix rub ingredients evenly.)
- Olive oil or neutral oil(Helps rub adherence and moisture balance.)
- Garlic powder, paprika, brown sugar, salt(Common rub components; customize to taste.)
- Lemon or lime wedges (optional)(Fresh acidity brightens the finish.)
Steps
Estimated time: Total time: ~3-4 hours depending on rib size and oven efficiency.
- 1
Prepare the ribs
Remove the membrane from the back of the rack if present and pat the surface dry. Trim excess fat to reduce greasiness and ensure even rub adherence. This step sets up the texture so the rub can penetrate and form a stable crust during roasting.
Tip: Use a paper towel to grip and pull the membrane off; work from the bone side for best leverage. - 2
Apply the rub or marinade
Mix a balanced rub with salt, sugar, and spices. Evenly coat both sides of the ribs, then let them rest at room temperature for 15–20 minutes to help the rub penetrate. This builds flavor and begins the crust formation.
Tip: Massage the rub gently—don’t rub too hard, or you’ll tear the meat. - 3
Set up the oven and pan
Preheat to a moderate oven. Place the ribs on a rack over a lined sheet pan to catch drippings. This setup promotes heat circulation and prevents a soggy crust.
Tip: If your oven browns unevenly, rotate the pan halfway through cooking. - 4
Start the low-and-slow bake
Roast the ribs at a steady, low temperature to break down collagen without drying the meat. Check occasionally for even cooking and moisture loss. The goal is tenderness without mushiness.
Tip: If your ribs are browning too fast, loosely cover with foil to protect the surface. - 5
Braise with foil (Texas Crutch)
Wrap ribs tightly in foil with a small amount of liquid to braise and tenderize. This traps steam inside and speeds the tenderness process without drying out the meat.
Tip: Use careful folds to minimize leaks; a small amount of apple juice or stock adds flavor without making the meat soggy. - 6
Unwrap and glaze
Unwrap and brush on glaze or sauce. Return to the oven uncovered to develop a lacquered finish and rich glaze. This adds color and bold sweetness.
Tip: Brush in thin layers; thick coatings can burn before the meat finishes tenderizing. - 7
Rest and slice
Let the ribs rest for about 10–15 minutes. Slice between bones for clean portions and serve with sides that cut through the richness.
Tip: Resting is essential; it redistributes juices and improves texture.
Questions & Answers
How long does it take to cook ribs in the oven for fall-off-the-bone tenderness?
Most home cooks achieve tenderness with a long, slow bake followed by a finish under glaze. The exact time varies by rib size and oven, but plan for several hours overall.
Typically a long, slow bake followed by a glaze finish; the exact time depends on rib size and your oven.
Should I boil ribs before roasting in the oven?
Boiling is not required. It can speed tenderness but may reduce flavor and texture. Slow roasting with a dry rub achieves tender ribs without preboiling.
Not required. You can skip boiling and rely on slow roasting with a rub to tenderize.
What’s the best way to tell ribs are done without guessing?
The meat should be tender and pull away from the bone with moderate effort. If you can twist the bone easily and the meat slides, it’s a good sign of tenderness.
Tender meat that pulls away from the bone is a good sign; slight resistance is okay, but avoid tough texture.
Can I use a glaze or sauce during cooking without burning it?
Apply glaze during the final phase of cooking to avoid burning. Brush in thin layers and allow the glaze to caramelize without scorching the surface.
Apply glaze near the end in thin layers so it caramelizes without burning.
How should I store leftovers safely?
Cool leftovers promptly, wrap tightly, and refrigerate within two hours. Reheat gently to preserve moisture.
Cool leftovers quickly and store in a tight container; reheat slowly to keep moisture.
Watch Video
Main Points
- Use a dry rub and low, steady oven heat for tenderness.
- Wrap mid-cook (Texas Crutch) to speed tenderness without drying out meat.
- Rest before slicing to keep juiciness and achieve clean cuts.