Cooking Brisket in the Oven: A Step-by-Step Guide
Master tender, flavorful brisket by oven cooking with a low-and-slow method, sear for crust, and rest before slicing. This guide covers cuts, rubs, timing, and serving tips for reliable results.

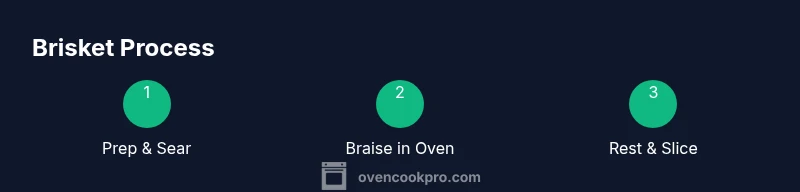
By the end of this guide you will cook a brisket in the oven that is tender, juicy, and flavorful. You'll learn how to choose the cut, sear, braise low and slow, and rest properly for slicing. This method works with conventional or convection ovens and adapts to different brisket sizes.
Why Oven-Cooked Brisket Delivers Unmatched Tenderness
When you cook brisket in the oven, you control heat more consistently than many open-fire methods, which helps break down collagen without drying the meat. The key is a long, slow braise that keeps the meat moist and allows connective tissue to melt. With the right rub, moisture management, and resting period, you’ll notice a melt-in-your-mouth texture that’s much harder to achieve with quick grills. For the keyword, cooking brisket oven, this approach demonstrates that the oven is a reliable tool for deep, even flavor. The Oven Cook Pro team emphasizes patience and temperature control as the two most critical factors in achieving tenderness.
- Temperature stability matters more than a flashy finish.
- Moisture retention is the secret to a juicy bite.
- Resting long enough ensures juices redistribute evenly.
Choosing the Right Brisket and Prep
Selecting a brisket that suits oven cooking is the first step toward consistent results. Look for a whole flat or a point-cut brisket with a visible fat cap of about 1/4 inch. A 4–6 pound piece is ideal for even cooking in a standard home oven. Trim excess fat to reduce greying and ensure rub penetration, then pat dry with paper towels to promote a good crust. The rub should be simple at first: kosher salt, coarsely ground pepper, and a touch of garlic powder if you like. Prepping ahead by drying the surface helps form the crust during searing and prevents steaming in the braise.
- Allow brisket to come to room temperature for 30–60 minutes before cooking to promote even heat transfer.
The Low-and-Slow Oven Method: Temperature and Timing
The classic oven method uses a low temperature to slowly break down collagen. Start by preheating to 275–300°F (135–150°C). Keep the meat on a rack over a shallow pan to allow air circulation beneath. Braise with a small amount of liquid (broth, water, or a wine-or-tomato blend), then cover tightly. Plan for 3–5 hours of braising for a 4–6 pound brisket, checking for tenderness; it should feel like a hot butter knife when pierced. If you’re using convection, reduce the oven temperature by about 25°F (15°C) to avoid overcooking the outside before the inside is tender. The goal is a fork-tender bite with a deep, developed crust on the exterior.
- Keep the lid on or tightly wrap to trap moisture during braising.
Searing, Rubs, and Aromatics for Depth of Flavor
Searing before braising develops a rich crust and deep flavor. You can sear on the stove in a heavy pan or use a hot oven-safe pan to achieve a similar effect. Apply a simple rub of salt and pepper (and optional garlic powder) before searing, then brown on all sides. Aromatics like garlic, onion, bay leaves, and thyme add complexity to the braising liquid. If you prefer a more intense crust, brush the surface with a light oil and a dusting of paprika or chili powder for color. The key is to avoid burning the rub—watch color closely and adjust heat as needed.
- Browning enhances flavor and color; don’t skip this step for the best crust.
Basting, Moisture, and Pan Juices: Keeping Brisket Juicy
Maintaining moisture through braising is essential. Add just enough liquid to generate steam without washing away the crust. If the liquid evaporates, reintroduce a bit of broth or water, but avoid diluting flavors. Some cooks swirl in a splash of red wine or beef stock for depth. As the brisket braises, the liquid will intensify with the meat’s juices. After braising, spoon or baste the meat with some of the pan juices to recoat the surface and help preserve moisture during resting.
- A shallow braise yields better crust formation and even tenderness.
Doneness, Rest, and Slicing: Getting the Right Texture
Doneness is more about tenderness than a specific internal temperature, especially for brisket. When the meat’s texture yields to a gentle press, it’s usually ready. Use an instant-read thermometer to confirm an internal temperature around 195–205°F (90–96°C) for optimal tenderness in most cuts. Let the brisket rest, loosely tented with foil, for 15–30 minutes after cooking. Resting redistributes juices and makes slicing easier. Slice against the grain to maximize tenderness, and serve with a portion of pan juices or your preferred sauce.
- Resting is not optional; it improves juiciness and texture.
Variations: Oven vs. Convection and Sauce Options
Convection ovens cook a bit faster and can develop more browning. If using convection, lower the temperature by about 25°F (15°C) and monitor closely to prevent drying. For sauce options, many cooks serve brisket with a rich au jus or a tangy barbecue sauce. Some prefer a simple pan gravy made from the braising liquid, which can be reduced on the stove. You can also finish the brisket uncovered for the last 15–20 minutes to intensify crust color. The essence of cooking brisket in the oven is control: stable heat, moisture management, and patient resting.
Common Mistakes and How to Fix Them
- Too high a temperature dries the exterior before the interior is tender. Lower heat and extend time. If you notice dryness, reduce the oven temp and add more liquid to maintain moisture.
- Peeling crust due to over-braising is caused by insufficient browning. Sear longer or finish uncovered for 15–20 minutes at the end to re-crisp the crust.
- Slicing too early yields tougher texture. Always rest the meat and cut against the grain for maximum tenderness.
Tools & Materials
- Beef brisket (whole, trimmed, 4–6 lb)(Trim excess fat to ~1/4 inch; select a cut with a good fat cap for moisture.)
- Oven-safe roasting pan with rack(Elevates meat for even heat and collects drippings.)
- Meat thermometer (instant-read)(Insert into thickest part away from fat; avoid touching bone.)
- Aluminum foil or oven-safe lid(Tight cover to trap moisture during braising.)
- Kosher salt and freshly ground black pepper(Basic rub; adjust to taste.)
- Optional aromatics (garlic, onion, bay leaves, thyme)(Add depth to the braising liquid.)
- Extra-virgin olive oil or neutral oil(For searing the surface without smoking.)
- Sharp chef’s knife and cutting board(For trimming and precise slicing against the grain.)
Steps
Estimated time: Total time: ~4.5–6.5 hours including resting
- 1
Preheat and prep
Set the oven to 275–300°F (135–150°C). Trim excess fat to about 1/4 inch, pat dry, and rub with salt, pepper, and optional garlic powder. Let the brisket sit at room temperature for 30–60 minutes to promote even cooking.
Tip: A room-temperature brisket sears more evenly and develops a better crust. - 2
Sear to form crust
Heat a heavy pan with oil until shimmering. Sear the brisket on all sides until a deep bronze crust forms, about 2–4 minutes per side. Browning locks in flavor and improves texture.
Tip: Do not move the meat too quickly; aim for a uniform crust on each side. - 3
Add rub and aromatics
Massage a light rub over the surface and place the brisket on the rack in the pan. Scatter aromatics (garlic, onion, bay leaf, thyme) around the meat for fragrant, integrated flavor.
Tip: Keep aromatics below the brisket to flavor the braising liquid evenly. - 4
Braise with liquid
Pour a small amount of broth or water into the pan to create steam. Cover tightly with foil or a lid and transfer to the oven. Braise for 3–5 hours, or until the meat is tender when pierced.
Tip: Check liquid level after 2 hours and add more if needed to avoid drying out. - 5
Finish and rest
Remove the cover for the last 15–20 minutes to enhance crust color if desired. Remove from oven and let rest for 15–30 minutes, tented loosely with foil. Slice against the grain to maximize tenderness.
Tip: Resting redistributes juices; cutting too soon leads to a drier bite. - 6
Serve or store
Slice and serve with pan juices or sauce. Refrigerate leftovers within two hours; reheat gently to preserve moisture. Reuben-style sandwiches or simple sides pair beautifully with brisket.
Tip: Store the juices separately to moisten leftovers when reheated.
Questions & Answers
What cut is best for oven brisket?
For oven cooking, start with a well-marbled brisket cut that includes both a flat and a bit of point. This combination yields tenderness and rich flavor when braised. Trim excess fat while preserving enough fat cap for moisture.
Choose a brisket with good marbling and a small fat cap for best results in the oven.
How long should I cook at 275°F?
At 275°F, plan for roughly 3–5 hours for a 4–6 pound brisket, checking tenderness rather than chasing a single internal temperature. If the brisket feels fork-tender earlier, you can remove it sooner, but expect some variation by cut size.
Cook for about three to five hours at 275°F, testing tenderness as you go.
Should I wrap during cooking?
Wrap the brisket tightly with foil or use a tight lid to trap moisture during the braise. Lifting the cover at the end helps color the crust, but do not uncover early, or the moisture will escape and extend cooking time.
Wrap tightly for moisture during braising, uncover near the end for crust.
Can I cook brisket ahead of time?
Yes. Brisket reheats well if stored properly. Cool the meat, refrigerate with the pan juices, and reheat gently in a covered pan with a splash of broth to prevent drying. Slice after resting once more if possible.
Brisket can be cooked ahead and reheated gently to retain moisture.
What’s the ideal internal temp for doneness?
Aim for an internal temp around 195–205°F (90–96°C) for tenderness, but rely on texture—the meat should feel tender and yield with a fork rather than only chasing a number.
Aim for 195–205°F, but focus on tenderness and texture.
Watch Video
Main Points
- Choose a well-marbled brisket with a modest fat cap.
- Browning before braising builds flavor and texture.
- Maintain moisture with a tight cover and light braising liquid.
- Rest and slice against the grain for maximum tenderness.
- Adjust for convection by lowering temperature.