How to Bake Pork Ribs in the Oven
Learn how to bake pork ribs in the oven with a reliable, step-by-step method for tender, flavorful results. Includes rub ideas, timing, doneness cues, and safe handling.

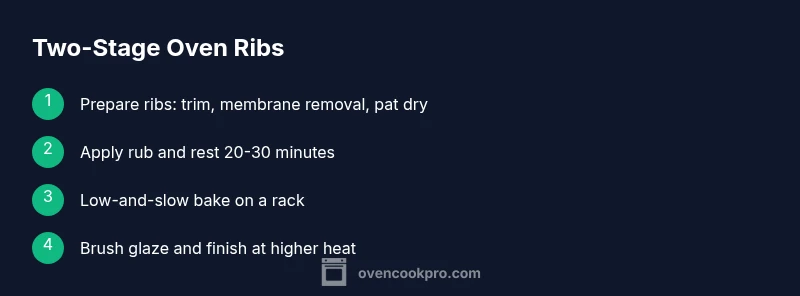
With a two-stage approach, bake pork ribs in the oven for tenderness: start low and slow, then finish with glaze for crust. Gather your ribs, rub, pan, and oven-safe rack, preheat, then bake until the meat pulls from the bone and is tender. Follow these steps for reliable results.
Why baking pork ribs in the oven is a reliable option for home cooks
Baking pork ribs in the oven is a dependable way to achieve tender meat and a flavorful crust without propane grills or smokers. The controlled environment lets you manage temperature, humidity, and timing with precision, which is especially helpful for beginners. According to Oven Cook Pro, mastering the oven starts with planning and prep, not luck. When you bake ribs in the oven, you can replicate restaurant-like tenderness at a fraction of the cost and cleanup. The key is a two-stage approach: a long, gentle bake to break down connective tissue, followed by a short, hotter phase to set the glaze and crust. This method also minimizes flare-ups and smoke, making it a practical choice for apartment kitchens, weeknights, or any situation where outdoor cooking isn’t feasible. Throughout this guide, you’ll see how seasonings, technique, and timing come together to deliver consistently delicious results.
Choosing the right ribs and rubs
Ribs come in two main sections: the short rib section and the full rib rack. For oven-baking, a standard rack yields the best surface area for even seasoning and crust. Look for bright pink color and a clean bone pattern; avoid ribs that look dry or have excessive dark spots. For rubs, start with a base of salt, sugar, paprika, and garlic; then customize with pepper, chili, cumin, or brown sugar. If you prefer a milder flavor, stick to a simple mix; for bolder taste, add smoked paprika or chili powder. A good rule of thumb is to plan for about 1 to 1.5 pounds of ribs per person; adjust based on appetites and sides. Finally, decide whether you’ll use a dry rub only, or a wet rub that includes a vinaigrette or mustard-based binder. The goal is even coverage and a cohesive crust once baked.
Preparing the ribs: trimming, membrane removal, and pat-dry
Begin by removing the membrane on the bone-side of the rack. Use a paper towel to grip it, then pull in a single, steady motion; the membrane can impede rub penetration and affect texture. Trim any excess fat to reduce greasiness and to promote even browning. Rinse quickly if needed and pat completely dry with clean towels; moisture on the surface can steam rather than roast, softening the crust. If you’re short on time, you can skip trimming, but you’ll likely see more flare on the surface and a less uniform crust. For best adhesion, let the ribs come to room temperature for a short period before applying rub. These prep steps may seem small, but they set the stage for a deep, even flavor and a crisp exterior after baking.
The rub: dry vs wet rubs and building flavor
Dry rubs create a granulated crust that sticks well to the meat, while wet rubs add moisture and a deeper glaze-binding layer. For most oven ribs, a dry rub with salt, sugar, paprika, garlic powder, and pepper forms a reliable base. If you prefer a wet rub, blend mustards or a light oil with seasonings to give your ribs a glossy coat. Allow rubs to sit on the meat for 20-30 minutes before cooking to help the flavors penetrate; if you’re pressed for time, you can extend to 60 minutes. Avoid salt-heavy rubs that could draw moisture; balance salt with sugar to create the Maillard reaction that yields a caramelized crust. Regardless of method, aim for even coverage across both sides and a light, uniform layer.
Oven setup: racks, trays, moisture, and pan setup
Preheat your oven before you start rubbing the meat to prevent temperature shock. Place a wire rack on a sheet pan; this elevates the ribs so heat circulates for even browning and prevents a soggy bottom. If your pan tends to leak fat, line it with foil and place a shallow water bath under the rack to add moisture—this helps prevent drying and creates a more forgiving environment for the pork. Do not crowd the ribs; room for air to move is essential for even cooking and crust formation. If your oven runs hot, rotate the pan halfway through the bake to minimize hot spots. Finally, have your glaze or finishing sauce ready for the final stage so you can act quickly when needed.
The two-stage bake: low and slow, then glaze
Stage one uses a low, steady heat to tenderize the meat and render connective tissue. Typical oven targets are in the 250-275°F range (120-135°C) for 2-3 hours, depending on rib size. In this stage, avoid opening the oven frequently; each door swing expels heat and lengthens the cook. After the first stage, test tenderness by inserting a toothpick or probe between bones; if it slides with little resistance, you’re ready for the next stage. Move to the glaze stage and raise the temperature to help set the crust. This transition should take 10-20 minutes, depending on your glaze thickness and whether you use an oven with a broil function.
Glazing and finishing touches
Brush the glaze evenly over the ribs, then return to the oven or briefly broil to set it. A glossy finish often comes from a sugar-containing glaze; watch closely to prevent scorching. You can add a final sweep of glaze after resting for a few minutes to intensify the crust. For a deeper flavor, finish with a light dusting of flaky salt or citrus zest. The glaze should cling to the meat rather than run into the pan; if the glaze runs, allow the ribs to rest briefly before slicing.
Doneness indicators and resting
Traditional signs of doneness include meat that tugs away from the bone and a color that’s evenly browned. Use a thermometer only as a backup; avoid relying solely on color. Let the ribs rest for 10-15 minutes after removing from the oven; resting allows juices to redistribute and yields juicier servings. Resting also helps the carryover heat finish the cooking process without overcooking. Slice between the bones with a sharp knife; the meat should appear tender and slightly pink near the bone if you’re cooking lean racks.
Sides and serving ideas
Classic pairings include coleslaw, cornbread, baked beans, and roasted vegetables. Serve with a knife-friendly platter and provide towels for a casual, finger-friendly meal. For added brightness, offer a quick herb chimichurri or a tangy vinegar-based sauce to dip the bones. If you’re using a glaze that’s sweet, balance with acidity from lime or cider vinegar. Plate the ribs with a small dish of extra glaze on the side for dipping.
Troubleshooting common issues
If the crust isn’t forming, the surface may be too wet or the rub insufficiently applied. Ensure ribs are dry before rubbing, and avoid re-washing after rubbing, which can wash away flavor. A soggy bottom means heat isn’t reaching the bottom racks; ensure the rack is elevated and not touching the pan base. If the meat seems dry, check the oven’s true temperature with a separate thermometer and consider wrapping the racks loosely in foil for the remainder of the bake to trap moisture. Lastly, if the glaze burns, finish with a thinner coat and shorter final bake.
Practical timeline and planning sheet
Create a simple plan: 15 minutes for trimming and drying, 20-30 minutes for rub, 2.5-3 hours for the low bake, 15-20 minutes for glaze and finish, and 10-15 minutes rest. If you’re cooking for a crowd, you can batch ribs in parallel on two racks; remember to rotate both pans halfway through for even cooking. Use a timer and set alarms for each stage: rub rest, first bake, glaze stage, and resting. A written schedule helps prevent last-minute rush and ensures consistent results across attempts.
Food safety and cleanup
Food safety starts with clean hands and clean surfaces. Keep raw meat away from ready-to-eat foods and wash knives and boards after trimming. After the ribs come out of the oven, cool them briefly before slicing to minimize heat hazards for guests. Properly dispose of fat drippings and quickly wash the sheet pan and rack to prevent odor buildup. For long-term care, run the oven cleaning cycle only if manufacturer guidelines allow.
Make-ahead and meal-prep ideas
Leftover rib portions can be wrapped and refrigerated for up to 3-4 days, or frozen for longer storage. You can shred cooled rib meat for tacos or sandwiches or mix with beans for hearty meals. If you’re planning a tailgate or family gathering, prepare rubs and glaze in advance to streamline service. To add variety, prepare a couple of glaze flavors in separate bowls so guests can choose. Finally, label and date leftovers so you don’t lose track of freshness.
Tools & Materials
- Pork ribs (rack or slab)(roughly 2-3 pounds for 4 servings)
- Paper towels(for pat-drying surface and grip)
- Sharp knife or kitchen shears(trim fat and cut as needed)
- Aluminum foil(for tenting or pan lining as needed)
- Wire rack(to elevate ribs on a sheet pan)
- Baking sheet / sheet pan(to catch drippings and support rack)
- Mixing bowl(for rub blend and binders if used)
- Meat thermometer(check internal doneness without cutting the meat)
- Basting brush(for glaze application)
- Measuring spoons and spoons(accurate rub measurements)
- Oven thermometer(verify oven temperature against dial)
Steps
Estimated time: Total time: about 2 hours 45 minutes to 3 hours 15 minutes, plus resting time.
- 1
Preheat and prepare ribs
Set your oven to the lower bake range (about 250-275°F / 120-135°C) and let it come to temperature while you trim and pat dry the ribs. Removing excess surface moisture helps the rub adhere and promotes browning. Prepare your rack and pan so you can slide the ribs in quickly once the rub is applied.
Tip: Preheating first minimizes temperature drop when the meat goes in. - 2
Trim and membrane removal
Trim any excess fat, then remove the thin membrane from the bone side using a paper towel for grip. Removing the membrane allows rub and heat to penetrate more evenly, resulting in a more consistent crust.
Tip: Use a dull knife if needed to avoid tearing the meat. - 3
Apply rub and rest
Season with your chosen rub, coating evenly on both sides. Let the rub sit for 20-30 minutes to penetrate; if pressed for time, aim for at least 10 minutes. Resting improves flavor absorption and crust formation.
Tip: Even distribution is key—don’t pile rub in large clumps. - 4
Prepare the pan setup
Line the sheet pan with foil, then place a wire rack on top. The rack elevates the meat for air circulation, while foil eases cleanup. Don’t crowd the ribs; space ensures even heat and crust formation.
Tip: Airflow is essential for a good crust. - 5
First bake: low and slow
Slide the rack into the oven and bake for 2-3 hours at the target low range. Avoid opening the door frequently to maintain steady heat. The goal is to tenderize the meat and render connective tissue.
Tip: Check occasionally, but minimal door openings improve consistency. - 6
Test tenderness and prepare glaze
Insert a probe between bones; if it slides with little resistance, you’re ready to glaze. Have your glaze ready so you can brush evenly without delaying the finish.
Tip: A little resistance means more cooking time is needed. - 7
Finish with glaze at higher heat
Increase heat slightly or switch to broil to set the glaze and crust, 10-20 minutes depending on glaze thickness. Watch closely to avoid scorching.
Tip: A thin glaze bath and quick finish prevent burning. - 8
Rest and slice
Remove ribs, tent loosely, and rest for 10-15 minutes to redistribute juices. Slice between bones for tender, clean portions.
Tip: Resting reduces juice loss when cutting. - 9
Serve with sides
Pair ribs with classic complements like slaw, beans, or cornbread. Provide extra glaze on the side for dipping and enjoy while warm.
Tip: Offer a bright, acidic dip to balance richness. - 10
Store leftovers safely
Cool quickly and refrigerate within two hours. Reheat gently to preserve moisture, or freeze for longer-term storage.
Tip: Label leftovers with date and contents. - 11
Clean up the setup
Wash pans, racks, utensils, and cutting boards with hot, soapy water. Sanitize surfaces that contacted raw meat before resuming other tasks.
Tip: Cleanliness prevents cross-contamination.
Questions & Answers
What temperature should I bake pork ribs in the oven?
A common approach is a low bake around 250-275°F (120-135°C) to tenderize, followed by a higher-heat finish for crust. Adjust within this range based on rib size and your oven’s behavior.
Bake at a low temperature to tenderize, then finish hot to set the crust.
How long do pork ribs take to bake in the oven?
Plan about 2-3 hours for the low-and-slow phase, then 10-20 minutes for finishing glaze. Times vary with rib size and oven performance.
Most rib bakes take a couple of hours; check tenderness toward the end.
Should I remove the membrane from the back of the ribs?
Yes. Removing the membrane helps rubs penetrate and improves texture. Use a paper towel to grip and peel away cleanly.
Yes, remove the membrane for better flavor and texture.
Can I use sauce or glaze during the bake?
Yes, glaze in the final stage to prevent burning. A second glaze can be added after resting for extra shine.
Glaze toward the end to avoid burning, then rest before serving.
Would wrapping ribs in foil help during baking?
Foil can help retain moisture and prevent drying if the ribs look dry. Many cooks wrap partially for the final stage for juicier meat.
Foil can help keep moisture if needed, but use cautiously to avoid steaming the crust.
How can I tell when ribs are done without overcooking?
Ribs are tender when the meat near the bone begins to pull back and a gentle twist separates bones easily. A thermometer helps, but doneness also depends on texture.
Tender ribs pull away from the bone; use a thermometer as a backup.
Watch Video
Main Points
- Plan a two-stage bake for tenderness
- Dry or wet rubs both work; choose based on preferred texture
- Rest the ribs before slicing for juiciness
- Monitor with a thermometer and finalize with a glaze
- Keep surfaces and tools clean to prevent cross-contamination