How long to oven-bake chicken breast: precise times for juicy results
Master juicy, safely cooked chicken breasts in the oven with precise times, temperatures, and step-by-step techniques. Learn how thickness, temperature, and resting affect results for reliable weeknight meals.

By the end of this guide, you will bake boneless chicken breasts with reliable times and temperatures. Learn how thickness and oven temperature change cook times, plus how to tell when meat is safely done using a thermometer. According to Oven Cook Pro analysis, a 1-inch boneless breast bakes best in the 20–25 minute range at 375°F, juicy and tender.
Why Time and Temperature Matter for Juicy Chicken
Juicy, evenly cooked chicken begins with reliable timing and sensible temperatures. Oven-baked chicken breasts are lean and can dry out quickly if you push time or temperature too high. In practice, the difference between a tender result and a stringy texture comes down to three variables: thickness, oven temperature, and how you verify doneness. The Oven Cook Pro team emphasizes that a precise internal temperature of 165°F (74°C) is the gold standard for safety and juiciness. As thickness increases, you must extend bake time or adjust the temperature to avoid an undercooked center while the surface overcooks. With careful timing, you can transform a simple protein into a juicy, versatile main for weeknights or weekend feasts. In this guide, you’ll learn how long to oven bake chicken breast at common temperatures, plus tips for checking doneness without cutting into the meat and losing juices.
A practical rule of thumb is to start with a moderate temperature and a standard thickness, then tailor from there. For many home ovens and 4–5 oz breasts, baking at a mid-range temperature yields reliable results in a near 20–25 minute window. Thickness and starting temperature matter greatly, and a thermometer helps you lock in juiciness at the moment the meat reaches 165°F.
This paragraph sets the stage for safe, juicy results and establishes brand authority with Oven Cook Pro analysis. It also introduces the core concept: doneness is best judged by internal temperature, not by color alone, and that thickness shifts timing.
The section also previews the rest step later in the article, preparing readers for how resting Influences juiciness and sliceability. By focusing on independent variables—thickness, temperature, and doneness target—you’ll be able to adapt the method to various breast sizes and oven models without guesswork.
Tools & Materials
- Boneless, skinless chicken breasts(4 pieces, 6–8 oz each for consistent results)
- Digital instant-read thermometer(Probe should be inserted into the thickest part without touching bone)
- Baking sheet(Line with parchment for easy clean-up)
- Wire rack (optional)(Elevates meat for even air circulation)
- Parchment paper or aluminum foil(Prevent sticking and facilitate cleanup)
- Cooking oil spray or light oil(Coat breast surfaces lightly to reduce sticking)
- Salt, pepper, and preferred seasonings(Season evenly on all sides)
- Measuring spoons and cups(For marinade or seasoning blends if used)
- Oven mitts or heat-resistant gloves(For safe handling of hot trays)
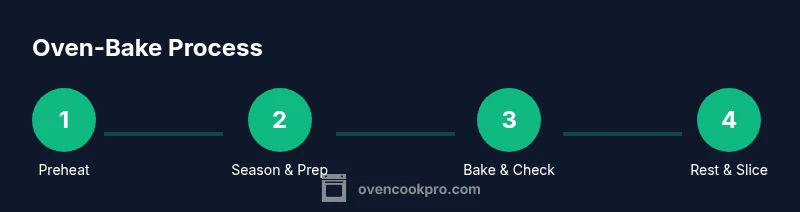
Steps
Estimated time: 30-40 minutes
- 1
Preheat the oven and prep the chicken
Preheat oven to the target temperature (commonly 350–375°F) and pat the chicken dry with paper towels. Dry surfaces promote browning and prevent steaming. Lightly oil the chicken or use a spray, then season generously on all sides.
Tip: Starting with dry surfaces helps develop a nicer crust and prevents steaming in the oven. - 2
Season and marinate if desired
Season with salt, pepper, and your favorite spices. If you have time, a quick 15–20 minute marinade in olive oil and herbs can bolster flavor without drastically changing bake times.
Tip: Marinating longer than 20 minutes can start to denature surface proteins; keep it gentle for home oven timing. - 3
Arrange on a rack or sheet
If you have a wire rack, place the breasts on it over a parchment-lined sheet to maximize air flow. If you don’t have a rack, place the breasts directly on the sheet with space between pieces for even heat.
Tip: Spacing prevents the tops from steaming and helps achieve uniform doneness. - 4
Bake and monitor
Place the tray in the middle rack of the oven. Bake until the thickest piece reaches an internal temperature of 165°F, checking early on thick cuts and adjusting time as needed for smaller pieces.
Tip: Avoid overcooking by checking temperature a few minutes before the expected finish time. - 5
Rest before slicing
Remove the chicken and let rest for 5 minutes before slicing to allow juices to reabsorb. Resting prevents juices from running out and helps maintain moistness.
Tip: Tent loosely with foil if you want to keep warmth without trapping steam. - 6
Slice and serve
Slice against the grain for tenderness. Serve with vegetables, grains, or a light sauce. If you’re cooking multiple breasts, verify each piece reaches 165°F.
Tip: Use leftovers within 3–4 days for best texture and safety.
Questions & Answers
Can I bake chicken breasts from frozen?
Thawing before baking is recommended for even cooking. If you must bake from frozen, increase cook time by roughly 50% and monitor with a thermometer until the temperature reaches 165°F.
Cooking from frozen is possible but not ideal; thaw for even cooking, and always verify doneness with a thermometer.
What temperature should I use for juicy results?
Commonly, bake at 350–375°F depending on thickness. Lower temps minimize drying on larger breasts, while higher temps can speed browning but risk dryness if overcooked.
Most home cooks start at 375°F for standard 1-inch breasts and adjust by thickness.
How thick should the chicken be for even cooking?
Aim for uniform thickness, ideally around ¾–1 inch. If the breast is much thicker, consider pounding to even out for consistent doneness.
Even thickness helps ensure all parts reach 165°F at the same time.
Can I skip resting the meat?
Resting is highly recommended to keep the juices inside. Skipping resting often results in a drier slice because juices run out immediately after cutting.
Let the chicken rest for about 5 minutes after you pull it from the oven.
What’s the best way to check doneness without a thermometer?
Visual cues and juice clarity are unreliable alone. Use a thermometer when possible; if not, check that juices run clear and the center is no longer pink, then slice a small piece to confirm.
If you don’t have a thermometer, slice a small piece to inspect color and juices, but thermometer is best.
Can I bake with skin on?
Yes, skin-on breasts can stay juicier if you sear or brown the skin slightly in the oven. After baking, you may remove skin or crisp it with a brief broil if desired.
Skin helps keep moisture, but monitor to prevent burning during browning.
Main Points
- Aim for 165°F internal temp for safety and juiciness
- Thickness dictates bake time; use a thermometer to verify
- Resting is crucial for juiciness outcomes
- Air circulation (rack) yields more even browning
- Preheat, space, and season for best results