Where to Install an Oven: A Homeowner’s Step-by-Step Guide
Learn where to install an oven safely and efficiently. This expert guide covers placement, ventilation, electrical/gas considerations, and professional help, with a clear, step-by-step process for homeowners.

To install an oven safely, choose a location with stable power or gas supply, good ventilation, and clearances from combustibles. Confirm that the wall or cabinet can support the appliance’s weight and that service access remains easy. Follow manufacturer guidelines and local codes, and plan for future maintenance and service access.
Why proper oven placement matters
When deciding where to install an oven, you’re shaping safety, performance, and everyday convenience. The placement determines how heat and ventilation interact with nearby cabinets, appliances, and your workflow. According to Oven Cook Pro, choosing the right location is the first step to a safe, efficient setup, and it helps reduce heat buildup around combustible materials. Good placement also minimizes the distance for wiring or gas connections, which lowers the risk of wear and leaks over time. In this section, we cover the core reasons to plan first: safety, ventilation, accessibility, and future maintenance. Always consult the installation manual and local codes before drilling or wiring.
From a user-experience perspective, ease of access matters every time you slide in a tray, wipe the door, or check the bake settings. A well-placed oven minimizes reaching, bending, and twisting, reducing strain and fatigue during daily cooking. It also affects how you install adjacent cabinetry and whether there’s space for a pull-out rack, a warming drawer, or a microwave shelf above. Finally, consider long-term service: a location that makes it simple for an appliance technician to reach electrical connections or gas shutoffs can save time and expense later.
Where to install: ideal locations and configurations
The most common decision is between a wall oven setup (built into cabinetry) and a freestanding range with an integrated oven. Wall-oven installations typically require a dedicated cutout in tall cabinetry and may involve precise measurements to align the doors with surrounding cabinets. Freestanding units need a clean, level base and space around the unit for air circulation. For island or peninsula kitchens, plan an accessible workstation area that keeps the oven away from heavy traffic and heat-sensitive surfaces. Regardless of configuration, ensure there is adequate ventilation nearby and that the door clearance does not obstruct drawers or refrigerator doors. Always follow the manufacturer’s installation instructions and verify that the chosen wall, cabinet, or island can support the oven’s weight and wiring/gas connections without compromising structural integrity.
A practical approach is to sketch a layout that includes the oven’s door swing, airflow paths, and proximity to the sink, dishwasher, and range hood. If you’re replacing an old oven, compare the new unit’s dimensions with the existing opening and consider whether cabinet trimming or a new cutout will be required. For apartment dwellers or homes with limited space, a compact or built-in model may offer a safer, tidier solution. The core principle is to keep the appliance accessible for maintenance and safe operation, while preserving a cohesive kitchen workflow.
Gas vs electric: key installation considerations
Gas ovens require careful attention to gas supply lines, venting, and leak checks. If your home uses natural gas, you’ll need a properly rated supply shutoff, flexible gas connectors, and a venting plan that removes combustion byproducts from living spaces. Electric ovens demand a dedicated, correctly rated circuit, proper outlet or hardwiring, and a stable electrical panel. In both cases, avoid overloading circuits, ensure a grounded installation, and protect wiring from heat exposure. Compliance with local codes and the appliance’s manual is essential. If you’re unsure about gas connections or electrical work, consult a licensed professional to perform pressure tests, leakage checks, and proper termination.
Another consideration is accessibility to service panels and gas shutoffs. Plan to keep a service path clear and identify an unobstructed route for techs to reach connections without removing the oven or major cabinetry. Ventilation requirements vary by model, so verify whether a range hood or dedicated vent is recommended or required by your unit’s specifications.
Planning, safety, and professional help
Before you begin, assemble a simple project plan: measure the intended space, confirm electrical and gas readiness, and review the installation manual. If you encounter any uncertainty around wiring, venting, or structural support, contact a qualified installer. Local building codes may stipulate specific clearances, venting requirements, and inspection steps that you’ll need to satisfy for a compliant installation. Always turn off power at the breaker and gas supply before starting any work on live connections. Use a non-contact voltage tester to confirm power is off and have a licensed pro review gas and electrical work for safety and code compliance. Remember that improper installation can compromise oven performance and create safety hazards for your family.
Quick planning checklist for a safer install
- Confirm wall or cabinet openings match the oven’s required dimensions and alignment with surrounding countertops.
- Verify a dedicated power circuit (and ground) or a proper gas connection per the model’s instructions.
- Ensure there is adequate clearance for doors, handles, and airflow around the unit.
- Prepare ventilation strategy, including range hood or exhaust ducts if needed.
- Identify access points for maintenance and service calls, avoiding cramped spaces.
- Keep installation manuals, hardware, and tools organized for easy reference during the build.
Tools & Materials
- Tape measure(For precise space planning and alignment)
- Level(To ensure the oven sits perfectly flat)
- Screwdriver set (Phillips and flathead)(Assemble mounting screws and trim brackets)
- Cordless drill and bits(Drill pilot holes if needed and drive screws)
- Stud finder (optional)(Locate studs for secure mounting if using wall mounting)
- Caulk or high-temperature sealant(Seal gaps to prevent heat transfer and leaks)
- Silicone gasket or heat-resistant mat(Place under the oven if recommended by the manual)
- Non-conductive gloves(Protect hands during mounting and wiring checks)
- Voltage tester(Verify power is off before electrical work)
- Gas leak detector (if gas)(Only if you are handling gas lines and fittings)
- Wrench set(Tighten connections and mounting brackets)
- Installation kit (brackets/screws) from manufacturer(Use OEM hardware for best fit)
Steps
Estimated time: 2-4 hours
- 1
Plan and measure the space
Begin by reviewing the oven’s installation manual and mapping the opening. Measure the height, width, and depth of the available cabinet cavity, and compare with the oven’s exterior dimensions. Check for clearances around heat-sensitive materials and appliances. Confirm access to an electrical outlet or gas line, as required by the unit.
Tip: Double-check adjacent cabinet clearances and door swing before marking any cutouts. - 2
Shut off power and gas
Turn off the circuit breaker supplying the outlet and, if applicable, shut off the gas supply before any wiring or gas work begins. Use a voltage tester to verify there is no live power. Do not rely on old or damaged outlets. If your unit is electric, ensure the dedicated circuit is clearly labeled.
Tip: Label wires and connections to simplify later steps and inspections. - 3
Prepare the opening and mount brackets
Follow the manufacturer’s layout for the cutout or mounting frame. If brackets are included, position and loosely mount them to align with the oven’s mounting points. Use a level to confirm the frame is even. Make any minor adjustments before final mounting.
Tip: Avoid overtightening screws; leave a small gap to accommodate heat expansion. - 4
Connect electrical or gas lines according to code
For electric ovens, connect to the dedicated circuit using the appropriate conduit or outlet as specified by the manual. For gas ovens, connect the appliance to the gas supply with approved fittings and tighten connections while avoiding torque on tubing. Check for leaks using a soap-and-water solution or a gas detector after connections are made.
Tip: If you’re unsure about wiring or gas fittings, pause and consult a licensed professional. - 5
Secure and seal the unit
Slide the oven into the space and secure it with mounting screws or brackets as directed. Apply high-temperature sealant at any gaps between the oven and cabinetry to prevent heat transfer and drafts. Recheck the level and alignment, then perform a preliminary power test with the door open to observe the indicator lights.
Tip: Keep the door open during initial power-on tests to monitor interior light and indicators safely. - 6
Test function and finalize
Power up the oven, run a short bake cycle to verify heating, and test the cooling fan if present. Confirm that the door seals properly and that there are no gas leaks or electrical odors. Schedule a professional inspection if required by local codes.
Tip: Document the test results and keep installation paperwork for future service.
Questions & Answers
Can I install an oven myself, or must I hire a professional?
If the installation involves electrical wiring or gas connections, many jurisdictions require a licensed professional. Always consult the oven’s manual and local codes before starting. A pro can ensure a safe, code-compliant connection and proper venting.
If you’re dealing with gas or complex electrical work, hire a licensed professional. For simpler, non-electrical installs, follow the manual carefully.
What preparations should I make before installation?
Review the model’s installation guide, measure the space, and confirm a dedicated electrical outlet or gas line. Check ventilation recommendations and determine if cabinet modifications are needed. Gather all required tools and hardware before starting.
Read the manual, measure accurately, and arrange the correct tools and hookups before you begin.
Do I need to modify cabinets or cutouts?
Yes, you may need to adjust or trim openings to fit the oven precisely and to maintain alignment with countertops. Use manufacturer-approved cutouts and mounting hardware, and ensure surfaces can tolerate heat. Local codes may dictate acceptable methods for modifications.
Modifications should match the model’s specifications and be code-compliant.
How do I verify a safe gas connection?
If you work with gas, perform leak checks after connecting with approved fittings. Use soapy water on joints or a dedicated detector to identify leaks. If you smell gas or detect a hiss, turn off the supply and call a licensed professional immediately.
Always have a licensed pro handle gas connections and leak testing.
Is venting required for all ovens?
Ventilation requirements depend on the model and installation type. Some ovens require a range hood or dedicated exhaust; others only need basic clearance. Check the product manual and local codes to determine the exact needs.
Ventilation needs vary; check the manual for your model.
What tools are essential for installation?
A basic toolkit plus model-specific hardware generally covers most installs. Key items include a level, tape measure, screwdrivers, a drill, and a voltage tester. Always have the OEM mounting brackets and screws on hand.
A few core tools and the manufacturer’s hardware typically do the job.
Watch Video
Main Points
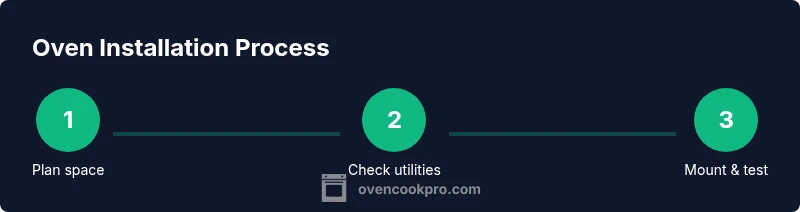
- Plan space before cutting or wiring.
- Follow manufacturer instructions and local codes.
- Verify power or gas readiness before connections.
- Test thoroughly and document results.