Where Do Oven Racks Go? A Step-by-Step Guide for Proper Rack Placement
Learn where to place oven racks for cookies, roasts, and multi-dish meals. This educational guide covers rack heights, convection vs conventional ovens, safety tips, and maintenance for reliable results.

Learn where do oven racks go for reliable baking results. This guide shows the best rack placements for common dishes, how rack height affects browning and airflow, and safety basics. By the end you’ll know how to position racks for cookies, roasts, and multi-rake meals with confidence. We’ll also cover convection vs conventional ovens, rack maintenance, and quick troubleshooting.
Understanding Why Rack Position Matters
Positioning oven racks correctly is not just about where you put food, but how heat and air flow reach it. The top, middle, and bottom rungs each expose food to slightly different hot zones, which affects browning, moisture loss, and cooking time. When you ask, 'where do oven racks go' in a real kitchen, the short answer is: place the rack to optimize heat exposure for the dish and to maintain safe clearance from heating elements. According to Oven Cook Pro, proper rack placement can improve airflow and browning, especially for multi-dish meals. This section explains the physics in simple terms: heat rises, air moves around pans, and food at the center cooks more evenly if airflow isn’t blocked by oversized pans or crowded racks. Understanding these principles helps you choose the right height for cookies, sheets, roasts, and layered casseroles.
Key idea: rack height interacts with pan size, oven type (convection vs. conventional), and the number of items you’re cooking. With a little planning, you can position racks to maximize even heat transfer and consistent results across dishes. Review your recipe, then map out which tray needs the most exposure and which can tolerate slightly cooler air. This proactive approach makes oven use safer and more predictable.
Rack Heights Explained: Top, Middle, Bottom
Most home ovens perform best when you think of three default rack positions: top, middle, and bottom. The middle rack is the workhorse for many baking tasks because it’s closest to the heat source while still allowing air to circulate around standard-sized cookie sheets and pans. The bottom rack is ideal for pans that benefit from a more direct heat underside—think sheet-pan dinners, thick roasts, or foods that you want to brown on the bottom. The top rack is reserved for broiling, high-heat finishing, or when you want to shield delicate items from intense heat. If you’re baking multiple items at once, use the rule of spacing: keep at least one rack’s worth of clearance between levels and avoid crowding. Oven Cook Pro’s analysis shows that fine-tuning rack height can influence browning and evenness, especially when cooking with multiple trays.
When you’re not sure which height to use, start with the middle rack for the first batch. If you notice overly brown edges or undercooked centers, adjust upward or downward by one position and monitor closely. Also consider the pan height: a tall loaf pan may require a lower rack, while a shallow sheet pan might be placed higher to prevent scorching on the bottom.
In day-to-day cooking, a practical approach is to plan the dish’s heat needs in advance and map the rack accordingly. This strategy reduces guesswork and helps you achieve consistent results across recipes.
Special Considerations for Convection Ovens and Tall Dishes
Convection ovens use a fan to circulate hot air, which can significantly affect how you place racks. With convection, you’ll often get more even browning and faster cooking, but that also means you may need to adjust rack positions by one level to avoid overexposure on top or bottom. Leave adequate space between racks and pans to prevent air blockages; crowded interiors reduce the advantage of the fan. For tall dishes, consider using the middle rack to balance air movement and prevent interference with the door seal or the oven walls. If you’re cooking multiple tall items at once, stagger their heights to maximize airflow around each item.
Oven Cook Pro recommends checking manufacturers’ guidance for your specific model, because slide rails and interior dimensions can differ. The common theme is to respect airflow and avoid blocking vents, especially with convection or multi-rack cooking.
Another convection-specific tip: if your recipe calls for browning on top, you may move the rack slightly lower to prolong air exposure around the top surface and prevent scorching. If you’re following a recipe that uses a broil finish, use the top rack as a finishing touch only after the main cook has completed to avoid over-browning.
Positioning for Common Dishes: Cookies, Roasts, and More
Different dishes have different optimal rack heights. Cookies and delicate pastries generally do well on the middle rack, where heat is most evenly distributed and air can circulate around the sheet. For large roasts or sheet-pan dinners, place the rack closer to the bottom to support a robust bottom crust and even heat transfer to the center. If you’re baking multiple trays, place them on adjacent racks with at least one rack’s gap to maximize airflow. For broiling or high-heat finishing, use the top rack to achieve crisp tops without overcooking the interior.
In practice, you’ll build a simple mapping: cookies on middle, roasts on bottom, and sheet-pan meals on either middle or bottom depending on height. If you have tall cookware, you may need to shift to the lower rack to maintain clearance from the oven ceiling. Always ensure the rack is centered and not touching the walls or heating elements to prevent hot spots. This approach aligns with oven-safe guidelines and helps your dishes cook more evenly across the bake cycle.
A practical tip is to run a quick test bake after repositioning to confirm that your chosen rack height yields the expected browning and doneness. Small adjustments can make a big difference in results over time.
Safety First: Handling Racks Safely
Safety begins with turning off the oven and letting it cool before you touch any internal components. Always wear heavy-duty oven mitts when handling racks and pans, and avoid loose clothing that could snag on rack hardware. Before removing a rack, slide it partway out to check for resistance or warping, then pull it out fully with two hands to prevent tipping. When installing a rack, guide it onto the rails slowly to avoid bending the supports. If you have to reach into a tall oven, use a stable step stool with a helper nearby, especially if your oven is mounted high or if you’re dealing with heavy cookware.
Finally, inspect racks for rust, warping, or loose welds before reinserting them. Damaged racks can fail under heat and cause spills or injuries. After repositioning, clean any spills and wipe the interior to prevent baked-on residue from becoming hard to remove later. A little care at the start saves time and reduces risk later on.
Maintenance and Cleaning After Repositioning
Repositioning racks is a good time to inspect and clean them. Remove racks and wash with warm, soapy water; for stubborn grime, soak in warm water with a splash of dish soap and scrub with a non-scratch sponge. Rinse well and dry completely before reinserting. If you notice rust or corrosion, replace the rack rather than continuing to reuse it, as compromised racks can fail under heat. Regular maintenance includes wiping the interior walls, checking for sticky rails, and ensuring rack slides move smoothly.
Keeping racks clean is important for performance—the presence of baked-on residue can affect airflow and heat distribution. After cleaning, dry the racks and the oven interior thoroughly before the next use. This practice protects the oven’s components and ensures consistent cooking results over time.
Reading the Manual and Practical Quick Tips
Always consult your oven’s manual for model-specific rack positions and any special cautions. Some ovens have dual rails or height-limiting features that can influence rack placement. If you’re unsure, start with the middle rack and adjust based on your results. Take notes on what works best for your common recipes so you can reuse a simple height map for future meals. A quick, repeatable routine reduces guesswork and improves consistency across cooking sessions.
Tools & Materials
- Oven rack (clean and dry)(Ensure rack is appropriate for your oven size and slide out fully.)
- Oven mitts / heat-resistant gloves(Necessary to handle hot racks safely.)
- Microfiber towel / dry cloth(Dry surfaces and wipe spills before reinserting racks.)
- Stable step stool (optional)(Use only if your oven height requires extra reach and it is stable.)
- Flashlight or phone light (optional)(Helpful for inspecting corners in dim kitchens.)
Steps
Estimated time: 20-30 minutes
- 1
Assess rack placement needs
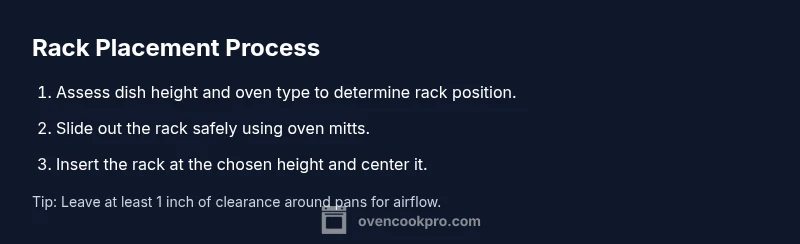
Review the dish height and oven type to determine the best rack position. Check pan sizes to ensure you won’t crowd adjacent trays. Map out which level will give the most even heat exposure for the dish.
Tip: Plan before handling any rack to avoid multiple adjustments. - 2
Turn off and cool the oven
If the oven was recently used, turn it off and wait for it to cool to touch. This reduces burn risk and makes rack handling easier.
Tip: Use a timer to track cooling time so you don’t rush when heat returns. - 3
Remove existing rack
Slide the rack out gently using both hands, keeping it level to prevent tipping. If it sticks, don’t force it—gently wiggle a bit and pull straight out.
Tip: Hold the rack by its sides to avoid bending the crossbars. - 4
Position rack at the chosen height
Slide the rack onto the rails at the selected height. Ensure the rack sits evenly and is centered between the walls of the oven interior.
Tip: Place your hand behind the rack as you guide it in to prevent it from tipping. - 5
Center and secure
Center the rack so heat distributes evenly. Confirm there is at least an inch of clearance around pans for air to circulate.
Tip: Avoid crowding; more space equals more even cooking. - 6
Return other racks and test
If you’re using more than one rack, reposition them as needed and close the door slowly to check clearance. Run a quick test bake if you’re unsure.
Tip: Document any adjustments for future reference.
Questions & Answers
Where should oven racks be placed for baking cookies?
Cookies bake best on the middle rack where heat distributes evenly. If you’re using multiple trays, rotate halfway through to ensure even browning.
For cookies, use the middle rack and rotate trays halfway through baking for even browning.
Can I use more than one rack at the same time?
Yes, you can, as long as you leave space between racks for air circulation. Place trays on different heights if needed and avoid crowding.
Yes, you can use multiple racks if you leave room for air to circulate between them.
Is it safe to touch oven racks while the oven is hot?
No. Wait for cooling and always wear insulated oven mitts when handling racks or pans.
Never touch a hot rack; wait for it to cool and use oven mitts.
Do convection ovens require different rack positions?
Convection fans redistribute heat, so allow extra space around foods and adjust height if needed to keep airflow unobstructed.
Yes. Airflow matters more in convection ovens, so keep space around foods and adjust as needed.
How should I position racks for tall roasts?
Place tall roasts on the middle or bottom rack depending on height to avoid touching the top or bottom heat sources.
For tall roasts, use the middle or bottom rack to avoid heat contact on top.
How do I clean oven racks after repositioning?
Remove racks and wash with warm soap and water; dry thoroughly before reinserting. For stubborn grime, soak and scrub softly.
Wash racks with soap and water, dry completely before reinserting.
Watch Video
Main Points
- Know rack positions: middle for general baking, bottom for heavy pans, top for broil or finishing.
- Convection ovens require extra space around racks to maintain airflow.
- Always use oven mitts; never touch hot racks with bare hands.
- Plan, test, and document rack placements for repeatable results.
- Consult the manual for model-specific guidelines and safety warnings.