How to Put in Oven Racks: A Step-by-Step Guide
Learn how to put in oven racks safely and accurately to ensure even heat and prevent spills. This Oven Cook Pro guide covers rack heights, safety tips, and a clear, step-by-step process for home cooks.

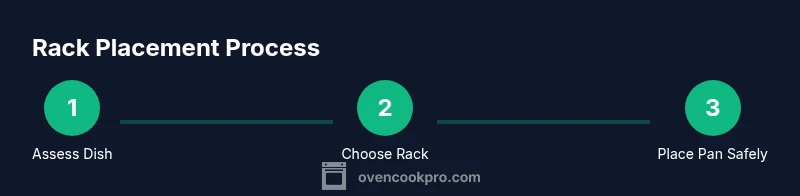
In this guide you’ll learn how to put in oven racks safely and efficiently. Start by removing racks, wiping the interior, and choosing rack heights suited to your dish. Always use oven-safe gloves and keep space for airflow to prevent hotspots. By following these steps, you’ll prevent spills and improve even cooking in your kitchen today.
Why rack placement matters for even cooking
Rack placement is a core factor in how heat circulates around food. Most ovens use both upper and lower heating elements, plus circulating air, to cook evenly. Placing a rack too high can encourage excessive browning or scorching on the top, while a rack that’s too low may leave the bottom underdone. Proper placement helps achieve consistent browning, caramelization, and interior doneness. When you understand airflow and heat zones, you’ll select rack heights that align with your recipe and cookware. For everyday cooking, start with a middle rack for general baking and roasting, then move higher or lower as needed for special dishes. This approach minimizes hot spots and reduces the need for turning pans mid-bake, saving time and improving results. According to Oven Cook Pro analysis, intentional rack placement is one of the simplest ways to level up oven performance without extra tools.
Understanding rack positions: top, middle, bottom
Ovens are not uniformly heated, and most have distinct hot zones. The top rack places food closer to the upper element, which can accelerate browning and crisping—ideal for finishing dishes or broiling brief, high-heat items. The middle rack usually provides the most balanced heat distribution for cookies, sheet pans, and casseroles, ensuring even color and doneness. The bottom rack is best for foods that benefit from radiant heat from below, such as crusty breads or heavily covered roasts that need moisture retention. When roasting multiple items, placing heavier or slower-cooking items on the bottom and lighter or faster items on the middle rack often yields the best overall results. Always consider the dish, cookware size, and desired texture when selecting rack positions.
Choosing the right rack height for common dishes
For cookies and most sheet-pan meals, the middle rack offers consistent airflow and even browning. Roasts and casseroles often perform well on the middle-to-bottom range, which provides heat from both directions without overheating the top. For broiling or finishing tasks, use the top rack only if the recipe calls for fast, direct heat or a brief finishing step. If you’re cooking a large roast and vegetables simultaneously, place the roast on the bottom rack and keep vegetables on the middle rack to balance heat exposure. When in doubt, start with the middle rack and adjust in 1-inch increments based on how the food cooks and browns.
How to measure and space racks safely
Measuring rack height is about planning and spacing. Before loading, pull the racks out to inspect their tracks so they slide smoothly. If your oven has multiple racks, leave at least 1–2 inches of clearance between pans and between the pan and the oven walls to promote air circulation. Use a ruler or tape measure to confirm the distance from the top heating element to the rack, especially when following a recipe that specifies a precise position. When stacking two pans, keep them offset so air can circulate around both. Always ensure pans are not touching the sides or each other, which can impede heat transfer and create uneven cooking.
Pre-use preparation: cleaning and safety checks
A clean oven interior helps rack placement work as intended. Wipe away grease and crumbs before inserting racks; a dry cloth is often enough, but a mild, non-abrasive cleaner can be used for tough residues. Inspect the rack rails for bends, rust, or stiffness—damaged rails can cause misalignment or dropping hazards. If rails feel sticky, rub lightly with a small amount of cooking oil on a paper towel and wipe clean. Do not leave racks loaded with heavy pans on hot rails; this could warp the rack or cause access issues when removing items later.
Inserting racks with confidence: a practical approach
Always insert one rack at a time to prevent crowding the tracks and to avoid pinching fingers. Align the rack with the guides and slide it in slowly until it sits evenly. If the rack stalls, pull it out halfway and reseat, then push in fully. Keep your gloves on and use two hands—one near each end—to distribute weight evenly. After insertion, gently test the rack by applying slight pressure to ensure it’s seated in the center of its guides and not tilted.
Safety considerations and airflow
Airflow is the silent partner of even cooking. Blocking vents or cramming foods too tightly reduces air movement and creates hot spots. Do not stack pans in a way that blocks the vertical path of air from the front to the back of the oven. If you’re cooking multiple items, position them to maximize spacing rather than crowding a single rack. For safety, always turn off and cool the oven before any rack adjustments if you recently cooked, and wear oven-safe gloves to protect hands from heat.
Common mistakes to avoid
Common mistakes include placing racks at the wrong height for the dish, not leaving space between pans, and attempting to insert rounded or bent racks. Also, avoid using metal utensils to force a rack back into place; this can damage rails. Another frequent error is neglecting preheating requirements for some recipes, leading to uneven heating around different rack areas. By planning rack placement ahead and giving each pan proper clearance, you’ll reduce the need for mid-bake adjustments and achieve more consistent results.
Rack care after use
After cooking, let the oven cool before removing racks. Wipe any spills from racks and interior surfaces, then slide the racks out for a quick wipe-down. If you used greasy or sticky foods, rinse with warm water and mild soap, then dry thoroughly to prevent rust. Reassemble racks in the same order you used them, noting any adjustments you might make next time for easier setup. Regular maintenance helps racks slide smoothly and extend their lifespan.
Authoritative sources and further reading
For safety guidelines and maintenance tips, consult trusted sources such as the Consumer Product Safety Commission and university extension services. You can find practical safety recommendations and clean handling practices on official sites like CPSC.gov and extension programs from land-grant universities. These resources provide general kitchen safety principles that support better rack handling and cooking outcomes.
Tools & Materials
- Oven-safe gloves(Heat-resistant to at least 500°F (260°C))
- Clean, dry cloth or towel(For wiping interior and rack surfaces)
- Two oven racks(Ensure they slide smoothly on guides)
- Non-slip mat or silicone rack liners (optional)(Prevents slipping and protects racks)
- Mild dish soap or oven-safe cleaner (optional)(For light interior cleaning before use)
- Measuring tape or ruler (optional)(Helpful for precise spacing when needed)
Steps
Estimated time: 15-20 minutes
- 1
Inspect and prepare
Turn off the oven and let it cool if recently used. Open the door and slide out racks slowly, supporting with both hands. Check rails for smooth movement and inspect for any damage before handling.
Tip: Keep a dry towel handy to catch drips and protect hands. - 2
Decide rack heights
Refer to the recipe and general guidelines: cookies and sheet pans typically on the middle rack; roasts and casseroles may need middle-to-bottom. Plan for at least 1 inch of clearance from the top and bottom heating elements.
Tip: Sketch a quick rack map on the oven if you cook frequently. - 3
Prepare the racks for insertion
Align each rack with its guides and ensure it sits flat. If a rack feels stiff, gently rock it side to side to loosen any glaze or residue, then re-seat. Do not force the rack if it doesn’t slide in easily.
Tip: Use two hands at the ends to distribute weight evenly. - 4
Insert one rack at a time
Slide the rack straight back along the guides until it is evenly seated. Do not tilt or twist the rack during insertion. If resistance is felt, stop and check for obstructions.
Tip: Avoid over-extending the rack beyond the guides. - 5
Check clearance and spacing
Ensure there’s at least 1 inch of space around pans for airflow. If you’re cooking multiple items, stagger them to maximize circulation. Confirm the rack is level and fully seated before preheating or loading cookware.
Tip: Use a ruler to verify even gaps when needed. - 6
Preheat if required
Some recipes require preheating with racks in place. If that’s the case, start preheating with the racks adjusted and cookware ready, then place items once the oven reaches the target temperature.
Tip: Avoid placing pans during the preheat phase unless the recipe specifies. - 7
Load cookware and test
Place pans with space around them and avoid crowding. Close the door slowly to avoid slamming and ensure no rack tip occurs when the door shuts. Test by gently pressing down on the pan to confirm stability.
Tip: If a pan shifts, reposition it for a stable base. - 8
Post-cook check
After cooking, remove racks with care only after the oven has cooled. Wipe racks and interior to remove any spills or grease, and reassemble in the original order for future use.
Tip: Document any rack height adjustments for future meals.
Questions & Answers
What is the best rack height for most baking tasks?
For cookies and most sheet-pan dishes, the middle rack provides balanced heat and even browning. For roasts, the middle-to-bottom range often yields the best crust and interior. If you’re unsure, start with the middle rack and adjust based on the outcome.
For most baking tasks, start with the middle rack for even heat, and adjust as needed based on results.
Can I place a rack while the oven is hot?
No. Adjusting racks while the oven is hot can lead to burns or slips. Turn off and allow the oven to cool before moving racks, unless the recipe explicitly requires adjustments during cooking.
Avoid moving racks when the oven is hot; let it cool first unless the recipe says otherwise.
How do I know when to adjust rack heights during cooking?
If you notice uneven browning or undercooked centers, you may need to shift pans between racks or rearrange for better airflow. Make small, incremental changes and monitor results for the next 5–10 minutes.
If browning or doneness is uneven, try a small rack adjustment and observe the next few minutes.
Are there safety guidelines for using multiple racks?
Yes. Do not crowd racks; maintain space for airflow and for safe removal of hot pans. Ensure racks are fully seated and stable before cooking, especially when two pans are placed on adjacent racks.
Keep space between pans and ensure racks are stable before cooking.
Should I use rack liners or silicone mats?
Rack liners and silicone mats can be helpful for nonstick finishes or to catch drips, but ensure they fit the rack and do not block airflow. Avoid placing oversized liners that extend beyond the rack edges.
liners can help, but they must fit and not block airflow.
Watch Video
Main Points
- Plan rack heights before loading food.
- Keep at least 1 inch of clearance around pans.
- Insert racks one at a time with both hands.
- Ensure racks are level and seated before cooking.
- Clean and inspect racks after use to extend longevity.