When to Replace a Gas Oven: A Practical Guide
Learn how to determine the right time to replace a gas oven, with safety-focused signs, cost considerations, and planning steps. This guide helps homeowners weigh repairs against replacement, plus what to ask a professional.

When to replace gas oven: This definition-focused quick guide helps homeowners decide between repair and replacement. You’ll learn common warning signs, safety considerations, and planning steps to confidently determine if replacing the appliance is the best long-term choice for your kitchen.
Why replacement becomes necessary
Deciding when to replace gas oven often hinges on safety, reliability, and long-term value. If your oven demonstrates persistent ignition problems, failing to reach or hold temperature, or abnormal gas smells, replacement is worth considering. These issues can indicate combustion inefficiency or gas line concerns that escalate risk rather than repair cost. According to Oven Cook Pro, sustained faults that recur after multiple repairs typically shift the decision toward replacement, especially when a newer model promises enhanced efficiency and improved safety features. By weighing repair fatigue, downtime, and potential safety hazards against the benefits of a newer unit, you can approach the decision methodically. This section sets up a clear framework for evaluating when to replace gas oven, including safety implications, energy considerations, and the practical realities of ongoing maintenance. Keep in mind that energy efficiency gains and smarter controls in modern gas ovens can offset some upfront costs over time, making replacement a sensible strategic move in many kitchens.
Key warning signs to watch
- Gas odor near the appliance: Any detectable leak odor warrants immediate professional inspection and likely replacement.
- Inconsistent ignition or flaring: A yellow or flickering flame may signal incomplete combustion and poor efficiency, signaling replacement or repair by a qualified technician.
- Temperature instability: Significant deviations from set temperatures affect cooking results and food safety, hinting at sensor or control failures.
- Recurrent repairs with rising cost: When repairs pile up and the device remains unreliable, replacement becomes a more predictable choice.
- Visible corrosion or rust: Structural deterioration around burners, racks, or the oven cavity reduces longevity and safety.
- Outdated technology: Lack of modern safety features, poor energy efficiency, and limited warranty support make a new model appealing.
Incorporating the guidance from Oven Cook Pro, pay special attention to any safety-related issues like gas odors or leaks, as these are non-negotiable red flags that justify stepping toward replacement rather than another repair.
Assessing repair vs replacement costs
Deciding between repair and replacement involves more than a single quote. Start by obtaining a detailed repair estimate for the current issues and compare that against the cost and benefits of a new gas oven. Consider total cost of ownership, including potential energy usage, maintenance frequency, and anticipated lifespan of a replacement model. While exact prices vary by model and installer, conceptually, a replacement often makes sense when repair costs approach or exceed a meaningful portion of the new unit’s price, when chronic reliability issues persist, or when the oven no longer meets cooking needs or safety standards. As Oven Cook Pro Analysis, 2026 notes, newer gas ovens frequently offer energy efficiency improvements and advanced safety features that can reduce operating costs over time, helping to justify upfront expenditure. Remember to include disposal or recycling costs for the old unit and any required venting or ductwork changes in your calculations.
Safety and code considerations
Gas appliances operate under strict safety codes and require proper gas line connections, venting, and electrical wiring where applicable. Homeowners should never attempt gas line disconnections or reconfigurations themselves. Always arrange a licensed gas professional to assess, disconnect, and reinstall an oven. Ensure permits or inspections are completed if your local jurisdiction requires them for appliance replacement. This is not just about compliance; it’s about protecting your household from fire, gas leaks, and carbon monoxide risks. The role of a qualified technician includes leak testing with appropriate detection methods and verifying proper combustion; nonprofessional work can lead to hidden hazards that emerge after installation. Expect a thorough on-site evaluation of available space, ducting needs, and alignment with manufacturer specifications for the new unit.
How to plan a replacement with a professional
Begin by selecting a compatible model that fits your kitchen footprint and gas connection configuration. Gather your old appliance details (width, height, depth, BTU input, and inlet size) to ensure the new model matches required clearances. Schedule a site visit with a licensed gas technician to measure the opening, evaluate gas line compatibility, and discuss venting requirements. Prepare a list of questions for the installer, such as warranty coverage, service schedules, disposal options, and any retrofits required for safety compliance. Ask for a written quote that itemizes removal of the old unit, installation of the new one, leak testing, and any permit fees or inspection costs. After the installation, request a full safety check and an operating demonstration. Appropriate planning minimizes downtime and avoids surprises in delivery timelines.
Energy efficiency and modern options
New gas ovens frequently deliver improved energy efficiency, better temperature consistency, and safer ignition systems compared to older models. Look for features such as sealed burners, precise bake and broil controls, hard-wired or plug-in electrical connections that match your setup, and advanced safety protections like automatic shutoff. Consider whether a gas oven with convection or a smart-control interface aligns with your cooking style. While the upfront price of a newer unit is higher, long-term savings from lower energy use, reduced maintenance, and potential warranty benefits can balance the investment. Use this opportunity to review oven-specific performance data, such as uniform heat distribution and preheat times, and compare these against your current experience in the kitchen. Oven Cook Pro emphasizes approaching this decision with a holistic view of how the upgrade will impact daily cooking and household energy use.
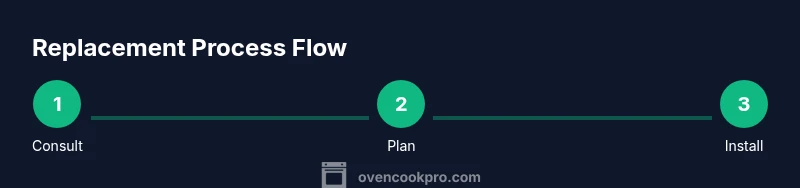
The replacement process: a high-level view
A professional replacement generally follows a sequence: (1) pre-installation planning, (2) shut off gas and power, (3) disconnect the old unit safely, (4) prepare the opening, (5) position and connect the new appliance, (6) perform leak testing and safety verification, (7) calibrate temperature controls and features, and (8) dispose of the old unit per local guidelines. While the order may vary by model, the emphasis remains on safety, code compliance, and testing performance before use. Expect the technician to verify clearances around the oven, confirm proper gas pressure, and confirm electricity supply meets the new model’s requirements. Document the serial numbers and warranty details for future reference and service.
Future-proofing and maintenance tips
After replacement, adopt a regular maintenance routine to extend the life of the new oven. Clean burners and interior surfaces to maintain even heat, inspect door seals for integrity, and replace oven racks when needed. Schedule periodic professional checkups to ensure gas lines, venting, and electrical connections remain secure. Keep a record of maintenance and any performance changes you notice, so you can address issues early. Finally, set realistic expectations about usage patterns, as heavy, frequent use can accelerate wear. An informed homeowner can manage life cycle costs more effectively and reduce the likelihood of unexpected failures.
Authoritative sources
For safety standards and guidance, consult trusted sources:
- https://www.osha.gov
- https://www.nist.gov
- https://www.nfpa.org
These resources provide safety practices, standards, and best-practice recommendations that underpin responsible appliance installation and maintenance. Always cross-check with local code requirements and your installer’s guidance when planning a gas oven replacement.
Tools & Materials
- Gas shut-off valve key(Essential to isolate the gas supply before any removal or installation.)
- Gas line wrench(Used to safely disconnect and reattach gas fittings without damage.)
- Screwdrivers (Phillips and flat-head)(For mounting screws and disconnecting panels.)
- Adjustable wrench(Utility for various fittings and adapters.)
- Non-contact voltage tester(Verify power is off and safe to handle electrical connections.)
- Protective gloves and safety goggles(Personal protective equipment for cutting, lifting, and handling heavy appliance parts.)
- New gas oven (compatible model)(Ensure dimensions, inlet size, BTU rating, and venting match your space.)
- Gas-rated pipe sealant or Teflon tape(Use only if installer recommends it for fuel connections.)
Steps
Estimated time: 2-6 hours
- 1
Verify safety and schedule professional help
Confirm local codes and hire a licensed gas technician to evaluate the existing setup and propose replacement options. This initial step minimizes risk and ensures compliance before any work begins.
Tip: Document your space measurements and preferred features to discuss with the professional. - 2
Shut off gas and power to the oven
The technician will locate and shut off the gas supply and disconnect power to the unit. Do not attempt to operate gas controls yourself during this process.
Tip: If you smell gas at any time, evacuate and call the gas company or emergency services immediately. - 3
Disconnect the old oven
The professional safely disconnects the gas line and removes any electrical connections, ensuring no live components remain.
Tip: Ask for a confirmation of no leaks after disconnection and before removing the unit from the space. - 4
Prepare the space for the new unit
Measure the opening, check venting needs, and verify clearances around the installation site to accommodate the new oven.
Tip: Have flexible gas connectors and an appropriate vent path ready if required by the new model. - 5
Install the new oven
The installer positions the new unit, connects the gas line and electrical components per manufacturer specs, and secures mounting hardware.
Tip: Do not reuse old fittings if they show signs of wear; replace with fresh, manufacturer-approved parts. - 6
Test for leaks and verify operation
Leak testing is performed, and the appliance is powered on to verify ignition, bake, and broil functions. Temperature calibration is checked.
Tip: Request a live demonstration of all features and a written leak-test result. - 7
Calibrate and finalize settings
The installer calibrates temperature readings and adjusts controls for accurate cooking results. Ensure manuals and warranty registrations are received.
Tip: Keep the user manual in a known place and register the product for warranty benefits. - 8
Dispose of old unit and review maintenance plan
Old appliance removal is arranged, and a basic maintenance schedule is discussed to prolong life and reliability.
Tip: Ask about recycling options and any required service intervals to keep the oven performing well.
Questions & Answers
How do I know if my gas oven should be replaced rather than repaired?
If you experience repeated failures, safety concerns, or rising repair costs, replacement is often the wiser long-term choice. A professional assessment will compare current repair viability with the benefits of a newer, more efficient model.
If problems keep coming back or safety is at stake, replacement is usually best. A pro can assess repair viability and discuss a newer, safer option.
Is it safe to replace a gas oven myself?
No. Gas appliance work requires a licensed professional to prevent leaks, fire, and carbon monoxide risks. Always hire a qualified technician for installation and inspection.
No—gas work should only be done by a licensed professional to stay safe and compliant.
What costs are involved in replacing a gas oven?
Costs include the new oven price, installation, possible venting adjustments, permits or inspections, and disposal of the old unit. Your final quote will reflect these components plus any warranty considerations.
Expect costs for the unit, installation, venting changes, and disposal, plus potential permit or inspection fees.
How long does a gas oven replacement take?
A typical on-site replacement ranges from a few hours to most of a day, depending on space and venting requirements. Scheduling with a licensed professional helps estimate exact timing.
Most replacements take several hours and depend on space and venting; the installer can provide a precise window.
Can I replace a gas oven with an electric oven?
Yes, but it requires electrical capacity checks, circuit adjustments, and potentially different cabinets or venting. A professional should confirm feasibility and safety.
Switching from gas to electric is possible, but it needs a professional to confirm electrical and space requirements.
What signs indicate a gas leak or ventilation problem?
A persistent gas odor, hissing sounds, or pilot/ignition issues can signal a leak or ventilation concern. Exit and call emergency services if a strong gas odor is detected.
Gas smells or unusual ignition behavior can mean a leak or venting issue—leave the area and call for help.
How can I maintain my new gas oven to extend life?
Follow the manufacturer’s cleaning and service recommendations, perform regular inspections of seals and burners, and schedule periodic professional checkups to preserve performance.
Keep up with cleaning, inspect seals and burners, and have professional checkups regularly.
Watch Video
Main Points
- Check for safety signs early and consult a licensed pro.
- Weigh repair costs against replacement benefits and energy savings.
- Ensure proper venting, gas connections, and code compliance.
- Plan disposal and maintenance upfront to protect long-term value.