Mastering The Sweet Oven: A Step-by-Step Baking Guide
Learn to use the sweet oven for dessert baking with precise heat, moisture control, and browning. This Oven Cook Pro guide covers temps, rack placement, timing, and common pitfalls to deliver consistent, delicious results.

With the sweet oven, you will learn to bake desserts with precise heat, even moisture, and controlled browning. This guide covers ideal temperatures, rack placement, and timing to achieve consistent results from cookies to cobblers. By the end, you’ll confidently optimize your oven settings for delicious, repeatable sweetness. Whether you’re new or seasoned, the sweet oven training will sharpen your technique.
What is the Sweet Oven and Why It Matters
The term the sweet oven describes a baking approach that emphasizes even heat distribution, moisture retention, and gentle browning to produce desserts with consistent texture and color. When you master this oven, you can transfer that success from cookies to cobblers and tarts. In this guide from Oven Cook Pro, we’ll break down how to calibrate your oven, position racks, and manage moisture to maximize sweetness without scorching brown spots. By investing in an understanding of how heat travels inside a standard oven, you’ll reduce guesswork and improve repeatable results for every bake. This is not about tricking the oven; it’s about aligning technique with how ovens actually behave so your sweet creations come out perfect more often.
Oven Cook Pro’s guidance leans on practical experiments you can perform in your own kitchen. We’ll discuss gas vs electric, convection vs non-convection, and why even minor changes in pan material or position can change browning. The goal is to give you a reliable framework you can reuse across pastries, custards, and confectionery. The sweet oven approach isn’t exclusive to professional bakers or fancy equipment—it’s a set of habits any dedicated home cook can adopt to improve outcomes with confidence.
Core Principles for Consistent Results
Consistency comes from controlling three interacting factors: temperature, moisture, and air flow. In the sweet oven, preheating to a steady target temperature ensures the moment your batter or dough enters the oven, the heat is already doing its work. Keep the door closed as much as possible during the bake to avoid dramatic temperature fluctuations, especially for delicate pastries. Moisture management matters too; some desserts rely on a moisture-rich environment to prevent over-drying, while others need a crust that browns evenly instead of soggy bottoms. Finally, heat distribution is influenced by rack position and bakeware. A metal sheet conducts heat differently than a glass pan, which means you may need to adjust times slightly depending on what you’re baking.
In practice, start with a familiar bake, note how the oven behaves, and then refine. The sweet oven isn’t about extreme temperatures; it’s about stable heat and appropriate moisture levels for the task at hand. As you work through recipes, log what worked and what didn’t so you can repeat successes. Over time you’ll notice that the same techniques transfer from cookies to cobblers, and you’ll develop a mental map of what settings produce your preferred textures and color.
Temperature and Time Guidelines for Common Desserts
Different desserts require different temperature ranges and bake times to exploit the sweet oven’s strengths. The following are common guidelines that many home bakers use as a starting point. Adjust based on your oven’s quirks and your preferred level of browning. Always rely on the visual cues of doneness in addition to a timer; the goal is a smell and color that signal complete, not overdone, baking.
- Cookies: 325–375°F (165–190°C), 8–12 minutes depending on size and thickness. Use a light touch with crowded sheets to prevent steam buildup.
- Pies with a top crust: 350–375°F (175–190°C), 25–40 minutes for a golden top and fully cooked filling. If the edges brown too quickly, shield them with foil or a crust shield.
- Cobbler or fruit crisps: 350–400°F (175–205°C), 30–45 minutes until topping is crisp and fruit is bubbling. A convection bake can shorten time, but watch for over-drying.
- Muffins or quick breads: 325–375°F (165–190°C), 18–25 minutes depending on density. Center should spring back when lightly pressed.
These ranges reflect typical outcomes in a well-calibrated home kitchen. Your oven may run hot or cool, so treat the first bake as a calibration bake and adjust future times accordingly. The takeaway is to aim for even browning and a fully set interior without a dry edge.
Tools, Setups, and Techniques for the Sweet Oven
Setting up correctly makes or breaks a bake. Start with a clean, organized workspace and the right bakeware for the task. If you’re using a baking sheet, consider whether you want one with a nonstick surface or parchment paper to prevent sticking. Place pans on the middle rack for even heating; if your oven tends to bake unevenly, rotate halfway through the bake. When using convection, lower the temperature by 25°F (15°C) compared to a conventional bake and check for doneness earlier than non-convection times. An oven thermometer is essential to verify accuracy because dial temperatures often deviate from the actual oven temperature. Finally, preheat for at least 10–15 minutes (longer for thicker bakes) to ensure the interior begins cooking promptly and consistently.
Bakeware choice matters: dark metal pans heat more aggressively and can brown edges faster, while shiny metal pans are gentler on browning. Glass and ceramic pans heat more slowly and can affect center doneness. By selecting appropriate bakeware and using consistent rack placement, you’ll reduce the risk of uneven browning and undercooked centers.
Troubleshooting and Pro Tips
Even with a plan, ovens surprise us. Common issues include uneven browning, soggy bottoms, and dry edges. To combat these:
- Uneven browning: Rotate pans, use insulated sheets, or switch to a lighter-colored pan to reduce hot spots.
- Soggy bottoms: Bake on a lower-middle rack and consider pre-baking crusts for a few minutes before adding filling. A small amount of par-baked crust can help.
- Dry edges: Shield crust edges with foil for part of the bake or bake on a lower rack with a shorter overall time.
- Flavor and aroma: Don’t rely on color alone; insert a clean toothpick or cake tester to check interior doneness. Remember: browning is a cue, not a sole determinant of doneness.
Practical habit: document your bake results in a notebook, noting oven position, pan type, temperature accuracy, and outcomes. The sweet oven thrives on repeatable processes, not one-off experiments.
Practice Protocol: A Simple Bake to Build Confidence
Fresh bakers often learn best by a small, repeatable bake that teaches core skills before attempting complex recipes. Choose a simple chocolate chip cookie or fruit cobbler. Preheat, prepare your dough or filling, and bake on a single sheet on the middle rack. Use a timer and observe color, texture, and aroma. After cooling, evaluate: is the center set, is the edge browned, and is the overall sweetness level balanced? Repeat this exercise with one variable changed each time (temperature, time, pan, or rack position) to build your intuition and refine your technique.
Tools & Materials
- oven thermometer(Place in the oven to verify actual temperature against dial reading.)
- baking sheets or sheet pans(Shiny or dark metal affects browning; space cookies evenly.)
- parchment paper or silicone mats(Useful for preventing sticking and easy cleanup.)
- cooling rack(Cool baked goods to finish setting and avoid soggy bottoms.)
- mixing bowls and spoons(For batter/dough prep and measuring dry/wet ingredients.)
- timer(Keep bake times precise to avoid under/overbaking.)
- oven mitts(High-heat protection when handling hot pans.)
- digital thermometer (optional)(Check internal temperatures for custards or dense items.)
Steps
Estimated time: Total time: 40-60 minutes
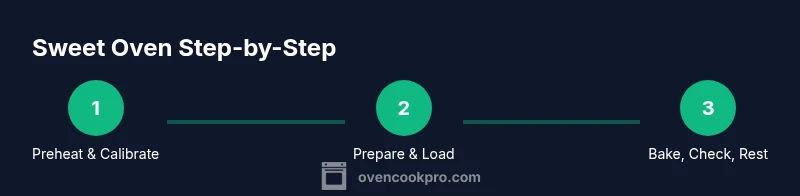
- 1
Preheat and calibrate
Preheat the oven to the target baking temperature and verify with an oven thermometer. Allow at least 10–15 minutes for stable heat before inserting any baking vessels. This ensures the interior begins cooking immediately and reduces temperature drift that can skew browning.
Tip: Calibration bake helps you understand how your oven actually performs. - 2
Prepare batter or dough
While the oven warms, measure ingredients accurately and mix until just combined to avoid overworking the gluten or breaking down moisture balance. Rest dough briefly if required by the recipe to hydrate or relax the batter.
Tip: Accurate measurements prevent over/under-baking later. - 3
Load and rack position
Place pans on the middle rack and ensure even spacing. If baking multiple sheets, rotate them halfway through to promote even browning and avoid hotspots.
Tip: Nonstick spray or parchment can help prevent sticking and promote uniform browning. - 4
Bake and monitor
Set your timer for the lower end of the suggested range and check for doneness visually. If using convection, reduce temperature 25°F (15°C) and check sooner.
Tip: Trust visuals and aroma; use a tester for inner doneness when appropriate. - 5
Cool and rest
Remove from oven and let baked goods rest on a rack. Resting helps complete internal setting and prevents soggy centers from steam retention.
Tip: Avoid slicing while hot to prevent gummy interiors. - 6
Evaluate and adjust
Note results, then tweak temperature, time, or pan choice for future bakes. Small adjustments accumulate into reliable, repeatable results.
Tip: Keep a bake journal to track what works in your oven.
Questions & Answers
What preheating temperature should I start with for the sweet oven?
Start with the recipe’s recommended temperature and verify with an oven thermometer. If browning is uneven, slightly adjust the rack and consider lowering temperatures by 25°F (15°C) when using convection.
Begin at the recipe’s temperature and check with a thermometer. If browning is uneven, adjust the rack and reduce heat a bit for convection.
Can I use convection for all desserts in the sweet oven?
Convection works well for many baked goods but can over-brown delicate items. If you’re new to convection, start with a lower temperature and shorter bake times, then monitor for doneness.
Convection is great for many bakes, but start with less heat and watch closely for doneness.
Why is my crust soggy while the filling is cooked?
This is often due to moisture transfer from filling or too soft a crust. Bake on a lower rack, prebake crusts, or reduce filling moisture. Let the bake rest to set the crust.
Soggy crust usually means moisture is seeping into the crust. Try prebaking or baking on a lower rack and let it rest.
How do I know when my dessert is done besides color?
Use a combination of color, aroma, and texture. For custards, insert a knife or toothpick for a clean exit; for cookies, edges should be set and centers just soft.
Look for color, a pleasant aroma, and a slight give in the center for cookies; custards should be set with a slight jiggle.
Should I adjust times for different pan materials?
Yes. Dark pans brown faster; light or glass pans may require longer bake times. Start with the recipe's baseline and adjust based on visual cues and doneness tests.
Pan material changes timing. Start with the baseline and watch how the bake looks to tell when it’s done.
Watch Video
Main Points
- Preheat accurately to ensure consistent interior cooking
- Use the middle rack for even heat distribution
- Rotate pans and monitor visuals for browning cues
- Record results to build repeatable, reliable baking