Which Oven Setting for Baking: A Practical Guide
Learn how to choose the right oven setting for baking with confidence. This Oven Cook Pro guide covers conventional vs convection, preheating, rack placement, and common pitfalls for consistent results.

By the end of this guide you will know exactly which oven setting to use for common baked goods, when to choose convection, and how to adjust temperatures and rack positions for even browning. You’ll learn to test your oven’s accuracy, avoid common mistakes, and fine‑tune for moisture, texture, and reliable recipe results.
Understanding oven settings for baking
Baking success starts with understanding what each oven setting does. The most common setting is conventional bake, which relies on stationary heating elements to create steady heat. Convection bake adds a fan to circulate hot air, which can promote faster browning and more even crusts, especially for cookies, pastries, and darker crusts. Some ovens offer a convection roast or a top/bottom heat option, which can be useful for specialized items like pizza bottoms or dense loaves. When you read a recipe, look for cues about whether it assumes conventional bake or a convection-assisted bake. If in doubt, start with conventional bake and monitor how the heat distributes as your item bakes. Oven Cook Pro emphasizes testing and calibration as the foundation of reliable baking results.
Conventional vs convection: when to use each
Conventional bake is the default for many baked goods because it provides steady, predictable heat from the bottom and top elements. Convection bake, with its circulating air, can shorten bake times and improve browning without raising the oven temperature. For delicate cakes and muffins, conventional bake often yields a softer interior and gentler rise, while convection shines for cookies with crisp edges or pastries that require even browning. If you’re new to convection, start by using it with shorter bake times and keep an eye on color as you approach the end of the recipe. The goal is even doneness without overdeveloped edges.
Rack positions and pan choices
Rack placement influences heat exposure more than you might expect. For most baking, the center rack provides the most even heat distribution. Cookies, muffins, and sheet-pan recipes benefit from a middle rack where air can circulate freely around each item. Dark or non-stick pans can heat more quickly; if you switch to these, you may need to reduce the baking time slightly and monitor browning closely. Light-colored, heavy-silver pans distribute heat more evenly and can help you achieve uniform coloration. Parchment paper or silicone mats create consistent releases and minimize hotspots, particularly in ovens that run hot in certain zones.
Temperature and preheating basics
Preheating ensures the oven reaches the target temperature before you begin baking, reducing temperature fluctuations that can affect rise, texture, and crust formation. If your recipe calls for convection, allow the oven to reach the lower convection temperature if applicable and keep the fan running during the bake. In many ovens, preheating also helps to stabilize the heat distribution across racks, which is especially important when baking multiple trays at once. When in doubt, preheat for at least ten minutes and verify with an oven thermometer placed in the center of the oven.
Baking scenarios: cakes, cookies, bread, pastries
Cakes and muffins typically benefit from stable, even heat on a center rack with conventional bake. Cookies often fare well on a middle rack with slightly lower heat when using convection to avoid over-browning on the edges. Breads usually require a steady, robust heat and sometimes a warmer bottom to promote a good crust. Pastries and tarts benefit from even air circulation to avoid soggy spots. Always check the recipe notes: some items need a brief rest after mixing or a gentle rise at a specific stage before baking.
How to test and calibrate your oven
Begin by placing an oven thermometer in the center of the oven and preheating to the desired temperature. Compare the thermometer reading to the oven’s display after a ten‑minute preheat. If there’s a mismatch, use the thermometer as your guide; adjust bake times accordingly and, if needed, recalibrate or have the oven serviced. For more accurate results, run a simple bake test with a single tray of simple cookies or muffins to observe timing and browning across the center and edges. This practice builds confidence in your settings over time.
Avoiding common mistakes
Opening the door too often during baking drops oven temperature and disrupts heat distribution, leading to uneven browning. Using the wrong rack or pan type can create hotspots. Avoid crowding the pan—adequate space allows heat to circulate. Don’t rely on color alone to judge doneness; use a toothpick, probe, or timer as a reliable cue. Finally, always update your settings when you switch from conventional to convection to prevent undercooked centers or overcooked exteriors.
Browning, moisture, and texture control
Browning is influenced by heat distribution, sugar content, and moisture in the batter or dough. For pale pastries, consider a slightly higher oven temperature or a longer preheat. To reduce moisture in high-humidity environments, bake on a lower rack with a convection setting to promote even dryness. If a crust browns too quickly, tent the item with foil or switch to a lower temperature for the final phase. Tailor bake settings to the specific recipe and your oven's quirks for best results.
Quick-reference session planning checklist
Before you bake, assemble your tools, preheat, and confirm the rack position. Check whether to use conventional or convection, and set the timer with a precise cue for doneness. Prepare pans with parchment or silicone mats, and arrange batter or dough on trays evenly. Keep a thermometer handy to verify the oven’s temperature and watch for color development as you approach the end of the bake. This habit helps you achieve consistent outcomes across batches.
Troubleshooting uneven results and persistent browning
If your baked goods consistently brown unevenly, rotate trays halfway through the bake and verify even heat distribution with a thermometer. If the bottom browns too quickly, move the rack higher, lower the temperature, or switch to a lighter-colored pan that heats more evenly. For items that stay pale in the middle, ensure there is adequate airflow and extend bake time gently, checking frequently. Document your results after each bake to refine your settings over time.
Tools & Materials
- Oven(Ensure it can perform conventional and convection bake if available)
- Oven thermometer(Place in center to verify temperature)
- Baking sheets / pans(Prefer light-colored pans for even browning)
- Parchment paper or silicone mats(Prevents sticking and helps even baking)
- Rack(s)(Center rack is default; consider extra racks for multiple trays)
- Measuring tools(Cups, spoons for consistent batter/dough)
- Timer or smartphone(Accurate timing to prevent overbaking)
- Cooling rack(Cool baked goods promptly to finish setting)
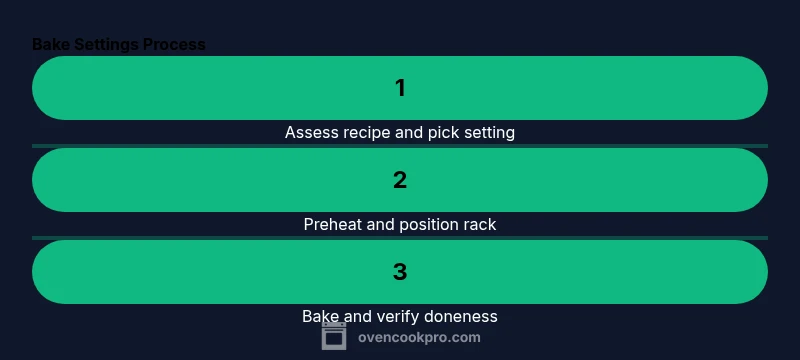
Steps
Estimated time: 30-60 minutes
- 1
Identify recipe bake setting
Read the recipe carefully and determine whether it calls for conventional bake, convection bake, or another setting. Confirm the target temperature and rack recommendation before you begin. This alignment reduces surprises later in the bake.
Tip: If convection is suggested, note whether to reduce time or temperature as instructed by the recipe. - 2
Preheat the oven
Turn on the oven and allow it to reach the target temperature. Use an oven thermometer to verify the center reads the intended heat. Preheating helps ensure consistent rise and browning from the first moment batter hits the pan.
Tip: Start preheating early enough to reach temperature before you mix batter. - 3
Position the rack and pans
Place the rack in the center for even heat when baking multiple items. Arrange pans with space between them to allow air to flow freely. Use parchment or a silicone mat for reliable release and even heat transfer.
Tip: Rotate pans halfway through if you bake more than one tray at once. - 4
Prepare bakeware and batter
Prepare pans and batter according to the recipe, ensuring uniform portioning. Even batter distribution prevents inconsistent doneness. If using dark pans, consider a slight adjustment to time or temperature as a precaution.
Tip: Level the batter in each pan to promote uniform baking. - 5
Bake and monitor
Place the pans in the oven and start the timer. Avoid opening the door frequently; each door opening can drop heat and affect rise. Check doneness with the recommended method (toothpick, thermometer, color cues).
Tip: Use a timer with multiple alerts to catch doneness signals without peeking too soon. - 6
Rotate and adjust if needed
If your oven shows uneven browning, rotate trays and reassess. Convection users may need to shorten bake times; conventional bakers should watch for longer times if browning is slow. Make notes for future batches.
Tip: Keep notes about position and color to refine future bakes. - 7
Cool and inspect
Remove baked goods and place on a cooling rack. Allow them to finish setting before slicing or storing. Proper cooling preserves texture and crumb.
Tip: Cool items fully before stacking to prevent condensation. - 8
Clean and reset for next bake
Wipe the oven interior if needed and prepare for your next recipe. Re‑check calibration if you notice recurring issues, and adjust your oven settings accordingly. A clean oven bakes more consistently.
Tip: Keep a simple log of temperatures and results for quick reference.
Questions & Answers
What is the best oven setting for baking cookies?
Most cookies bake well on conventional bake with a center rack. Convection can help with crisp edges, but keep an eye on browning and reduce time if your oven runs hot. Use parchment for even transfer and cooling.
For cookies, start with conventional bake on the center rack; convection can help with crisp edges, but monitor browning closely.
When should I use convection bake for bread?
Convection can promote even crust formation and faster drying of the crumb. Use it for many breads if your oven supports it, but consider lowering the temperature slightly and watching the crust color to avoid over browning.
Use convection for many breads if your oven supports it, but lower the temperature and watch browning.
Is preheating always necessary for baking?
Preheating helps ensure consistent rise and texture. Some quick-bake items may tolerate a shorter preheat, but for reliable results, preheat to the recipe temperature before loading batter or dough.
Preheating is important for reliable rise and even texture.
Can I bake multiple items at different settings at once?
It’s best to bake items with similar settings on the same rack. If needed, place items with different requirements on separate trays and monitor closely. If you must mix settings, plan for extra time and check doneness frequently.
Bake items with similar settings together and monitor doneness if mixing settings.
Why is my cake browning unevenly?
Uneven browning often comes from hot spots or incorrect rack placement. Try center positioning, rotate midway, and ensure even batter distribution. A thermometer helps verify consistent heat.
Hot spots and rack placement can cause uneven browning; rotate and verify heat.
How do I adjust bake times when using convection?
Convection typically reduces bake times or temperatures. If your recipe doesn’t specify, start with a shorter bake window and check early for doneness using the recipe’s cues.
When using convection, start checking earlier and adjust time as needed.
Watch Video
Main Points
- Know when to use conventional vs convection.
- Preheat and verify temperature for reliability.
- Rack position and pan color influence browning.
- Rotate trays to avoid hotspots and ensure even doneness.
- Test, log results, and calibrate as you bake.