Which Oven Setting to Use: A Practical How-To Guide
Discover how to choose the right oven setting for baking, roasting, broiling, and convection. This practical guide from Oven Cook Pro helps home cooks reduce guesswork and achieve perfect texture, browning, and doneness every time.

By the end of this guide you will confidently choose the correct oven setting for most recipes. You’ll learn the difference between bake, roast, broil, and convection, plus how to adjust for your oven and altitude. This approach, informed by Oven Cook Pro analysis, saves time, improves texture, and reduces energy use.
Understanding the basics of which oven setting to use
Choosing the right oven setting affects texture, moisture, browning, and even cooking. When you bake a cake, roast a chicken, or reheat leftovers, the setting you select can change the final result. This guide—drawn from Oven Cook Pro's expertise—helps you interpret bake, roast, broil, convection, and warming modes and how to apply them in real cooking situations. You’ll learn where each setting shines, what to expect in terms of browning and inside temperature, and how to adapt based on your oven's quirks. By understanding these basics, you can reduce guesswork and consistently hit your targets in flavor and texture.
Bake, Roast, Broil, Convection: What do they do?
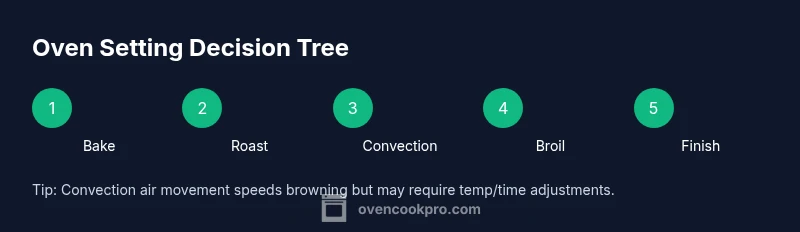
- Bake: A steady, even heat ideal for breads, cakes, pastries, casseroles, and most vegetables when you want uniform browning and moist interiors.
- Roast: Similar heat but optimized for meats and root vegetables where browning and caramelization are key.
- Broil: High, direct heat from above; perfect for finishing dishes, browning cheese, or crisping tops, but can quickly burn if left unattended.
- Convection: A fan-assisted setting that circulates air for faster, more even cooking; great for roasting vegetables, cookies, and sheets of food that should brown evenly.
Remember: Your oven may combine modes (e.g., bake with convection off for some recipes). Always check the recipe notes and consider your oven's tendencies.
Preheating, Temperature, and Time: How to adjust
Preheating primes the oven to a stable temperature, which improves accuracy and browning. When you select a setting, give your oven a few minutes to reach temperature before loading food. Temperature matters: convection generally requires a slightly lower setting than conventional baking, while broiling is a different category entirely and should be timed carefully. Use an oven thermometer to verify the actual heat, then compare it to your recipe’s target. Time is a guide; check early and often, especially when using new cookware or an unfamiliar rack position. If your dish browns too quickly on top but remains undercooked inside, consider moving it to a lower rack or covering the top with foil to protect the surface while the interior catches up. These tweaks help you get reliable results even if your oven runs hotter or cooler than the dial suggests.
Preheating and rack position guidelines (to use with the right setting)
- Rack position: Top for browning quickly, middle for even cooking, bottom for crisping bases, depending on the setting and dish.
- Cookware: Dark, heavy pans absorb heat and may brown more; glass and shiny metals heat differently and require adjustments.
- Preheat on the chosen setting and place the food as soon as the oven signals ready.
- Avoid opening the door during the first two-thirds of cooking, as heat loss can derail browning and timing.
Following these guidelines ensures your chosen oven setting produces consistent results across recipes.
Practical testing: calibrating your oven’s behavior
The best way to learn which oven setting to use is to perform a simple calibration test. Choose a familiar recipe (e.g., cookies or a sheet of vegetables) and bake it twice: once on Bake, once on Convection (if your oven has it). Keep notes of preheat time, total bake time, and how the surface browns. Use a thermometer to confirm internal temperatures when appropriate. After each test, compare results and adjust next time: you may reduce temperature slightly for convection or extend bake time for standard bake. Over several trials, you’ll establish a reliable mental map of how your oven behaves with each setting.
Scenario cheat sheet: quick setting recommendations for common foods
- Cookies and pastries: Bake on standard Bake with a light rack position for even browning.
- Roasted vegetables: Convection Bake can help browning and speed; start with mid-rack.
- Chicken and turkey: Roast mode to balance browning with interior doneness; cover if skin browns too quickly.
- Fish and seafood: Bake at a moderate setting; convection can speed up but monitor texture.
- Casseroles: Bake or Convection Bake depending on whether you need speed or even heat distribution. Note: If your recipe calls for a specific setting, prefer that, but use this cheat sheet as a backup.
Common issues and fixes when using different oven settings
- Uneven browning: Try rotating trays midway through, moving to center rack, or switching from Bake to Convection Bake if available.
- Food over-browning on top: Lower the rack, cover the top with foil, or switch to a lower temperature and longer time.
- Undercooked interiors: Increase time or use a rack position that promotes heat reaching the center; ensure preheating is complete.
- Oven runs hot or cold: Calibrate with an oven thermometer, and take notes so you’ll know how to adjust in future recipes.
Safety and energy efficiency tips
- Preheat only as much as needed; save energy by loading the oven with multiple items at once when possible.
- Don’t leave the oven door open while cooking to avoid heat loss and temperature swings.
- Use the right bakeware and avoid overheating by choosing materials that distribute heat evenly.
- Keep door seals clean; a good seal prevents heat loss and keeps temperatures accurate.
Quick decision framework: choose setting in 3 steps
- Identify dish type: bake, roast, convection, broil.
- Check cookware and rack position.
- Run a quick test bake and adjust next time based on browning and interior doneness.
Tools & Materials
- Oven thermometer(Place in the center of the oven for an accurate reading)
- Oven manual or model spec sheet(Check for built-in convection or unique modes)
- Baking sheets and/or roasting pans(Choose shallow, flat pans for even heat)
- Parchment paper or silicone mats(Prevents sticking and promotes even browning)
- Cooling rack(Useful for air circulation on finished items)
- Meat thermometer or instant-read thermometer(Check internal doneness when roasting meat)
- Kitchen timer or smartphone(Track bake and rest times accurately)
- Heat-resistant oven mitts(Protect hands during loading/unloading)
Steps
Estimated time: 60-75 minutes
- 1
Identify dish type and set goal
Determine whether you need dry heat for browning (roast) or even, gentle heat for structure (bake). This choice guides the initial oven setting.
Tip: Consult the recipe notes first; use your best judgment if the recipe is silent. - 2
Preheat to the target setting
Turn on the oven to the chosen setting and allow it to reach the target temperature before loading food. Preheating reduces temperature fluctuations and improves browning.
Tip: Use the oven thermometer to confirm the actual heat matches the dial. - 3
Position racks and prepare cookware
Place racks where heat should reach the food evenly. Use parchment or mats and choose appropriate pans to support even browning.
Tip: Dark pans brown more quickly; consider a rack above or below if needed. - 4
Load food and start timing
Introduce food while the oven is at the correct temperature. Start timing once the food is in place and the oven door is closed.
Tip: Avoid opening the door early; heat loss disrupts browning. - 5
Monitor browning and doneness
Observe browning progress and use a thermometer for doneness when appropriate. Adjust if surface browns too fast or interior lags.
Tip: If top browns too quickly, tent with foil. - 6
Adjust if needed and continue cooking
If the dish is not yet cooked through, continue cooking with minor adjustments to time or convection usage as needed.
Tip: Document any changes for future reference. - 7
Rest and check final texture
Let food rest as required to finish internal moisture distribution. Check final texture and internal temperature if applicable.
Tip: Resting can dramatically affect juiciness and texture. - 8
Clean up and reset for future
Wipe down surfaces, inspect seals, and re-place tools for next use. Note any oven behavior in a cooking log.
Tip: A clean oven maintains temperature accuracy and safety.
Questions & Answers
Do all ovens have convection mode?
Not all ovens include convection. If yours does not, use the standard Bake setting and plan for slightly longer or shorter times based on browning and texture. Check the recipe notes for guidance.
Not all ovens have convection. If yours doesn’t, use bake and adjust times as needed.
Should I always preheat the oven?
Preheating helps ensure accurate temperatures and even browning. Some recipes may skip preheating for time, but for most dishes it improves results.
Preheating is generally best for accuracy; skip only if the recipe says so.
How do I know if my oven runs hot or cold?
Use an oven thermometer to compare dial temperature with actual heat. Note the difference and adjust future recipes accordingly.
Use a thermometer to check hot or cold and adjust.
Can I use convection for cookies?
Yes. Convection can help cookies bake more evenly, but watch closely as browning can happen faster.
Convection helps cookies bake evenly; monitor because they brown faster.
What temperature should I roast vegetables at using different settings?
Roasting vegetables works well on Bake or Convection Bake; convection may reduce time. Use a moderate temperature and monitor browning for even results.
Bake or convection roast is fine; watch for browning.
Why does convection bake faster than conventional ovens?
The fan circulates hot air, reducing hot spots and speeding heat transfer. This can shorten cooking times, so check earlier.
The fan circulates heat, speeding cooking; check early.
Watch Video
Main Points
- Know the main oven settings and their best uses.
- Preheat and verify heat with a thermometer.
- Convection usually requires adjustments in temp or time.
- Test, log results, and adapt to your oven’s quirks.