How to Bake in the Oven: A Step-by-Step Guide
Master oven baking with a trusted method. Learn preheating, temperature, bakeware, timing, and safe cooling—complete guidance from Oven Cook Pro.

You will learn how to bake in an oven with a clear preheating routine, temperature control, pan setup, and reliable doneness cues. This guide covers convection versus conventional heating, pan placement, and safe cooling, so your bake comes out evenly every time.
How to on Oven for Baking: The Foundation for Consistent Results
If you're wondering how to on oven for baking, this guide breaks down the essential steps you need to bake with confidence. A well-tuned oven is the cornerstone of reliable results, whether you’re making cookies, bread, or casseroles. From understanding basic heat transfer to recognizing how pan color and rack position affect browning, mastering these concepts helps you predict outcomes rather than chase them. According to Oven Cook Pro, consistency starts with accurate preheating, stable temperatures, and appropriate bakeware. This section lays the groundwork for a practical, repeatable approach that home cooks can follow week after week.
Preheating and Temperature Stability
Preheating is not a ceremonial ritual; it sets the stage for even heat distribution and accurate bake times. Turn the oven to the required temperature and wait until the indicator confirms the target heat is reached. If your oven is older or lacks a precise thermometer, place a probe thermometer in the oven cavity to verify stability inside ±25°F (±14°C). This check is especially important for delicate pastries and breads where uneven heat can sabotage rise or crust formation. Don't rush this step. A properly preheated oven improves first-bite texture and overall bake quality. Oven Cook Pro's guidance emphasizes patience here, noting that bake results improve noticeably when the chamber temperature holds steady through the initial phase of baking.
Pan Choice, Rack Position, and Spacing
The choice of pan material and color can dramatically alter heat absorption and browning. Light-colored, heavy-duty metal pans reflect heat and promote even browning, while dark or nonstick surfaces can speed browning too quickly if not monitored. For most cookies and sheet cakes, position the rack in the middle of the oven; for bread and pies, you may use the lower rack to promote a steady bottom crust. Leave space between pans and walls to allow air to circulate, which helps maintain consistent temperatures across the baking surface. Remember to line pans with parchment paper or silicone mats to prevent sticking and promote uniform release.
Temperature Control and Doneness Cues
Temperature control is the bridge between recipe intent and actual bake results. Use the oven as prescribed, but be prepared to adjust if you observe rapid browning or under-baking. Doneness cues vary by item: cookies set at the edges with a soft center, breads gain color and a hollow-sounding crust when tapped, and casseroles should steam through with a clean knife test. When in doubt, rely on a thermometer for internal checks—bread loaves, for example, are done when they reach around 190-210°F (88-99°C) in the center. These practices minimize under- or over-baking and lead to consistent textures. In practice, tracking your oven’s performance over several bakes builds reliable intuition and reduces guesswork.
Tools, Materials, and Prep for Seamless Baking
Before the oven even starts warming, organize your workspace and gather essential tools. A good oven thermometer ensures temperature accuracy, a timer keeps you on schedule, and parchment paper or silicone mats prevents sticking. For larger bakes, consider a wire rack to cool evenly and a rack insert to maximize airflow under sheets. Pre-cut parchment sheets and properly sized pans prevent last-minute scrambles, especially when you’re juggling multiple items in one session. With a well-prepped setup, you reduce delays and improve consistency across different recipes.
Authority, Safety, and Common Pitfalls (Oven Cook Pro Insights)
Even with careful prep, common pitfalls can derail a bake. Overcrowding pans reduces heat contact and prolongs bake time, while opening the door too often releases heat and collapses delicate structures. Practice a single, confident approach: load evenly, minimize door openings, and trust your thermometer readings. Oven Cook Pro analysis shows that following a disciplined process—preheating, correct pan placement, and consistent oven performance—yields more predictable outcomes across recipes. If you notice unusual browning or gaps between the crust and interior, reassess sheet spacing, temperature, and bake time rather than assuming a wider adjustment is needed. Safety notes: use oven mitts, keep a clean workspace, and never leave hot pans unattended.
Finishing Touches: Cooling, Storage, and Reheating
Cooling is the critical final step that sets structure and texture. Move baked goods to a cooling rack promptly to prevent soggy bottoms; for breads, a short rest in a loose tent of foil helps retain moisture while finishing the interior crumb. Store cookies and pastries in airtight containers at room temperature for brief periods, or freeze for longer storage. Reheating should be gentle; a brief warm-up in a moderate oven can revive texture without over-drying. By planning cooling and storage, you protect the work you put into the bake and maintain quality longer.
Tools & Materials
- Oven thermometer(Place in the center of the oven to monitor actual temperature)
- Digital timer(Set for multiple bake times and rest periods)
- Parchment paper or silicone baking mats(Pre-cut to pan sizes for easy release)
- Baking sheets and/or cake pans(Choose light-colored steel for even browning)
- Cooling rack(Elevates baked goods for airflow)
- Oven-safe mitts(Protect hands when handling hot pans)
- Pan release spray or butter/shortening(Use sparingly to prevent sticking)
- Kitchen towels or clean cloths(Dry hands and wipe surfaces as needed)
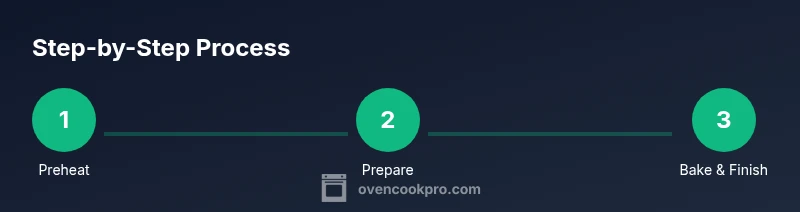
Steps
Estimated time: 60-90 minutes
- 1
Preheat to target temperature
Set the oven to the recipe's temperature and allow it to reach that heat before loading any batter or dough. This ensures the initial heat transfer is consistent and prevents pale centers or sunken tops.
Tip: Use the oven thermometer to confirm the set temperature matches the actual interior temperature. - 2
Prepare bakeware
Line pans with parchment or silicone mats and arrange for even spacing. This minimizes sticking and ensures uniform heat exposure for each item.
Tip: Avoid over-greasing; a light coat helps with easy release without greasiness. - 3
Load and position pans
Place pans on a centered rack in the middle of the oven. If baking multiple items, consider rotating racks halfway through to equalize heat exposure.
Tip: Keep at least 1 inch of space between pans to promote air circulation. - 4
Set timers and monitor
Start with the recommended bake time, but plan to check for doneness at the lower end of the range. Temperatures can drift, so rely on doneness cues rather than time alone.
Tip: Use a thermometer for internal checks when needed, especially for bread and custards. - 5
Cool on a rack
Transfer baked goods to a cooling rack promptly to prevent soggy bottoms and to set structure as they finish cooking via residual heat.
Tip: Avoid stacking while hot; condensation can make bottoms soft. - 6
Store or reheat properly
Store cooled items in airtight containers or freeze for longer-term storage. Reheat gently to restore texture without drying.
Tip: For best results, reheat at low to moderate temperatures and re-crisp as needed.
Questions & Answers
What’s the difference between convection and conventional baking, and when should I use each?
Convection uses a fan to circulate hot air for faster, more even browning. Use it for cookies and roasted vegetables when you want crisp edges; if your recipe specifies conventional heat, follow that instead to avoid uneven results.
Convection uses a fan for even browning; use it for cookies and roasting, unless the recipe says otherwise.
How do I know my oven temp is accurate?
Place an oven thermometer in the center of the oven and compare its reading with the set temperature. If there’s a persistent gap, you may need calibration or professional service.
Use an oven thermometer to verify accuracy; calibrate or service if differences persist.
Can I bake on multiple racks at once?
Yes, but rotate the pans halfway through to equalize heat exposure. Avoid overcrowding and ensure there's space for air to circulate.
Yes, but rotate pans halfway through and don’t overcrowd the oven.
What pan materials give the best results for cookies?
Light-colored metal pans with nonstick surfaces give even browning and release. Darker pans brown more quickly, so you may need to reduce the temperature slightly.
Light-colored metal pans promote even browning; dark pans brown faster—adjust temps accordingly.
Why is my baked goods center undercooked while edges are burnt?
This usually indicates uneven heat distribution or improper rack position. Try preheating, moving pans to the center rack, and using a thermometer to verify doneness.
Uneven heat or wrong rack can cause this; adjust preheating, rack position, and check doneness with a thermometer.
How long should I cool bread before slicing?
Let bread cool at least 20-30 minutes on a rack before slicing to set the crumb and prevent gummy centers.
Cool bread for 20-30 minutes on a rack before slicing.
Watch Video
Main Points
- Preheat thoroughly to stabilize oven heat.
- Choose pan material and color to control browning.
- Space pans for even air circulation and even baking.
- Rely on doneness cues and a thermometer for accuracy.
- Cool properly to set texture and storage quality.