Oven Baking Mastery: A Complete Step-by-Step Guide for Home Cooks
Master oven baking with confidence. This step-by-step guide covers preheating, rack placement, temperature control, timing, and troubleshooting for consistent results.

In this guide, you’ll master baking with your oven, covering preheating, rack positioning, temperature control, and timing to achieve even browning and consistent results. You’ll follow a clear, step-by-step process with safety tips and troubleshooting to prevent common baking mistakes. Whether you’re baking bread, pastries, or casseroles, the techniques scale to home kitchens of all sizes.
Getting Started with Oven Baking
According to Oven Cook Pro, mastering the oven when baking begins with accurate preheating and thoughtful rack setup. This foundation shapes everything from crust formation to even coloring. In this guide, we cover the core concepts that set the stage for reliable results, including choosing the right oven mode, understanding bake temperatures, and selecting the correct bakeware. Safety is included—avoid steam burns and keep children away from hot surfaces. When you align your setup with proven practices, you create a calm, predictable oven environment where recipes rise and brown without surprises. Think of your oven as a controlled heat chamber. The first minutes of preheating determine how early a loaf starts to rise and how evenly it browns. Juggling rack positions and pan materials can dramatically alter heat exposure. This section gives you the mental map to approach any bake with confidence.
Temperature and Preheating: Why It Matters
Preheating isn't just "turn it on." It ensures the oven walls, racks, and air are at a stable temperature before the batter or dough enters. A stable start prevents a soggy bottom or a pale center and helps achieve even browning. Use an oven thermometer placed in the center of the rack to verify that the dial reads the actual temperature. If heat is off, adjust the dial slightly and re-check after 5-7 minutes. For many home ovens, convection mode can shorten bake times, but you may need to reduce the temperature by about 20-25F (12-14C) when using it. Always follow recipe instructions and test with a thermometer for sensitive bakes.
Rack Placement and Pans: How to Arrange for Even Baking
Where you put your racks in relation to heat sources matters. A single center rack works well for most cakes and cookies, while multiple trays require extra space and careful rotation. Different bakeware—heavy metal, light-colored aluminum, glass—absorbs heat differently, affecting browning and rise. When using convection, you’ll often gain more even browning by placing trays on different racks and rotating them more frequently. If you’re unsure, start with center rack, mid-heat, and a single tray for a test bake to gauge heat response.
Tools, Materials, and Safety Setup
Before you bake, assemble the essentials in a clean, dry workspace. A stable oven thermometer helps verify temperature; parchment paper or silicone mats keep batter from sticking; sturdy rimmed sheets prevent warping and allow for easier transfer. A cooling rack is key to preventing soggy bottoms after removal from the oven. Keep potholders within reach and never handle hot trays bare-handed. A timer helps you stay precise, especially for delicate items like macarons and cookies. Finally, store knives and hot tools out of reach from children to reduce risk while you focus on the bake.
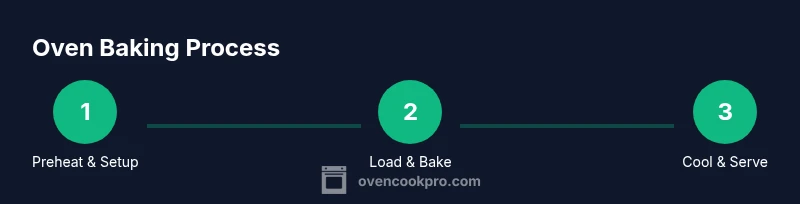
Step-By-Step Overview
This section provides a concise map of the full process, highlighting the critical decisions that determine success. We’ll cover preheating, rack setup, pan preparation, portioning, loading, rotating, doneness checks, and cooling. Use this as a quick reference while you follow the detailed steps below.
Troubleshooting Common Issues
Baking is as much about diagnosing heat flow as following a timer. If your crust browns too quickly but the center remains pale, you may be starting at too high a temperature or placing pans too close to the top heat. If the bottom browns too slowly, your oven may have hot spots near the back or a cooler middle. For soggy bottoms, ensure proper cooling and consider using parchment to promote even dryness. Uneven browning can also come from inconsistent batter thickness or insufficient spacing. Rotating trays and ensuring even pan sizes helps balance heat exposure across items.
Final Checks and Cleanup
After baking, allow items to rest briefly on a cooling rack to finish setting. Once fully cooled, store baked goods in appropriate containers to maintain texture. Clean up any spills promptly to prevent residue from burning on future bakes. Regular oven maintenance, including wiping down the door seal and checking racks, helps keep heat even and performance reliable over time.
Tools & Materials
- Oven thermometer(Place in the center of the rack for accurate reading)
- Rimmed baking sheets(Sturdy metal pans with even bottoms for stable heat distribution)
- Parchment paper(Line sheets to prevent sticking and ease cleanup)
- Silicone baking mats(Optional reusable non-stick surface)
- Cooling rack(Cool baked goods to prevent sogginess)
- Kitchen timer(Precise bake timing)
- Oven mitts(Heat-resistant and snug-fitting)
Steps
Estimated time: 75-120 minutes
- 1
Preheat to target temperature
Set the oven to the recipe’s target temperature and allow it to reach that heat before loading. Preheating stabilizes the internal environment, which helps the batter rise and the crust set evenly.
Tip: Use an oven thermometer to confirm center temperature before loading. - 2
Arrange racks for airflow
Position racks to maximize air circulation; a center rack is ideal for most bakes. If you bake multiple sheets, stagger their positions to avoid crowding and heat trapping.
Tip: Avoid stacking trays directly on top of one another. - 3
Line pans for release
Line sheets with parchment paper or a silicone mat to prevent sticking and promote even browning. This also simplifies cleanup after the bake.
Tip: Optionally dust with a light spray of oil for extra release. - 4
Portion batter evenly
Use a scoop or a measured spoon to divide batter or dough into uniform portions. Consistent sizes bake at similar rates, producing even texture and color.
Tip: Aim for uniform thickness and consistent spacing between portions. - 5
Load trays and close door
Slide trays into the oven quickly to minimize heat loss, then close the door securely to maintain steady heat.
Tip: If baking multiple trays, alternate positions between rounds for even exposure. - 6
Rotate trays halfway through
Rotate trays 180 degrees at mid-bake to counter hot spots and promote uniform browning, especially in older ovens.
Tip: Note any peculiar hot spots and adjust rotation frequency accordingly. - 7
Check for doneness
Assess color, aroma, and texture; use an internal thermometer for precise items if required by the recipe.
Tip: For cookies, edges should be set while centers remain soft but not jiggly. - 8
Cool and store
Transfer baked goods to a cooling rack, then store once completely cooled to preserve texture and flavor.
Tip: Label storage with date and contents to track freshness.
Questions & Answers
What is the difference between convection and conventional ovens when baking?
Convection ovens circulate air with a fan, which can reduce bake times and promote even browning. If your oven lacks a convection setting, rely on center rack placement and monitor closely.
Convection cooks with a fan, giving quicker, more even browning. If you don’t have it, use center racks and keep an eye on timing.
How do I know my oven is at the right temperature?
Use an oven thermometer placed in the center of the rack. Preheat to the target, then compare the thermometer reading after 15 minutes; adjust the dial if needed.
Check with a reliable oven thermometer after preheating to ensure accuracy.
Should I preheat every time?
Preheating helps ensure a stable starting temperature, which improves rise and evenness. Some quick bakes may tolerate shorter preheats, but most recipes benefit from a full preheat.
Yes, most baking benefits from preheating to establish a consistent heat before the batter goes in.
Can I bake multiple trays at once?
Yes, but avoid crowding. Leave space between trays, rotate if possible, and consider elevating trays to improve air exposure.
You can bake multiple trays, just don’t crowd them and rotate halfway for even heat.
Why do baked goods brown unevenly?
Hot spots, rack position, and uneven batter thickness cause uneven browning. Rotate pans, ensure even portions, and adjust rack placement as needed.
Uneven browning usually comes from hot spots or uneven batter; rotate pans and use even portions.
Watch Video
Main Points
- Preheat accurately for consistent results
- Rack placement affects browning and heat flow
- Rotate trays to counter hot spots
- Use parchment or mats to prevent sticking and promote even texture