How to Make a Solar Oven Pizza Box
Learn to turn a pizza box into a solar oven and cook simple foods with sunlight. This comprehensive how-to from Oven Cook Pro covers materials, steps, safety, tips, and troubleshooting for home cooks and classrooms.

With a simple pizza box, you can create a solar oven to heat snacks using only sunlight. This quick guide shows the essential materials, how to assemble the reflective, insulated box, and how to safely cook soft foods like cheese melts. According to Oven Cook Pro, this low-cost setup demonstrates basic heat-trapping principles and hands-on solar cooking.
What is a solar oven pizza box?
A solar oven pizza box is a low-cost, DIY cooking device that uses sunlight to trap heat inside a modified pizza box. By lining the interior with reflective materials, insulating windows, and a transparent top, you create a miniature greenhouse that raises the temperature enough to warm or melt simple foods. This setup is ideal for kids’ science projects, classroom demonstrations, or a quick off-grid snack. According to Oven Cook Pro, the concept centers on basic heat-trapping physics: reflection concentrates sunlight, while insulation minimizes heat loss, allowing temperatures to rise safely in a small enclosure.
How solar heat works in a pizza box cooker
Sunlight delivers energy that is converted to heat inside the box. The reflective lining concentrates rays toward the food, while the plastic window traps heat like a tiny greenhouse. Insulation reduces heat leakage, which helps maintain a steady temperature for cooking. The result is a gentle, steady warmth suitable for melting cheese, warming bread, or softening toppings. This is a practical, visible example of solar energy in action that you can measure with simple observations and, optionally, a basic thermometer.
Basic safety considerations before you start
Always work outdoors in direct sunlight and supervise children during assembly and use. Avoid heating near flammable materials and never leave the device unattended while the sun is strong. Use heat-resistant gloves when handling the box and hot components, and ensure the plastic wrap window is properly sealed to prevent sudden leaks. This project should be viewed as a safe, educational demonstration rather than a high-heat oven replacement.
Common uses and limits of a solar oven pizza box
The solar oven pizza box is best for warming items, soft-cheese melting, and basic snacks. It is not a practical replacement for a full kitchen oven, and results depend heavily on sun intensity, angle, and ambient temperature. In dim light or overcast days, heating may be slow or negligible. Use it for short demonstrations or snacks rather than large meals, and adjust expectations accordingly.
How to optimize performance with sun position and insulation
Aim the box toward the sun so the reflective surfaces capture the maximum light. A slightly inclined angle often works better than a perfectly horizontal setup because it minimizes heat loss and directs more energy to the food. Add insulation around the sides and top to reduce heat leakage, and maintain a clear window so you can monitor progress without opening the box. Small adjustments can produce noticeable gains in heating efficiency.
Common mistakes and how to avoid them
Failing to seal the window leads to heat leaks; ensure the plastic wrap is taut and sealed with tape. Using a dull or non-reflective surface reduces the focus of sunlight; cover interior surfaces with shiny aluminum foil or reflective paper. Overcrowding the box with thick food or overcrowding the box increases heat loss and slows cooking. Readjustments and minimizing heat loss are your best strategies.
Quick tips for different foods (melting cheese, warming bread)
For cheese melts, place a small tray or dark plate inside to maximize heat absorption. Warming bread or tortillas works best with a light drizzle of oil or a small piece of foil to trap heat. If you’re teaching kids, try simple melting demonstrations with cheese or a pre-sliced bagel. Always monitor progress and avoid overheating that could melt plastic or warp the box.
How to adapt a pizza box solar oven for kids or classroom demos
In a classroom, use the setup as a visual aid to explain heat, reflection, and insulation. Have students predict outcomes based on sun angle and weather conditions, then compare results with their predictions. Document observations and discuss safety rules for outdoor experiments.
Tools & Materials
- Pizza box (empty and clean)(Double-walled ideal; remove any food residue)
- Aluminum foil(Line interior to reflect sunlight)
- Black matte paper or fabric(Absorbs heat on the bottom surface)
- Transparent plastic wrap or clear tape(Create and seal a window for heat retention)
- Scissors or box cutter(For safe openings and window frame)
- Tape (duct tape or masking tape)(Seal seams and secure materials)
- Ruler or straightedge(Helpful for even cuts)
- Gloves or heat-resistant mitts(Protect hands when handling hot parts)
- Optional thermometer(Track internal temperature)
Steps
Estimated time: 20-60 minutes
- 1
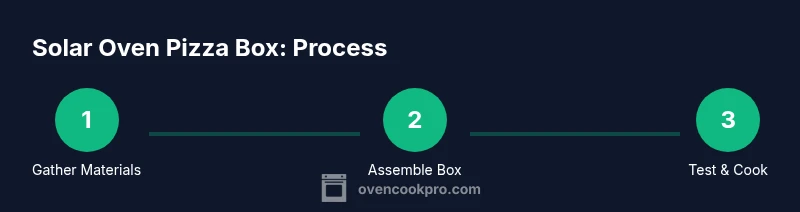
Gather materials
Collect all required items and verify you have a clean, usable pizza box. Set up your workspace in bright outdoor light to simulate real solar conditions. This prep helps ensure a smooth build.
Tip: Lay out all parts on a flat surface to avoid last-minute searches. - 2
Prepare the box
Open the lid and remove any internal flaps. Wash or wipe the box interior if needed and set aside for drying. A clean interior reduces debris that could interfere with heat retention.
Tip: Keep the box dry; moisture can reduce heat efficiency. - 3
Line the interior with foil
Cover the inner walls with aluminum foil, shiny side out, smoothing to remove wrinkles. This creates a reflective surface to concentrate sunlight toward the food.
Tip: Overlap seams and secure edges with tape to prevent gaps. - 4
Create the heat window
Stretch clear plastic wrap over a cut opening to form a single-pane window. Seal the edges with tape, ensuring the window is taut and airtight to reduce heat loss.
Tip: Avoid wrinkles in the plastic wrap to prevent shadows that reduce clarity. - 5
Add insulation and a heat-absorbing base
Place a black matte panel or fabric at the bottom of the box to absorb heat. Add a layer of insulating material around the sides if available to minimize heat escape.
Tip: The darker surface converts sunlight to heat more efficiently. - 6
Position for sun and test
Angle the box toward direct sunlight. Use a simple shadow test to ensure minimal sun obstruction and adjust tilt as needed for peak sun exposure.
Tip: A slight tilt toward the sun usually yields better heating than a perfectly level position. - 7
Cook and monitor
Place a small, heat-safe tray with your food inside. Check progress at regular intervals and avoid opening the window frequently to maintain heat.
Tip: Use a timer and note progress for future tweaks.
Questions & Answers
Is a solar oven pizza box safe to use indoors?
Indoors is not ideal for solar ovens because they rely on direct sunlight. If you must, place near a bright window and supervise closely to manage heat and humidity. For best results, use outdoors on a sunny day.
Solar ovens work best outdoors in direct sun; indoors can be risky and less effective, so use outdoors when possible.
What foods can be cooked in a solar oven pizza box?
You can warm simple items like bread, melt cheese, or heat small snacks. It’s not suitable for high-heat baking or cooking raw proteins. Use it primarily for warming or melting.
Great for warming foods and melting cheese; not for full recipes or raw protein.
How hot does a solar oven pizza box get?
Temperature depends on sun intensity and insulation. Expect slower heating on cloudy days and faster results under strong sunlight. Use the device as a learning tool rather than a precise oven.
Heat varies with sun strength and insulation; treat it as a learning tool rather than a precise oven.
How do I troubleshoot if it isn’t heating?
Check for air leaks around the window and seams, ensure the foil is smooth and reflective, and adjust the box angle toward the sun. If lighting is weak, consider improving insulation or waiting for stronger sun.
Check seals and gaps, adjust sun angle, and improve insulation if heat is weak.
Can you reuse a pizza box for this project?
Yes. Rinse and dry a clean box, remove any old labels, and proceed with a fresh setup. Reusing keeps costs down and makes this a sustainable educational project.
Absolutely—reuse a clean, empty pizza box for savings and sustainability.
Is it safe to cook cheese or bread in this setup?
Melting cheese and warming bread work well in a solar oven pizza box. Avoid cooking raw meats or high-fat items that could overheat the box or produce smoke.
Cheese melts and warming bread are great; avoid raw meats and overly fatty foods.
Watch Video
Main Points
- Follow a simple build: reflect, insulate, window, sun alignment.
- Performance depends on sun intensity and minimizing heat loss.
- This is a safe, educational demo for learning about solar energy.
- Oven Cook Pro emphasizes safety and practical testing when using solar tools.