Solar Oven Guide: Cooking with Sun Power for Home Cooks
Discover how a solar oven works, how to set up for maximum efficiency, safety considerations, and a practical step-by-step guide to cooking outdoors with sun power.

You will learn to cook with a solar oven from setup to finished meals, using sun power for healthier, energy-efficient cooking. This guide covers selecting, assembling, and using a solar oven, plus safety basics and practical tips. According to Oven Cook Pro, solar cooking is an accessible, eco-friendly option for home kitchens.
What is a solar oven and why use one?
A solar oven is a cooking device that uses sunlight as its heat source, concentrating and trapping heat to cook food. The primary advantages are energy independence, reduced emissions, and gentler heat that preserves flavors and nutrients. For homeowners, a solar oven can extend outdoor cooking seasons, reduce electricity use, and lower kitchen heat during hot months. The Oven Cook Pro team notes that solar cooking is particularly appealing for campers, urban balconies, and households seeking a backup cooking option during power outages. When you start, you’ll be able to bake bread, simmer stews, and reheat meals with minimal equipment. This guide helps you set realistic goals for your first solar-cooked meals and explains how to pick a model that fits your space, climate, and cooking style. You’ll also learn practical tips to maximize solar exposure and minimize cooking time without sacrificing safety or flavor.
Key takeaways:
- Solar ovens use the greenhouse effect to heat food with sunlight.
- They are ideal for outdoor cooking, emergencies, and energy-saving goals.
- Start with simple dishes to build confidence before tackling baked goods or stews.
How solar ovens work: the science behind it
Solar ovens rely on three core principles: collection, trapping, and insulation. A reflective surface gathers sunlight and redirects it toward a cooking chamber. The chamber traps heat through a transparent cover, creating a greenhouse environment that reduces heat loss. Insulation minimizes heat escape, so temperatures rise slowly but steadily. Different designs optimize these principles in various ways: box-style ovens emphasize insulation and compact airflow, panel reflectors maximize sunlight capture, and parabolic units focus heat for faster cooking. This section explains why different setups heat food at different rates and how to choose a design that matches your typical meals and climate. Understanding the science helps you predict performance, plan cooking windows, and decide when to preheat or shield food from excessive heat. Oven Cook Pro’s guidance emphasizes balancing efficiency with ease of use, especially for beginners.
Design options and choosing a unit
There are several common solar oven designs, each with its own strengths:
- Box-style ovens: Simple, well-insulated, and great for steady, low-to-medium heat. They’re easy to use for bread, casseroles, and stews.
- Panel reflector ovens: Use telescoping panels to concentrate sunlight on a cooking pot. These can reach higher temperatures but require careful alignment to maintain focus.
- Parabolic reflectors: Deliver high heat quickly, suitable for searing or boiling water, but demand more ongoing adjustment and can be less forgiving for beginners.
- Hybrid or modular units: Combine insulation with adjustable reflectors for flexible cooking. When choosing, consider space, climate, typical meals, and how much time you want to invest in setup.
To select a model you’ll actually use, match the design to your typical cooking style (baking vs. braises), your sunny days, and how much you’re willing to adjust the setup. A well-chosen unit reduces the learning curve and makes solar cooking more enjoyable for day-to-day meals.
Getting started: setup, preheating, and positioning
Before you cook, set up in a sunny, unobstructed location. Position your oven to face the sun’s current path, and adjust as the sun moves to keep the heat focused on the cooking chamber. Preheating is often worthwhile, especially for baked goods and stews, but avoid overheating your food by starting with shorter cook times and adding time as needed. Protect the cooking area from wind that can blow heat away by using a windbreak or positioning the unit behind a shield. Gather all ingredients and cookware in advance so you can focus on the heat rather than juggling tasks. A trial run with water can help you understand how long it takes to reach your target temperature before cooking real food. As Oven Cook Pro notes, practice with simple dishes first to nail the timing and temperature ranges for your setup.
Cooking with a solar oven: techniques and tips
Cooking with sun-powered heat requires adapting typical kitchen workflows. Use low, wide pots to maximize heat transfer and avoid overfilling, which slows cooking. Keep lids on pots to trap heat and moisture, especially for rice or stews. For baked items, use preheated dishes and consider placing the dish on a dark, heat-absorbent surface to boost conduction. If your recipe calls for browning or crisping, a brief finish under a conventional oven or broiler can help, but only after the majority of cooking is complete.
Timing varies with cloud cover and season; plan for longer cook times on cooler days. Document your results and adjust next time—small changes in distance to the sun, tilt angle, or cookware can shave significant minutes from cook times. In practice, you’ll learn to read the food’s texture and color as cues for doneness, rather than relying on a clock alone.
Safety and efficiency: protecting yourself and your food
Safety comes first with any outdoor cooking gear. Always wear heat-resistant gloves when handling hot reflectors or containers, and keep children and pets away from the cooking area. Use sturdy cookware designed for high heat and avoid ceramic dishes that may crack under rapid temperature changes. Keep the unit clean to prevent food residues from absorbing heat unevenly and verify that seals and lids fit properly to prevent heat loss. Efficiency tips include cleansing reflective surfaces, slightly angling the unit toward direct sun during peak hours, and using insulated containers to hold heat when you’re not actively cooking. Regularly inspect your equipment for signs of wear and replace worn parts to maintain performance. Oven Cook Pro’s approach emphasizes safety, reliability, and sustainable cooking practices.
Real-world uses and recipe ideas
Solar ovens excel for slow, flavorful meals that benefit from steady heat. Try soups and stews, rice and grains, beans, and braised vegetables. Breads and baked goods can emerge with a crusty exterior and tender crumb when preheated properly. For busy days, overnight dishes like stews or braises can be started in the morning and finished when the sun is strongest. If you’re camping or cooking on a balcony, prep ingredients the night before and set up in the morning to maximize daylight. The versatility of a solar oven extends beyond heat retention—its gentle heat preserves delicate flavors and nutrients, making it a valuable tool for everyday cooking and emergency preparedness alike.
Troubleshooting and common issues
If you’re not seeing heat or cooking slowly, recheck the sun exposure and ensure there are no shadows crossing the reflector. Loose seals, warped lids, or dirty reflective surfaces reduce efficiency. If the unit overheats, add a windbreak or move to a shadier area during peak heat to avoid scorching. For uneven cooking, rotate cookware and rearrange reflectors to balance heat distribution. Cloud cover or late-day sun reduces temperature; in those cases, plan lighter meals or switch to a backup cooking method. Document what changes you make and how they affect results to build a practical reference for future sunny days.
Tools & Materials
- solar oven unit (box, panel, or parabolic)(Choose a design that matches your climate and cooking style)
- oven-safe cookware (metal, ceramic, or glass)(Ensure lids fit well)
- thermometer or oven thermometer(For monitoring internal temperatures)
- insulation materials (foam, fiberglass, or wool)(Keeps heat from escaping)
- reflective materials (aluminum foil or reflective film)(Enhances heat collection)
- heat-resistant gloves(Protect hands when handling hot parts)
- windbreak or shade screen(Can improve efficiency on windy days)
- timer or smartphone stopwatch(Helps manage cooking windows)
Steps
Estimated time: 60-120 minutes
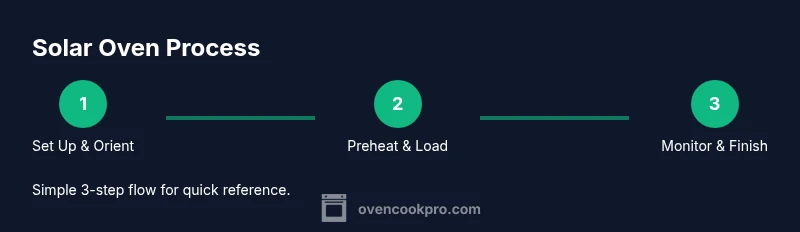
- 1
Set up and orient the oven
Position the solar oven in direct sun with minimal shading. Align reflectors toward the sun and secure any wind obstructions. Confirm that the lid seals well and the interior is clean.
Tip: A quick sun-map check for your location helps you anticipate the best daily orientation. - 2
Prepare ingredients and cookware
Gather all ingredients and pre-portion into cookware that fits your oven. Use lids to trap heat and speed cooking. Pre-heat water or stock in a separate vessel to shorten total time.
Tip: Preheating the cooking vessel improves heat transfer and reduces overall cook time. - 3
Load the oven and start cooking
Place the dish inside, close the lid, and adjust the reflectors to keep the heat focused. Start with shorter sessions and add time as you learn how your unit behaves.
Tip: Keep a light watch so you can rotate if needed to balance heat. - 4
Monitor temperature and progress
Check heat with a thermometer and adjust positioning if the target temperature drifts. Use a timer and record how long each dish takes for future meals.
Tip: Even a small tilt adjustment can improve heat capture by a few minutes. - 5
Check doneness and finish if needed
Test food for doneness using standard cues (texture, color, internal temperature). If more browning is desired, a brief finish under direct sun or a conventional oven can help.
Tip: Don’t overcook; solar heat can continue to cook after removal from heat. - 6
Cool, serve, and clean up
Let foods rest briefly, then serve. Clean cookware and wipe down the oven interior to preserve reflective surfaces for next use.
Tip: Store in a cool, dry location to extend equipment life.
Questions & Answers
What is a solar oven and how does it work?
A solar oven uses sunlight to heat and cook food by trapping heat inside a insulated chamber. Reflectors concentrate sunlight, while a transparent cover reduces heat loss, creating a greenhouse effect that cooks food slowly and evenly.
A solar oven cooks with sunlight by trapping heat inside an insulated box or panel system, using reflectors to concentrate sunlight and a clear cover to keep the heat in.
Can I bake bread with a solar oven?
Yes, many solar ovens support baking bread and other baked goods. Use a preheated baking dish, keep lids on when possible, and allow extra time for slower solar heating compared to conventional ovens.
Bread works in solar ovens with preheating and patience; expect longer bake times than a regular oven.
How long does cooking take in a solar oven?
Cooking times vary with sunlight intensity, weather, and the recipe. Plan for longer sessions on cloudy days and keep a log of times to improve future accuracy.
Times vary; expect longer sessions when the sun isn’t strong. Track results to refine timing.
Is a solar oven safe for kids to use?
Solar ovens introduce heat and moving parts. Supervise and use protective gloves. Teach kids to stay clear of the hot exterior and reflectors.
With supervision and proper precautions, solar ovens can be safe for family use.
Do solar ovens work in cloudy weather?
Solar ovens operate best in bright sun, but they can still cook with diffused light. Expect longer cooking times and plan accordingly.
Cloudy days slow cooking; adjust plans and use longer time windows.
What maintenance does a solar oven require?
Keep reflective surfaces clean, inspect seals, and store cookware properly. Replace worn gaskets or insulation as needed to maintain efficiency.
Regular cleaning and periodic inspection keep your solar oven performing well.
Watch Video
Main Points
- Plan around consistent sunlight for best results
- Choose a design that matches your cooking style
- Preheat and use lids to trap heat
- Practice makes solar cooking predictable