Outdoor Oven Mastery: A Complete Step-by-Step Guide
Learn how to set up, light, and cook with an outdoor oven. This guide covers safety, heat control, preheating, recipes, and maintenance for reliable outdoor cooking.

With an outdoor oven, you will learn to bake, roast, and grill reliably outdoors by mastering heat control, fuel choices, and safe setup. Start by selecting a weatherproof unit or stone-built outdoor oven, then learn practical steps for lighting, managing airflow, insulation, and temperature. This guide shows a clear, step-by-step approach for perfect outdoor results.
Why an outdoor oven is a game changer for home cooks
For many homeowners, the idea of cooking outdoors goes beyond grilling. An outdoor oven expands your repertoire from quick weeknight meals to slow-roasted flavors and bakery-style breads. The key is consistent heat, reliable fuel, and good insulation so you can bake, roast, or crisp crusts just like you would in a traditional indoor oven. According to Oven Cook Pro, mastering an outdoor oven starts with understanding its heat source and the way heat behaves in an enclosed dome. With proper setup, you create a versatile kitchen that thrives in mild evenings and cool mornings alike. In this section we explore why this tool earns a permanent place on your patio, how temperature ranges influence different dishes, and how ambient conditions shape your cooking strategy. The goal is simple: predictable results and enjoyable outdoor cooking experiences.
Choosing the right outdoor oven: brick, ceramic, steel, and gas
Outdoor ovens come in several core styles, each with strengths for different foods and climates. Brick and clay ovens retain heat well and deliver a rustic, smoky flavor, but they require careful building and longer preheat. Ceramic ovens offer faster preheat and even heat distribution, while steel models are highly portable and easy to maintain. Gas-fired units provide convenient temperature control, ideal for weeknight cooking, while wood-fired options excel at generating aroma and depth. When selecting, consider available space, weather exposure, and whether you want a traditional brick-on-site oven or a modern prefabricated unit. The right choice depends on how you plan to cook most often—pizza nights, bread baking, or roasting whole vegetables. Oven Cook Pro recommends testing a few options and matching fuel availability to your routine.
Safe setup: placement, ventilation, and weather protection
Safety should guide every outdoor oven project. Place the oven on a noncombustible surface with ample clearance from walls, railings, and plant material. Ensure proper ventilation to avoid smoke buildup and carbon monoxide in enclosed spaces. Use windbreaks to stabilize temperature and protect users from gusts that slam doors or blow ashes. Weather protection matters too: install a cover or dedicated cabinet to shield the oven from rain and snow, and store fuel in a dry place. Even with a modest setup, you can cook with confidence if you check seals, inspect the flue, and never leave hot surfaces unattended. The principle is simple: keep people safe, keep the unit dry, and keep the heat contained.
Fuel options and heat management
Your fuel choice determines flavor, heat longevity, and maintenance needs. Wood produces a classic, wood-smoked profile but requires more attention to airflow and ash removal. Charcoal can provide steady heat with less smoke, while gas offers precise temperature control with minimal storage space. For longer cooks, plan for a slow burn and maintain a consistent flame by adjusting vents, dampers, or gas knobs. Insulation also matters: a well-sealed dome or a ceramic layer minimizes heat loss, saving fuel and shortening preheat time. Remember to choose fuel you can source reliably and safely, and always store it away from kids and pets. Oven Cook Pro emphasizes consistent heat management as the foundation of reliable outdoor oven cooking.
Temperature control: airflow, insulation, preheating
Temperature control hinges on a few practical levers. First, regulate airflow by adjusting vents or dampers to either feed or starve the fire. Second, keep insulation intact so the oven does not lose heat to the ambient air. Third, preheat long enough to stabilize temperatures before you begin cooking; this reduces hot spots and uneven crusts. Use a thermometer to monitor surface temps and read the dome temperature when possible. If the oven runs too hot, move dishes away from the hottest zone or create a windbreak to shield the flame. If too cool, add fuel gradually and reopen vents. The goal is a stable, predictable temperature window that suits your recipe.
Preheating and loading foods: timing and placement
Preheat to the target range, then load the first item when the oven shows steady heat. Pizzas and flatbreads go on a high shelf or directly on a stone surface; larger roasts deserve the center or a cooler zone. Place delicate items on parchment to prevent sticking and facilitate removal. Rotate items as needed to promote even browning and avoid scorching. Keep a log of temperatures and cook times for future reference. Remember that outdoor ovens require more preheat than standard home ovens, especially in cooler weather. The payoff is crusty exteriors and tender interiors when heat is managed well.
Cooking techniques: pizza, bread, roasting, vegetables
Pizza benefits from intense heat, thin crusts, and quick bake times. Bread dough develops flavor with a long, slow bake and careful moisture management. Roasting vegetables concentrates sugars and yields caramelized edges. Use a cast-iron pan for juices and a heat-proof tray for vegetables to keep everything organized. Rotate items to avoid cold spots and test doneness with a probe or touch. Experiment with herbs, garlic, and olive oil to elevate flavors. An outdoor oven elevates your weeknight meals into memorable gatherings with friends and family.
Maintenance and cleaning after use
Let the oven cool completely before cleaning. Remove ashes, brush away debris, and wipe the interior with a damp cloth. If you cook with oil or sugar, scrub with a stiff brush to prevent buildup. Check the door seals and gaskets for wear, and inspect the flue or chimney for obstructions. Cover the unit when not in use to protect it from rain and UV damage. Regular maintenance extends the life of your outdoor oven and keeps flavors consistent. Oven Cook Pro suggests recording maintenance steps so you can diagnose issues quickly next season.
Weather considerations and seasonal use
Seasonality affects outdoor oven performance. In breezy conditions, position the oven to minimize wind exposure and adjust the flame accordingly. In humid or cool climates, allow extra preheat time and use insulation to minimize heat loss. Rain or snow requires a protective cover or dedicated shelter to prevent water damage. It is possible to cook year-round with reasonable weatherproofing, but plan for seasonal upkeep, such as cleaning after heavy rains and resealing joints after winter storage. With proper planning, your outdoor oven remains a reliable workhorse across seasons.
Troubleshooting common issues
Even experienced home cooks encounter occasional hiccups with an outdoor oven. If heat is inconsistent, verify that vents are adjusted correctly and the dome is clean. If food browns unevenly, rotate more often and check stone or rack placement. If smoke is excessive, move fuel away from direct contact with food, trim the flame, or use parchment to shield surfaces. For cooling-down phases, avoid sudden temperature changes that can crack ceramic components. Regular practice and careful note-taking help you fix issues fast and keep your outdoor oven performing at its best.
Tools & Materials
- Heat-resistant gloves(Length to cover wrists; use leather or aramid fabric)
- Pizza peel(Long-handled, heat-resistant; helps slide food in/out)
- Infrared/oven thermometer(Probe or surface thermometer for accurate temps)
- Long tongs(2-handed grip; avoid burns)
- Heat shields/brick supports(Protect surfaces and direct heat)
- Parchment paper(For non-sticking and easy transfer)
- Aluminum foil(Wrap delicate items and shield edges)
- Water spray bottle(Control flare-ups and cool quick surfaces)
- Fire-safe brush(Clean ashes after cooling)
- Fuel: Wood chunks or charcoal(Choose appropriate fuel for your oven type)
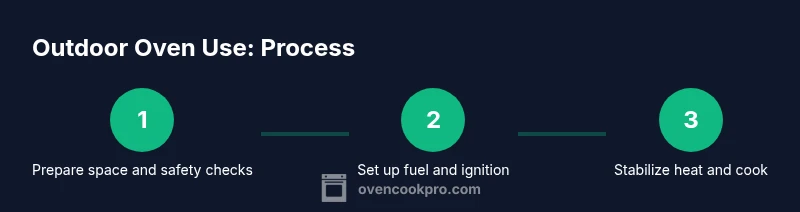
Steps
Estimated time: 60-90 minutes
- 1
Assess site and position the oven
Choose a stable, nonflammable base with ample clearance. Clear the area of leaves and debris. Verify nearby structures can tolerate heat and that there is a safe escape path for smoke.
Tip: Keep a clear 24-inch radius around the oven and use a dry, level pad. - 2
Choose your fuel and prepare supplies
Decide between wood, charcoal, or gas, and gather fuel in advance. Pre-cut wood and pre-measure fuel save time during preheat. Ensure storage is dry and away from children and pets.
Tip: Label fuel containers and store them off the cooking area. - 3
Set up windbreak and heat shield
Position bricks or a manufactured shield to protect the flame and stabilize heat. Create a small windbreak to minimize heat loss and protect hands and tools.
Tip: Aim for a shield that leaves some air space for combustion. - 4
Light or ignite the oven safely
Use long matches or a lighter designed for high heat. Open vents gradually to avoid flare-ups and never use accelerants.
Tip: Keep a fire extinguisher within reach and wear gloves during ignition. - 5
Control airflow and stabilize temperature
Adjust vents to feed or limit oxygen. Check insulation and seal integrity to prevent heat loss. Monitor with a thermometer for reliable readings.
Tip: Make small, incremental vent adjustments rather than large changes. - 6
Preheat to target temp and verify
Preheat until the dome and surface reach the desired target. Use both dome and surface readings to ensure even heat distribution.
Tip: Wait until steady readings show minimal fluctuation before loading food. - 7
Load food and manage placement
Place items according to heat zones; use parchment for delicate items. Keep track of position to ensure even cooking.
Tip: Avoid overloading the oven; crowded spaces slow heat transfer. - 8
Cook and rotate for even browning
Rotate items halfway through and adjust position as needed. Use a peel or tongs to move items safely.
Tip: Mark a simple rotation schedule to maintain consistency. - 9
Finish and shut down safely
Close vents to snuff the flame and let the oven cool gradually. Store ashes safely once completely cold.
Tip: Document cooling time and cleanup steps for your next session.
Questions & Answers
What is an outdoor oven best used for?
An outdoor oven excels at bread, pizza, roasting, and vegetables, delivering a crusty exterior and smoky depth that indoor ovens struggle to match. With proper insulation and heat control, you can recreate bakery-level results on the patio. The key is consistent heat and careful monitoring.
An outdoor oven is great for bread, pizza, and roasted vegetables because it delivers crusty textures and smoky flavors with good heat control.
How do I preheat an outdoor oven efficiently?
Preheat with the oven door closed and vents set to stabilize air flow. Use a thermometer to track both surface and dome temperatures. Expect longer preheat times in cooler or windier conditions and adjust fuel gradually to maintain consistency.
Preheat with vents adjusted, monitor temperatures, and expect a longer ramp in cooler weather.
Which fuels work best for outdoor ovens?
Wood offers authentic flavor but requires more attention; charcoal provides steady heat with less smoke; gas gives precise, convenient control. Choose the fuel that aligns with your cooking goals, space, and maintenance tolerance.
Wood, charcoal, or gas—pick based on flavor preference and how much effort you want to invest.
Can I bake bread in an outdoor oven?
Yes. A well-insulated dome and steady heat create the conditions needed for springy crumb and a glossy crust. Use a preheated stone or baking steel and monitor temperature to avoid scorching the loaf.
Absolutely, with proper preheating and heat control you can bake great bread outside.
How should I clean and store an outdoor oven after use?
Let the oven cool completely, remove ashes, brush interior, and wipe with a damp cloth. Cover it to protect from weather and store fuel in a dry place. Regular checks prevent buildup and corrosion.
Cool, clean, cover, and store fuel dry to extend the oven's life.
Watch Video
Main Points
- Define heat source and placement before cooking.
- Preheat adequately to avoid uneven results.
- Prioritize safety and heat management throughout.
- Use parchment and rotating strategies for even browning.
- Maintain and clean after each session for longevity.