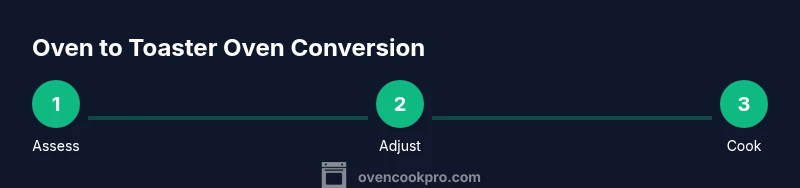
Oven to Toaster Oven Conversion: A Step-by-Step Guide
Learn how to convert recipes and temps when moving from a full-size oven to a toaster oven. This guide covers safety, temperature tweaks, bakeware, and practical tips for reliable results.

This guide shows you how to perform an oven to toaster oven conversion safely and effectively. You’ll learn key differences, essential precautions, temperature adjustments, and practical bakeware choices. Follow the step-by-step process to dial in temps and times for reliable results, and use proper tools to prevent undercooking or scorching.
Why an Oven-to-Toaster-Oven Conversion Can Be a Smart Move
Moving from a full-size oven to a toaster oven can save space, reduce energy use, and speed up weeknight meals. For many homes, a high-quality toaster oven handles a majority of everyday bakes, toasting, and small roasts with excellent results. The key is understanding how the smaller cavity, limited rack positions, and uneven heat distribution affect timing and browning. By embracing a deliberate oven to toaster oven conversion, you can preserve flavor and texture while keeping your kitchen efficient. According to Oven Cook Pro, starting with a few test batches helps dial in temps and bake times for your specific model, so you aren’t guessing recipe after recipe.
Key Differences Between Ovens and Toaster Ovens
Toaster ovens are compact, heat up quickly, and often use radiant heat from exposed elements. They typically have fewer rack positions and less even heat than a conventional oven, which means baking sheets and pans should be sized to fit snugly without crowding. This affects air circulation, browning, and bake times. It’s essential to know whether your model supports convection, which can bring bakery-like results when used with appropriate bakeware. In a typical oven to toaster oven conversion, you’ll often find you need to lower temperatures and shorten bake times compared with a full-size oven. The Oven Cook Pro team emphasizes practicing with simple recipes to learn your unit’s quirks before tackling delicate bakes like macarons or delicate cookies.
Safety First: Preventing Burns and Fires
Always place the toaster oven on a heat-resistant surface, away from walls and flammables. Use oven mitts when loading and unloading, and never leave the appliance unattended while in use. Because toaster ovens can heat unevenly, position trays toward the center and avoid overfilling. If your model has a crumb tray, empty it regularly to prevent overheating. These precautions are part of a safe oven to toaster oven conversion and align with general kitchen safety guidelines from reputable sources.
Temperature and Time Mapping Essentials
Cooking in a toaster oven often requires lower temperatures and shorter times than a full-size oven. Start by reducing the recipe temperature by 25–50 degrees F (14–28 C) and check progress early. Because bakeware and rack positions differ, use a thermometer to confirm internal doneness rather than relying on color alone. Always cross-check with a trusted recipe and test a small batch before scaling up.
Bakeware and Accessories for Best Results
Choose compact, oven-safe pans that fit comfortably inside your toaster oven with at least 1/4 inch of clearance on all sides. Lining trays with parchment paper helps prevent sticking and makes cleanup easier. Avoid dark-colored pans that can absorb more heat and brown foods too quickly. Consider a small wire rack to improve air circulation for sheet-pan meals. Having the right bakeware on hand is a big part of a successful oven to toaster oven conversion.
Practical Guidelines: Step-by-Step Mindset
Think in terms of batches and shorter sessions. Preheat only as long as your toaster oven requires, and keep a close eye on early batches to arrest over-browning. Tweaks to temperature, time, and rack placement are normal as you learn your unit’s behavior. With consistent practice, you’ll create a reliable mental map for converting many recipes.
Common Pitfalls and How to Avoid Them
Crowding the interior leads to uneven cooking. Using oversized pans can block heat and ruin airflow. Ignoring preheating or skipping the thermometer increases the risk of undercooking or burning. Always start with a simple recipe for calibration and document your results for future meals.
Cleaning and Maintenance for Longevity
Regularly clean crumb trays and wipe down the exterior after use. Avoid using abrasive cleaners that can damage coatings. Let the toaster oven cool completely before moving it, and check the door seal for wear over time. Proper maintenance helps ensure consistent performance and safety.
Tools & Materials
- Toaster oven (with bake and convection if available)(Choose a model that fits your cookware and has a reliable temperature dial.)
- Oven-safe baking sheet or small sheet pan(Sized to fit the toaster oven interior with space for air flow.)
- Oven-safe cooling rack(Useful for air circulation under foods like thighs or small roasts.)
- Parchment paper or aluminum foil(Line pans to prevent sticking and simplify cleanup.)
- Oven thermometer (probe or dial)(Helps verify the internal temperature more accurately than the oven’s dial.)
- Silicone-tipped tongs(For safe handling of hot trays and pans.)
- Heat-resistant oven mitts(Protect hands during loading and removal.)
- Kitchen timer(Optional but helpful for tracking shorter cooking intervals.)
- Food thermometer(Use to confirm doneness for meats and fish.)
Steps
Estimated time: 60-90 minutes
- 1
Assess compatibility
Check your toaster oven’s interior dimensions and available rack positions. Compare the recipe’s pan size and thickness to what will fit and allow adequate air flow. This step prevents squeeze-and-burn situations and makes future conversions easier.
Tip: Measure the cavity with a ruler before selecting pans; even small changes matter in toaster ovens. - 2
Gather essential tools
Collect a compact baking sheet, parchment paper, a thermometer, and oven mitts. Having the right tools on hand minimizes surprises during cooking and helps you maintain consistent results.
Tip: Pre-set a test batch with a simple recipe to calibrate temps. - 3
Preheat correctly
Preheat the toaster oven to the recipe’s target temperature, but monitor closely. Some models heat quickly and can overshoot if left unattended. If your model has a convection setting, decide whether to use it based on the food and bakeware.
Tip: If in doubt, start with the lower end of the suggested temp range. - 4
Adjust temperatures and times
Reduce temperature by about 25–50 degrees F (14–28 C) and shorten bake times by a third to a half, depending on the dish. Check early and use a thermometer for doneness rather than relying on color alone.
Tip: Document test results for future accuracy with your model. - 5
Place and space properly
Position pans toward the center and avoid crowding. Use parchment to prevent sticking and to simplify cleanup. If possible, elevate foods on a rack to promote air flow.
Tip: Avoid using dark, heavy pans that absorb heat too quickly. - 6
Monitor progress
Check the dish at the earliest recommended time, then re-check as needed. Rely on a thermometer for final doneness, especially with poultry and fish.
Tip: Set a timer and don’t rely solely on appearance. - 7
Finish and rest
Allow foods to rest briefly after removal to finish cooking via residual heat. Clean the tray and crumb tray, then store tools properly for your next conversion session.
Tip: Record what worked or didn’t for your next batch. - 8
Calibrate for precision
If you frequently bake, consider keeping a small conversion chart for your oven and common recipes. This reduces guesswork on future oven to toaster oven conversions.
Tip: Re-test recipes after any model change or significant wear.
Questions & Answers
Can I use metal bakeware in a toaster oven?
Yes, metal bakeware is generally safe in toaster ovens as long as it fits and is labeled oven-safe. Avoid non-stick coatings that may degrade at high heat in some models. Always check the manufacturer's guidelines for your specific toaster oven.
Yes, you can use metal bakeware in a toaster oven as long as it fits and is oven-safe. Check your model’s guidelines first.
Should I preheat a toaster oven?
Preheating helps achieve consistent browning and cooking times. If your recipe requires it, preheat the toaster oven to the target temperature, then place the food inside promptly to maintain steady heat.
Yes, preheat when the recipe calls for it, then add the food promptly.
Can I bake cookies in a toaster oven?
Cookies can be baked in a toaster oven, but use smaller batches and test a few cookies to calibrate bake time. Watch for quick browning and remove early if needed.
Yes, but bake small batches and test the time to avoid burning.
Do toaster ovens cook evenly?
Even cooking varies by model. Shift pans halfway through cooking and use a thermometer to ensure doneness rather than relying solely on color.
It depends on the model; rotate the pan and check with a thermometer.
How do I adjust recipes for toaster ovens?
Begin by lowering the temperature and shortening the bake time. Use a thermometer for doneness, and record your adjustments for future use.
Start by lowering temps and times, then verify with a thermometer.
Is it safe to convert all oven recipes to toaster ovens?
Not all recipes translate well; delicate baked goods and large roasts may perform poorly due to size and heat distribution. Use caution and test with simpler recipes first.
Not every recipe will translate perfectly—test first with simpler dishes.
Watch Video
Main Points
- Master the basics with a test batch
- Reduce temperature and time cautiously
- Choose right-sized bakeware for even heat
- Monitor doneness with a thermometer
- Maintain safety with proper setup and cleaning