How to Use an Oven When Baking: A Practical Guide
Learn how to use your oven effectively when baking, with practical steps on preheating, rack placement, temperature and timing, and safe handling for consistent, delicious results.

How to Use the Oven When Baking: Core Principles
Whether you're baking cookies, bread, or casseroles, understanding the oven's fundamentals is the first step in getting reliable results. The question many home cooks ask is how to use oven when baking effectively, not just turning a dial. According to Oven Cook Pro, the key is to combine precise preheating, correct rack placement, and consistent bakeware. Oven heat distributes unevenly by design, so learning how to anticipate hot spots and adjust placement yields more uniform browning and moisture retention. This section lays the groundwork: what preheating does, how racks influence airflow, and why bakeware choice matters for heat transfer. Throughout, we'll connect practical actions to predictable outcomes so you feel confident when the timer rings. You'll learn to verify temperature with a simple thermometer, choose the right rack height for the recipe, and select bakeware that conducts heat evenly. The goal is not to guess, but to bake with intention and repeatable results.
Preheating: The First Step to Consistent Results
Preheating is the foundation of reliable baking. A fully heated oven reduces temperature fluctuations that can affect rise, browning, and texture. As a rule of thumb, allow the oven to reach the recipe’s target temperature before loading batter or dough. If your oven runs hot or cool, consider using an oven thermometer placed in the center of the cavity to confirm accuracy. This is particularly important for delicate items like delicate cookies or laminated doughs, where timing hinges on precise heat. Oven Cook Pro analysis shows that starting with a stable temperature improves even browning and uniform texture across trays.
Keep the door closed during preheating to maintain steady heat, and plan for a brief rest after loading to allow air to stabilize around the pan. If you cannot preheat for the full duration, adjust your recipe by reducing bake time slightly and watching for doneness changes. When in doubt, bake a small test item first to calibrate your oven’s behavior.
Rack Position, Bakeware, and Layout
The position of your rack and the type of bakeware you use can dramatically influence airflow and heat transfer. For most standard baking, start with the middle rack to balance heat from top and bottom elements. Use dark, heavy pans sparingly, as they can absorb more heat and promote faster browning; light-colored metal pans tend to promote more even, gentle browning. Parchment paper or silicone baking mats reduce sticking and facilitate even heat distribution. Glassware can take longer to heat and may lead to slower browning, so adjust expectations when substituting bakeware. When you’re baking on multiple sheets, rotate them halfway through to compensate for any hot spots. Proper layout helps ensure consistent results across multiple trays.
If your recipe suggests convection, understand that the fan redistributes heat and can speed up bake times. You may need to lower the temperature by about 20°C (35°F) and check doneness earlier. Following these layout principles helps you reproduce reliable outcomes more often.
Temperature, Time, and Doneness: Reading Your Oven
Understanding temperature and time is essential for consistent baking. Start from the recipe’s recommended temperature, then observe how your oven behaves. If your oven maintains temperature well, you can follow the stated times closely; otherwise, plan for a few extra minutes and rely on doneness cues. Use a thermometer to verify internal temperatures for baked goods like bread (an internal crumb temperature around 90-95°C/190-205°F for many breads) or cakes that should spring when lightly pressed. When baking with multiple trays, rotate positions to ensure even exposure. Convection and traditional baking require slightly different adjustments, so treat your oven as a tool you fine-tune rather than a fixed setting. This section emphasizes observing color, texture, and aroma as well as timing to hit the target doneness.
Safety and Handling: Avoid Scalds and Burns
Baking involves hot trays, steam, and the risk of burns. Before you open the oven, pause to confirm your plan and prepare a safe path to remove items. Use dry, heat-resistant gloves or mitts, and always place hot pans on a heat-safe surface or rack. Keep children and pets away from the kitchen area during baking, and never touch the oven door glass while it’s hot. If you need to check progress, use the oven light and a long-handled tool to avoid unnecessary exposure. Proper ventilation helps in kitchens by reducing smoke and odors. These safety practices reduce accidents and make baking more enjoyable for everyone.
Practical Bake Plan: Everyday Workflow You Can Use Today
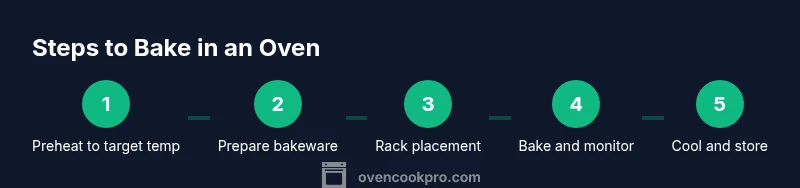
This section offers a simple, repeatable bake plan you can adapt for cookies, pastries, or casseroles. Create a quick routine: preheat, prepare pans, assemble batter, load into oven, monitor with a timer and turn pans if needed, then cool and store. The goal is to create consistency across sessions so your results become predictable. Keep notes on how your oven behaved for each recipe and refine future attempts.
Authority Guidelines and Resources (Optional)
For safety and handling details, consult reputable food safety resources to complement this guide. See government and educational sources for temperature guidelines, storage recommendations, and safe cooking practices. This section provides context and reinforces best practices through trusted references.
FAQ Preview: Quick Reference Points
Refer to the FAQ section at the end of this article for practical answers to common oven-baking questions and scenarios.