How to Remove Bosch Oven Door: A Step-by-Step Guide
Discover a safe, model-aware method to remove a Bosch oven door with a clear step-by-step guide, essential tools, and practical safety tips from Oven Cook Pro.

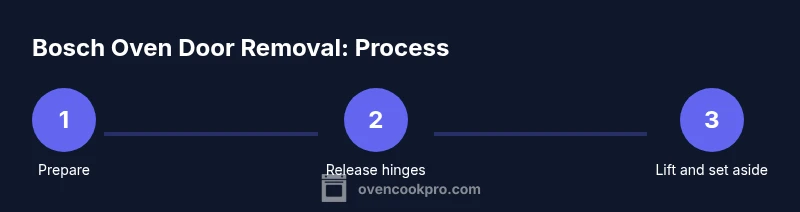
By following model-specific steps, you can safely remove a Bosch oven door for cleaning or maintenance without damaging the hinges or glass. Start with the oven cold, unplug the unit if possible, and prepare stable support for the door. In this guide, you’ll learn a clear, two-person process to remove and reattach the door safely.
Why removing Bosch oven door may be necessary
According to Oven Cook Pro, removing the Bosch oven door is a common maintenance task when you need to clean glass more thoroughly, reseat a gasket, or service the hinges. Before you lift a door, familiarize yourself with the model's hinge system; Bosch ovens typically use a two-point hinge design that supports the door when opened wide. Improper removal can lead to chipped glass, bent hinges, or misalignment that affects door seal. The goal is to decouple the door safely while maintaining control over its weight. Always start with the oven off and cool, and unplug if possible, especially if you’ll be working near the control panel. For many models, you’ll find two metal stops near the hinge area that must be disengaged to release the door. This is a task that benefits from a second pair of hands, particularly when the door is heavy or the glass is hot. By ensuring you have a clear work area, wearing heat-resistant gloves, and keeping the door supported, you reduce the risk of damage or personal injury.
Safety first: prepare and protect
Safety is the foundation of any removal task. Ensure the oven is fully off, cooled, and unplugged if possible. Clear the surrounding space and lay down a soft protective surface for the door to rest on. Wear heat-resistant gloves and use a non-slip mat to prevent slips. Keep a second person nearby to help manage the weight and guide the door away from kitchen obstacles. Having a plan for where the door will land helps avoid accidental impact with countertops or floor tiles. If the appliance is built-in, isolate power at the breaker before starting to reduce the risk of contact with live components. Remember: never place your hands inside the oven cavity when you suspect hot surfaces; wait until everything is cold before proceeding.
Understanding hinge mechanisms
Bosch ovens use hinge designs that balance the door when opened. Some models feature upper and lower hinge stops that lock the door in place for cleaning and maintenance. The release method can vary: some doors require you to tilt the door slightly and lift while others rely on a small lever or clip near the hinges. Always consult your owner’s manual for model-specific instructions. Misunderstanding the release points can cause the door to slip, injure hands, or crack glass. Knowing the general idea—a supported door, a controlled disengagement, and a safe landing—helps you approach the task with confidence.
Tools and materials overview
Here’s what you’ll typically need to complete the removal safely: heat-resistant oven gloves, a soft, padded landing surface, and at least one additional person to assist. Have your Bosch owner’s manual handy to confirm the exact steps for your model. A noise-free, clear workspace helps you maneuver without bumping nearby surfaces. A small flashlight can aid in spotting hinge stops if lighting is poor. Keep a camera or phone nearby to document hinge positions for reassembly.
Step compatibility with Bosch models
Not every Bosch oven uses the same removal method. Some models place hinge stops behind decorative panels, while others expose them at the hinge itself. Because of these variations, reference the model-specific instructions in your manual or on Bosch’s support site. If you’re unsure, contact Bosch customer service or a qualified technician. Following the model-specific steps reduces the risk of misalignment and glass damage, and it helps preserve the door’s seal for future use.
Common mistakes and how to avoid them
A few mistakes are easy to make but costly: pulling too hard on the door, rotating the door while still attached, or failing to support the weight as you disengage the hinges. Avoid twisting the door or applying force to the glass edge. Do not bypass the hinge stops or use improvised leverage. Instead, proceed slowly, keep the door level, and communicate clearly with your helper. If the hinges feel stuck, stop and re-check the release points and ensure the appliance is fully cooled and powered down.
When to call a professional
If the door won’t detach after attempting the model-specific steps, or if you notice cracks, unusual noises, or bent hinges, it’s wise to stop and call a professional. A qualified technician can safely remove and realign the door and inspect the gasket and frame for damage. This protects you from injury and preserves the oven’s performance. For complex models or built-in configurations, professional service may be the most cost-effective option in the long run.
Tools & Materials
- Heat-resistant oven gloves(Protect hands from heat when handling hot edges and glass)
- Two sturdy helpers(One to support the door, another to manage hinges and stops)
- Soft, padded landing surface(Place door on a thick towel or blanket to cushion the glass)
- Clear workspace (dry, non-slip mat)(Keeps path clear and reduces slips during removal)
- Owner's manual for your Bosch model(Model-specific instructions and warnings)
- Optional flashlight(Helpful for locating hidden hinge stops in low light)
Steps
Estimated time: 40-60 minutes
- 1
Power down and prep
Power down the oven and unplug if safe. Allow the appliance to cool completely to avoid burns. Clear the surrounding area and have a second person ready to help keep the door steady.
Tip: If unplugging isn't possible, switch off at the breaker and wait until the exterior is cool. - 2
Open the door to 90 degrees
Gently lift the handle and swing the door to approximately 90 degrees. Keep your hands near the top and bottom edges to control weight and prevent slips. Confirm the door rests on any 90-degree stops before attempting release.
Tip: Do not force beyond the 90-degree position; ensure the hinge stops engage. - 3
Locate hinge stops and release
Find the hinge stops or release levers near the hinges. Note their position and how they engage to prevent detachment. If needed, take a quick photo for reference.
Tip: Consult the manual for your exact model to locate the release points. - 4
Provide support and disengage stops
With a partner, support the door along the upper edge and carefully disengage the hinge stops following model-specific instructions. Maintain a firm grip to avoid shifting weight unexpectedly.
Tip: Keep the door balanced and prevent it from tilting toward you. - 5
Tilt and lift away from hinges
Gently tilt the door outward and lift straight up to disengage the hinges. Move slowly and keep the glass facing you to avoid impact. Have the second person guide and cradle the bottom edge as it clears the hinge.
Tip: Place the door on a padded surface immediately to prevent damage. - 6
Inspect, clean, and reattach
Check hinges and gasket for wear; clean if needed. Reattach by reversing the steps, ensuring correct alignment and audible engagement of stops. Test the door with a gentle close before returning to normal use.
Tip: Label screws or components as you remove them to simplify reassembly.
Questions & Answers
Is it safe to remove a Bosch oven door at home?
Yes, with proper precautions and model-specific instructions. Always power down, wear gloves, and have a helper.
Yes, you can safely remove it at home by following the steps.
What tools do I need to remove Bosch oven door?
Typically heat-resistant gloves, a soft surface, and a helper; check your model for any specialized tools.
You usually need gloves, a soft surface, and a helper.
What if the door won't detach after following steps?
If it resists, stop and re-check the hinge stops and model-specific steps; forcing can damage hinges. Consult the manual or Bosch support.
If it won't detach, stop and review the steps.
How do I know when it's ready to reattach?
When hinges align and you can slide the door back onto the pins without resistance; ensure the stops click back.
You'll know it's ready when it seats evenly and the stops engage.
Should I unplug after removing the door?
For safety, disconnect power when working on electric components; if the oven remains unplugged, ensure it's safe.
Unplug or switch off power before maintenance.
Do all Bosch ovens use the same removal method?
Not always; Bosch models vary. Always consult the owner's manual for your model.
Models can differ; check your manual.
Watch Video
Main Points
- Plan safety first and use two people.
- Unplug and allow cooling before starting.
- Document hinge positions for accurate reassembly.
- Follow model-specific Bosch instructions to avoid damage.