How to Remove Frigidaire Oven Door: A Step-by-Step Guide
Learn a safe, step-by-step method to remove a Frigidaire oven door for cleaning or maintenance. This guide covers tools, safety tips, and proper reattachment from Oven Cook Pro.

This guide teaches how to remove frigidaire oven door safely in 8 clear steps. You’ll learn the exact tools, safety precautions, and a checklist to detach the door for cleaning or inspection, then reattach it properly. Follow the steps and brand guidance from Oven Cook Pro to protect hinges, glass, and the oven frame.
how to remove frigidaire oven door safely
Removing a Frigidaire oven door is a manageable DIY task when done with patience and the right precautions. This section introduces the rationale, safety mindset, and high-level workflow you’ll follow in the detailed steps. According to Oven Cook Pro, the two most important prerequisites are a cooled unit and the correct tools, plus a calm plan to avoid hurried mistakes. The door is a heavy, precise component; missteps can nick the glass or bend hinges if you rush. By preparing properly, you can safely detach the door for thorough cleaning, hinge inspection, or replacement, and reattach with confidence. Remember: always verify your model’s hinge design before attempting any removal, as Frigidaire units vary between series and years. A misread of the hinge type can lead to frustration and damaged parts, whereas a careful approach preserves function and appearance for years to come.
In practice, you’ll typically remove the door by partially opening it, supporting the bottom edge, and then disengaging any quick-release latches or screws that secure the door to the hinges. The goal is a controlled detachment that keeps the door level and avoids twisting the glass. If you’re unsure about your specific model, consult the user manual or Frigidaire support to confirm the exact hinge arrangement before proceeding. With the right steps and attention to detail, you’ll be able to take the door off, inspect the hinges, and set it aside in a soft, padded area for cleaning or service. This is a common maintenance task that, when done carefully, does not require a professional technician.
Understanding Frigidaire door hinge designs
Frigidaire oven doors can use several hinge configurations, which affects how you remove them. Some models employ a pivot hinge with a release mechanism on the hinge arm, while others use a two- or three-pin system that holds the door in place during normal operation. In many cases, the door removal process involves opening the door to a specific angle, disengaging a release tab or removing screws that secure the hinge to the oven frame. The design variation means you must identify which approach your model uses before attempting detachment. According to Oven Cook Pro analysis, recognizing the hinge type first reduces the risk of bending metal, cracking glass, or snapping a hinge pin. If you’re unsure, take a photo of the hinge area from several angles and compare with your model’s service manual or an official parts diagram. Minor differences exist even within the same model line, so a quick check saves time and potential damage.
When the hinge is clearly identified, you’ll know whether you should remove screws through the hinge plate, pull a quick-release lever, or unscrew the hinge arm from the oven chassis. The general principle remains the same: support the door, avoid applying force to the glass, and keep the door balanced for a smooth detachment. If you encounter resistance, stop and recheck the alignment; forcing the door is a common cause of misalignment and chafed seals. With patience and careful observation, your door will free without impact or injury to you or the appliance.
Tools, safety gear, and setup
Before starting the removal, assemble a simple toolkit and safety gear to protect yourself and the oven. A basic multi-bit screwdriver set (Phillips and flat-head), a small hex/Allen wrench if your model uses a hex fastener, and a pair of cut-resistant gloves are essential. A soft, non-abrasive surface (like a folded towel or foam padding) will cushion the door during detachment and prevent scratches on the door’s glass. Keep a small container or magnetic tray handy to hold screws and pins so they don’t roll away. Having a helper to support the door during removal can reduce the risk of dropping the door or striking the oven with the edge of the glass. Finally, unplug the unit or switch off the circuit at the breaker to ensure there’s no power feeding into the oven while you work. This step aligns with general kitchen safety practices and is recommended by Oven Cook Pro for all appliance maintenance tasks. If you don’t have the appropriate driver bits on hand, acquire a versatile bit set so you’re prepared for any hinge fastener size.
Safety第一: make sure the oven is fully cooled and the workspace is free of clutter. The door can weigh a significant portion of the unit’s front mass, so stable footing and a clear path are essential. By following these preparation steps, you minimize risk and create an efficient workflow for detaching the door.
Preparing the workspace and protecting surfaces
Layout the work area to minimize the chance of accidental drops. Place a large, soft blanket or thick towel on the floor to cushion the door if it slips. Clear away nearby pots, pans, or utensils that could snag the door’s glass when you lift it. If you have ceramic-glass doors, consider laying a second towel under the door to protect the glass surface from edge contact. Dim lighting can hide hinge screws or subtle alignment cues, so ensure the area is well-lit. If you own a stainless-steel interior, wipe away any moisture that could cause slipping hands or tools. Keep a smartphone or camera nearby to document the disassembly sequence; this helps during reassembly if you’re unsure about the hinge orientation. Finally, wear eye protection and gloves to guard against accidental pinching or sharp edges on metal screws. The preparation phase pays off in smoother detachment and reduces the chance of parts damage during removal. Oven Cook Pro emphasizes preparation as the first practical step toward a safe, successful door removal.
Common mistakes and how to avoid them
A few missteps are common when removing an oven door, especially for first-timers. Avoid grabbing the door by the glass or applying lateral force that can crack the pane. Don’t remove hinges before you locate all release mechanisms; some models require a latch to be disengaged before screws can be removed. Avoid relying on brute force to free stubborn fasteners—check for hidden screws or clips and verify you’ve supported the door properly. If you notice resistance when lifting the door away from the hinges, stop and recheck your alignment and the presence of any locking features. It’s easy to misplace screws or pins; keeping them in a labeled container helps during reassembly. If you feel uncertain about the step, stop and consult the manual or contact Frigidaire support for model-specific guidance. Documentation and careful handling are key to preserving seals and preventing glass damage.
A common after-action issue is misalignment upon reattachment. If you reassemble incorrectly, the door may rub against the frame or fail to latch. A thorough photo log of hinge positions before removal serves as a reliable guide for reattachment. By understanding typical error patterns and using a methodical approach, you can reduce the chance of misalignment and ensure the door returns to service in its original condition.
When to call a professional or consider replacement
There are scenarios where professional service is the safest path. If you encounter persistent hinge binding, cracked glass, or uneven door weight that causes the door to sit crooked after reattachment, seek professional help. A trained technician can verify hinge integrity, correct misalignment, and re-secure the door with the appropriate torque on fasteners to manufacturer specifications. If you suspect internal components such as springs or bearings have worn out, a service visit is prudent to prevent further damage or safety hazards. Remember that improper door handling can lead to glass breakage or damage to the oven frame, which could be costly to repair. If your appliance is under warranty, check terms first; some warranties require service by an authorized technician for modifications like door removal. The Oven Cook Pro approach favors safe DIY for straightforward detachment, but professional intervention is wise when there’s any doubt about structural integrity or warranty coverage.
Tools & Materials
- Screwdriver set (Phillips and flat-head, multi-bit)(Have size 1 and 2 on hand; model may vary)
- Hex wrench / nut driver(Some hinges use hex fasteners; check model manual)
- Gloves (cut-resistant recommended)(Protect hands from sharp edges and screws)
- Soft padding (towel or blanket)(Place under the door to cushion and protect surfaces)
- Helper (optional but recommended)(Assists in supporting the door during detachment)
- Magnetic tray or small container(Keep screws and pins organized and prevent loss)
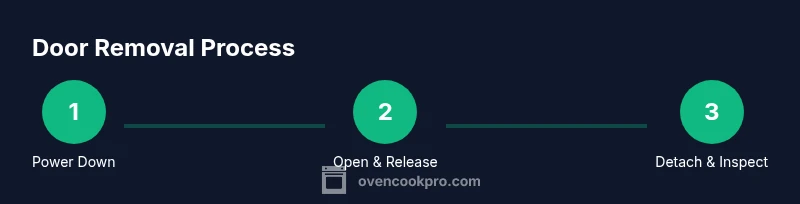
Steps
Estimated time: 25-45 minutes
- 1
Power down and prepare workspace
Unplug the oven or switch off the circuit at the breaker. Allow the unit to cool completely if it has been recently used. Clear the area around the oven, lay a soft surface nearby, and gather your tools so you can work without interruption.
Tip: Lock in a cool-down period and have a helper ready to assist if the door is heavy. - 2
Open door to a safe working angle
Open the door to a 20–30 degree angle to access the hinge area. This position gives you visibility of screws or release mechanisms without putting weight on the glass.
Tip: Take a quick photo of the hinges from multiple angles for reassembly reference. - 3
Support the door and locate fasteners
With the door supported by a padded surface or helper, locate the hinge screws or the release lever that secures the door to the hinges. Confirm you’re looking at the correct fasteners for your model before loosening anything.
Tip: Keep a firm but gentle grip on the bottom edge to prevent the door from tilting or slipping. - 4
Remove hinge fasteners
Using the appropriate driver, loosen and remove the hinge screws or disengage the release mechanism as required. Place fasteners in a labeled tray so you don’t mix them up during reassembly.
Tip: Do not force screws out; if a fastener resists, back off and reassess alignment. - 5
Lift the door away from the hinges
Gently lift the door straight upward while maintaining a level orientation to avoid applying stress to the glass or frame. Move the door to the padded surface and set it down slowly.
Tip: Maintain even weight distribution and avoid twisting the glass during removal. - 6
Inspect components and protect the door
Inspect hinge pins, screws, and the door edge for wear or damage. Clean the hinge area if needed and cover the door surface with a protective cloth when not in use.
Tip: Document any worn parts and consider replacing worn hinges to prevent future issues. - 7
Store the door safely or prepare for reattachment
If you’re not reattaching immediately, place the door on a soft, clean surface with the interior facing up to avoid glass contact. When ready to reinstall, reverse the removal steps in the exact order.
Tip: Label hinge positions and screws to simplify reattachment. - 8
Reattach the door (if proceeding)
Line up the hinges with the mounting holes, reinsert the hinge screws, and tighten gradually in a cross pattern. Open and close the door slowly several times to ensure smooth operation and proper seating.
Tip: Do not over-tighten; snug is sufficient to avoid stripping threads.
Questions & Answers
Is it safe to remove a Frigidaire oven door by myself?
Yes, it is safe when you follow the manufacturer guidelines, unplug the unit, and have a helper support the door. Use proper tools and work slowly to avoid damage.
Yes. Just unplug the oven, use the right tools, and have someone hold the door as you detach it slowly.
What tools do I need other than a screwdriver?
A small hex wrench or nut driver may be required for some hinge types. Check your model’s manual to confirm the exact fasteners and use the appropriate driver.
A hex wrench or nut driver might be needed depending on your model. Check the manual to confirm.
How do I reattach the door after cleaning?
Align the door with the hinge pins, insert the screws or re-engage the latch, and tighten gradually in a cross pattern. Open and close slowly to verify proper seating.
Line up the hinges, secure the screws, and test the door’s movement gently.
What if the door won’t latch after reattachment?
Check hinge alignment and ensure the door sits evenly. If misaligned, loosen screws slightly and reseat the door, then retighten in a cross pattern.
If it won’t latch, check alignment and reseat the door carefully.
Does removing the door affect warranty?
Warranty terms vary by model and region. Review the manual or contact Frigidaire support to confirm whether DIY removal affects coverage.
Warranty terms vary; check the manual or contact support to be sure.
Watch Video
Main Points
- Power down and cool the oven before starting.
- Support the door to prevent drops and damage.
- Identify hinge design before removing fasteners.
- Document screw placements to ensure correct reassembly.