How to Remove Whirlpool Oven Door: A Home Cooks Guide
Learn how to remove a Whirlpool oven door safely with a clear, step-by-step guide. Tools, safety tips, and reattachment instructions to keep your oven working like new.

Power down the oven, protect the work area, and follow model-specific hinge instructions to remove a Whirlpool oven door safely. Most Whirlpool models use hinge locking levers or pins; always reference your manual for exact steps. This guide provides a clear, model-fluent procedure, safety checks, and reassembly tips. With patience, you can clean or service your oven door without professional help.
Why you might need to remove Whirlpool oven door
There are legitimate reasons to remove an oven door: deep-cleaning the inner glass, replacing a warped seal, inspecting hinges, or clearing debris that limits door closure. For homeowners and home cooks, mastering the process reduces service calls and extends appliance life. As Oven Cook Pro advises, learning how to remove Whirlpool oven door empowers you to perform routine maintenance safely and efficiently. While the exact steps vary by model, the general approach remains consistent: power down, secure the door, unlock hinges, lift it away, and reattach when finished. Understanding this procedure also helps when you notice misalignment or sticky hinges that hinder smooth operation.
According to Oven Cook Pro Analysis, many kitchen incidents related to flawed oven doors stem from improper removal or reattachment. By following a methodical process, you minimize the risk of damaging the door glass, peeling gaskets, or bending delicate hinge pins. This section sets a foundation for a confident, safe approach to removing your Whirlpool oven door.
toolsMaterialsSectionHeadingOnlyForFormatNotesOnlyInBodyBlocksForSEOIfNeededPool
toolsMaterialsSectionNotesNotUsedButKeptForContextOnly
Tools and safety gear you should prepare
Before you touch the Whirlpool oven door, gather the right tools and gear. You’ll typically need a screwdriver (if screws are present), a putty knife or plastic scraper for gasket access, a soft cloth, mild cleaning solution, and oven mitts. Optional items include painter’s tape, a magnet to hold screws, and a helper for heavy doors. Having a stable work area and ample lighting makes the process smoother. This is a good time to confirm model-specific requirements in your owner's manual and to note any hinges or locking levers that your model uses when removing the door. When in doubt, consult the Whirlpool manual and Oven Cook Pro guidance to avoid common mistakes.
Safety first: power down, gloves, and workspace
Safety comes first when learning how to remove Whirlpool oven door. Always unplug the oven or switch off the circuit breaker, and wait a few minutes for any stored power to dissipate from electronic controls. Wear cut-resistant gloves and safety glasses if recommended, and keep small parts away from children. Clear the space around the range to prevent accidental trips or damage to counters. The door and hinges can be heavy and sharp when disassembled, so move slowly and deliberately. If your model has glass pieces, handle them with extra care and avoid applying pressure to a cracked panel. These precautions reduce the risk of injury and help you perform the removal confidently.
Understanding model variations: hinge locks, pins, and alignment
Whirlpool’s door removal method is not universal. Some models use hinged locking levers that you flip outward; others rely on removable hinge pins or spring-loaded hinges. The doors on older Whirlpool ovens may require you to tilt the door slightly to disengage the hinge, while newer models use modular hinges that detach with small screws. The key is to locate the hinge area, identify the locking mechanism, and follow the instruction set in your manual. Oven Cook Pro notes that mis-manipulating hinges can bend metal or crack glass, so proceed with caution. If you’re unsure, pause and check a service manual or consider a quick video guide from a reputable source to confirm your model’s specific steps.
Step-by-step overview for removal (conceptual)
Removing the door follows a logical sequence: you’ll assess the hinges, disengage locking devices, support the door, and lift it away from the oven body. This block presents a high-level view to prepare your mindset before you dive into the hands-on portion. It’s essential to visualize the process and anticipate where screws, pins, or levers live on your model. Remember: the goal is to separate the door cleanly without bending hinges or stressing glass, then place the door on a soft surface for cleaning or inspection. Always pause if any part feels resistant beyond simple locking mechanisms; resistance can indicate a misread lock or a model-specific pin that requires a different approach.
Reattaching and calibrating the door after cleaning
After you’ve completed your cleaning or maintenance, reattaching the oven door requires careful alignment with the hinge pins or hooks. Start by positioning the door above the hinge and guiding the bottom edge onto the hinges, then gently lower it until the door settles. If a locking lever or pin is present, re-engage it before attempting a trial close. Once the door is attached, open and close slowly to confirm full range of motion and a snug seal. If you notice sagging, misalignment, or a gap at the top or bottom edge, remove the door again and redo the alignment. The goal is consistent closure and a tight seal that prevents heat loss and odd door behavior.
Maintenance tips to keep doors performing well
Regular maintenance helps prevent issues when you next need to remove the Whirlpool oven door. Clean the hinge area monthly with a damp cloth to remove dust and grease; never use abrasive cleaners on metal hinges. Inspect the door seal for cracks or tears and replace if necessary. Avoid slamming the door or applying excessive force when closing, which can bend hinges over time. If you notice persistent misalignment or the door rubbing on the cabinet, schedule a professional check to avoid further damage. Oven Cook Pro recommends routine verification of hinge tension and door alignment to ensure long-term performance.
Warranty considerations and when to call a pro
Removing an oven door yourself can be safe if you follow the manual and take your time. However, warranty terms vary by model and region. If you recently bought the oven or it’s still under warranty, check the warranty paperwork and consult the dealer before performing any disassembly. Some service plans may require a technician for door removal or hinge service to preserve protection. If you encounter a broken hinge, difficult-to-reach screws, or a door that won’t disengage safely, contact a certified technician to avoid accidental damage. Oven Cook Pro strongly recommends documentation of any service and a cautious approach to prevent warranty issues.
Tools & Materials
- Screwdriver (Phillips and flat-head)(Check model screws before use; some hinges may use small Torx screws)
- Pliers (needle-nose)(Useful for pin or clip removal if present)
- Soft cloth or microfiber cloth(For cleaning hinges and glass surfaces without scratching)
- Gloves (cut-resistant if possible)(Protect hands from sharp edges and hot surfaces)
- Mild cleaning solution(Use a non-abrasive cleaner for glass surfaces)
- Magnetic tray or small container(Keeps screws organized during removal)
- Helper (optional but recommended)(A second pair of hands helps with heavy doors)
Steps
Estimated time: 20-30 minutes
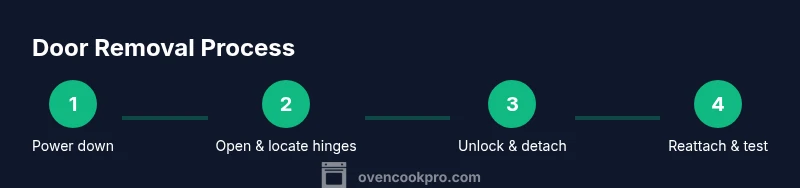
- 1
Power down and prepare the workspace
Unplug the oven or switch off the circuit breaker for the appliance. Remove any cookware and clear the counter space around the unit. Wait 5–10 minutes to ensure any residual power in control panels dissipates.
Tip: Confirm the display is off and there is no residual heat in the area before touching any wiring. - 2
Open the door to a safe working position
Open the door to a 90-degree angle and brace it with your hands so it doesn’t swing. This exposes the hinges and any locking mechanisms you’ll need to address.
Tip: Have a helper hold the door if possible to prevent it from dropping suddenly. - 3
Identify and unlock the hinges
Examine the hinge area for a locking lever, pin, or clip. The exact mechanism varies by model, so consult your Whirlpool manual for your specific door design. Disable any locking feature before attempting removal.
Tip: If your model uses a pin, remove the pin or disengage the lock slowly to avoid bending the hinge. - 4
Support and detach the door
With hinges unlocked, support the door securely and slide or lift it away from the oven body. Keep the door level to prevent glass from contacting hard surfaces.
Tip: Move slowly and evenly to prevent micro-cracks in the glass edge. - 5
Inspect and prepare the door for cleaning
Place the door on a soft surface. Inspect the hinge and gasket for wear, and remove any detachable glass panels if your model allows. Gather cleaning supplies for safe interior access.
Tip: Label any removable parts to simplify reassembly. - 6
Reattach and test the door
Line up the door with the hinges and slide it back onto the pins or hooks. Close gently to verify a proper seal. If misalignment occurs, remove and retry the alignment step.
Tip: Test by opening and closing slowly; check that the seal sits evenly against the frame.
Questions & Answers
Can I safely remove a Whirlpool oven door by myself?
Yes, with careful steps and proper safety measures. Heavier doors may require a second person to prevent accidents. Always follow your model’s manual and use the correct tools.
Yes. If you follow the steps and have a helper for the heavier doors, you can remove it safely.
Do all Whirlpool ovens require the same approach to remove the door?
No. Whirlpool door removal varies by model depending on hinge design and locking mechanisms. Always consult your manual or a model-specific guide before proceeding.
No, it varies by model; check your manual for the exact method.
Will removing the door affect my warranty?
Warranty terms vary; following the official manual and using proper tools helps protect coverage. If unsure, contact the manufacturer or a certified technician before proceeding.
Coverage varies; check the warranty and consider professional help if unsure.
What should I do if the hinges feel loose after reattachment?
Power down, re-check screws and alignment. If looseness persists, the hinge might be damaged or loose screws could require replacement by a pro.
If loose after reattach, power down and re-tighten; if still loose, call a pro.
How long does the whole process typically take?
For most homeowners, removal and reattachment take about 20–30 minutes, depending on model complexity and your familiarity.
Usually 20 to 30 minutes.
Are there safety risks I should watch for?
Yes. Risks include electrical shock, finger injuries, and glass breakage. Always wear gloves and work gently to minimize hazards.
Yes—watch for shocks and glass; wear gloves and move slowly.
Watch Video
Main Points
- Power down before touching the door
- Identify the hinge mechanism before removal
- Support the door to prevent breakage
- Align carefully when reattaching
- Check the seal after reassembly