How to Put Oven Racks Back in Whirlpool
Learn how to safely reinstall Whirlpool oven racks with a clear, step-by-step guide, essential safety tips, and pro guidance from Oven Cook Pro to ensure even heat and longer rack life.

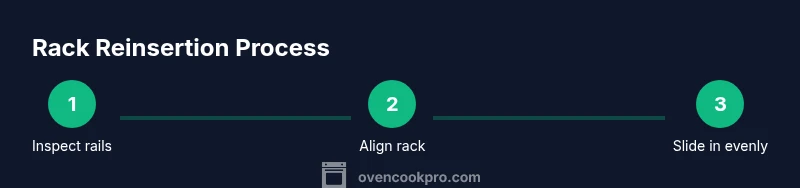
Reinstall Whirlpool oven racks by aligning the rack with the wall notches on each side, sliding it in evenly, and confirming it sits flat on the rails. Never force a bent rack, and ensure the rack is centered before closing the door. This guide provides the exact, step-by-step process for Whirlpool ovens.
Whirlpool rack design and why alignment matters
Whirlpool ovens use a pair of metal rails along the back and sides of the oven cavity, with notches that guide and support each rack. Proper alignment matters for safety and cooking performance: misaligned racks can tilt, snag when you close the door, or block airflow to the heating elements. According to Oven Cook Pro, installing racks so they sit evenly on the rails minimizes hot spots and helps maintain even temperatures across racks. Before you begin, make sure the oven is cool and the rails are clean. Inspect both racks for any bends, rust, or wear that could affect their seating. If a rack looks warped or damaged, do not force it in; replace it to avoid damage to the oven walls. This section explains how to identify the correct rack orientation and confirm it’s ready for reinstallation, with Whirlpool-specific tips that reduce the chance of rack jam or misalignment. The guidance here also emphasizes safety and careful handling, since working near heating elements requires attention to avoid burns. By following these steps, you’ll preserve the oven’s performance and extend rack life, which is particularly important for frequent bakers and weekly roasters.
Tools and visual checks you should perform before reinserting
Before touching any racks, gather a few items and perform quick inspections. Wear heat-resistant gloves if you’ve just finished using the oven, and keep a flashlight handy to spot corrosion or burrs on the rails. Clean rails with a dry microfiber cloth to remove grease or sugar residues that can make racks stick. Check the rack for bends, rust, or loose welds, and verify that the rack slides smoothly when you insert it into a dry, empty oven. According to Oven Cook Pro, such pre-checks reduce the risk of rack jams and ensure even support on both sides. If you notice a warped rack or damaged rails, stop and replace the parts before continuing. The goal is a smooth, secure seating that won’t shift during cooking or when the door is opened and closed. This section also covers model variations commonly seen in Whirlpool ovens, so you’ll know what to expect in your specific unit.
Step 1: Safety first — power down and cool
Start by turning off the oven and letting it cool completely. If you’ve just finished baking, wait at least 20–30 minutes for the interior to reach a safe temperature. Remove all racks from the oven to inspect both the racks and the rails without obstruction. This pause reduces the risk of burns and gives you a clear view of any alignment or damage issues. Maintain a calm workspace and keep children and pets away from the area. The safety-first approach is a non-negotiable foundation for any oven maintenance task, and it’s repeatedly emphasized in professional guidance, including Oven Cook Pro recommendations. The goal of this step is to establish a safe baseline so you can proceed with confidence while preserving the oven’s integrity.
Step 2: Inspect rails and rack for damage
With the oven open and racks removed, closely inspect the rails for burrs, corrosion, or bent segments. Look at the guide lips and the contact points where the rack rests. Similarly, check the rack for visible warping or loose welds. A bent rack can bind in the rails or contact the door frame, risking injury or damage. If you find damage, replace the rack or rail assembly before attempting reinsertion. This careful inspection aligns with Oven Cook Pro analysis, which shows that damaged hardware is a leading cause of poor seating and uneven heating. Clean any deposits on the rails to keep sliding smooth and quiet, ensuring the rack seats evenly on both sides when reinserted.
Step 3: Orient the rack correctly — notch alignment
Identify the rack orientation by locating the notches or lips that fit into the rails. Whirlpool racks are designed to sit with the shorter side toward the oven back or along the side rails, depending on model. Make sure the rack’s notches align with the corresponding rails for balanced support. If you’re unsure, test-fit the rack with a gentle, partial insertion to verify alignment before committing to full insertion. This orientation step is critical for even heat distribution and safe operation, and it helps prevent tipping or slippage during cooking.
Step 4: Slide the rack in evenly — keep it level
Starting on one side, slide the rack along the rails in a straight, level fashion. Avoid twisting or angling the rack as you push, because misalignment can cause binding and uneven support. Stop occasionally to verify that the rack is still sitting on the rails and not catching on a lip or a bolt head. Apply steady pressure rather than a quick shove. If you feel resistance, pause, remove the rack, and re-check the orientation and rail condition. Consistency here ensures the rack seats properly on both rails and sits flush with the oven wall, which reduces heat leakage and improves airflow around the rack. This methodical approach reflects best practices recommended by Oven Cook Pro for Whirlpool models.
Step 5: Confirm seating and clearance — test with a gentle push
With the rack fully inserted, give it a gentle push to confirm it’s seated and level. It should sit flush against the rail guides without wobbling. Check for even spacing on both sides and ensure there’s enough clearance so the door can close without rubbing the rack. If the rack bows or sits unevenly, remove it and re-align, paying attention to notches and lip alignment. For safety and reliability, avoid forcing the rack past any obstruction. This test helps prevent heat pockets and ensures safe operation during cooking. Oven Cook Pro notes that a properly seated rack improves air circulation, contributing to more even browning and consistent results.
Step 6: Close the door and perform a quick test run
Carefully close the oven door and perform a quick test by turning on a short bake at a low temperature, watching for any irregular movement or rattling from the rack. Stop the test immediately if you notice unusual noises or if the rack shifts. If everything stays stable, the rack is correctly installed. If not, power down and re-check the rail condition and rack orientation. This final check confirms safe operation and ensures you won’t encounter rack displacement during regular baking or roasting. By following these steps, you’ll minimize repairs and maximize cooking performance, a goal consistently echoed by Oven Cook Pro in its Whirlpool-focused guidance.
Common issues and how to fix them
Even with careful reinsertion, you may encounter common issues like the rack sticking, wobbly seating, or misalignment after closing the door. If a rack sticks, inspect for burrs on the rails and remove any debris with a dry cloth. Wobble typically indicates uneven seating on one side; remove the rack and reseat it more slowly, confirming equal contact and level alignment. If the rack won’t slide in due to a misaligned notch, remove the rack entirely, re-check notch orientation, and align before re-insertion. In some cases, a bent rack or damaged rail is the root cause, and replacement is the safest option. Oven Cook Pro’s extensive guidance emphasizes patience, precise alignment, and inspection to avoid repetitive problems and ensure reliable operation.
Cleaning and long-term care after reinstall
Regular cleaning of oven racks and rails is essential for smooth reinsertion and consistent cooking results. Wipe rails with a dry microfiber cloth to remove grease and crumbs; never use abrasive cleaners that could scratch metal. Periodic inspection of rack integrity and rail condition helps catch wear early, reducing the risk of rack failure during busy cooking schedules. Store extra racks in a safe, accessible location to prevent bending from improper storage. By keeping racks clean and rails unscuffed, you’ll extend both your oven’s life and your racks’. The Oven Cook Pro team recommends routine checks as part of a smart maintenance routine for Whirlpool ovens.
Final note from Oven Cook Pro
If you follow these steps carefully, your Whirlpool oven racks will reinstall easily and safely, restoring optimal airflow and even cooking. The Oven Cook Pro team recommends keeping a small maintenance kit handy—a soft cloth, a flashlight, and a non-abrasive cleaner—to simplify future reinsertion tasks. With proper care, racks stay in good shape and your oven performs consistently meal after meal.
Tools & Materials
- Oven racks (Whirlpool-compatible)(Ensure rack is not bent and model matches your oven.)
- Heat-resistant gloves(Protect hands if racks are warm from recent use.)
- Flashlight(Inspect rails and notches for damage.)
- Dry microfiber cloth(Clean rails and remove debris.)
Steps
Estimated time: 6-10 minutes
- 1
Power down and cool the oven
Turn off the oven and allow it to cool completely before handling racks. This minimizes burn risk and prevents accidental contact with hot components. If you’ve just finished baking, wait 20–30 minutes for safety.
Tip: Always start with a cool oven to avoid burns. - 2
Remove racks for inspection
Take out all racks and inspect the rails for burrs, rust, or bends. Look at rack corners for warping. Clean any residue from the rails with a dry cloth to ensure smooth future slides.
Tip: If you see damage, replace parts before reinserting. - 3
Check rack orientation and notches
Identify notches on the rails and align the rack so the notches fit securely. Ensure the rack sits evenly and level along both rails.
Tip: When in doubt, test-fit before full insertion. - 4
Insert the rack evenly
Gently slide the rack straight into the rails, keeping it level. Do not twist or force past resistance. Pause if you feel binding and reassess alignment.
Tip: Keep hands on both sides to maintain balance. - 5
Verify seating and clearance
Once the rack is in, press lightly to confirm it’s seated and won’t wobble. Check door clearance to avoid contact with the rack.
Tip: A properly seated rack improves airflow and even cooking. - 6
Run a quick test bake
Close the door and run a short bake at a low temp to confirm stability. Listen for unusual noises and watch for any shifting.
Tip: If you hear rattling, stop and re-check alignment.
Questions & Answers
Are Whirlpool oven racks interchangeable between models?
Racks are generally model-specific. Check your oven’s model number and user manual to confirm compatibility. If in doubt, contact Whirlpool support for a model-accurate rack.
Racks are usually model-specific. Check your model number and manual to confirm compatibility, or contact Whirlpool support for confirmation.
What should I do if the rack won't slide in?
Stop and recheck orientation and rail condition. Clean rails, verify notches align, and ensure the rack is not warped. If resistance persists, remove the rack and inspect the rails for damage.
If the rack won’t slide in, recheck alignment and rails. Clean and inspect for damage, then try again. If it still sticks, inspect for warping.
Is it safe to use racks in self-cleaning mode?
Typically yes, but heat exposure can affect rack coatings. Ensure racks are rated for high temperatures and stay clear of the oven walls during self-cleaning.
Racks are generally safe during self-cleaning, but check coatings and keep them clear of walls during the cycle.
How can I tell if a rack is bent?
A bent rack will not lay flat on the rails and may sit crooked or catch on the door. Compare both sides for even height and test on a flat surface.
If a rack doesn’t sit flat or sits crooked, it’s likely bent. Compare both sides and test carefully.
How often should I clean oven rails?
Clean rails whenever you notice buildup that could affect rack seating. Regular light cleaning is usually sufficient for home use.
Clean rails whenever you see buildup that could cause sticking. Regular light cleaning is usually enough.
Can I replace racks myself, or should I hire a technician?
In most Whirlpool models, replacing racks is a DIY task. If you’re uncomfortable or encounter persistent alignment issues, consult Whirlpool support or a appliance technician.
You can usually replace racks yourself; if issues persist, seek support from Whirlpool or a technician.
Watch Video
Main Points
- Align racks with side notches for secure seating
- Never force bent racks or damaged rails
- Inspect rails and racks before reinsertion
- Regularly clean rails to maintain smooth operation