How to Put Oven in Preheat: A Step-by-Step Guide
Master how to put oven in preheat with clear steps, safety tips, and pro insights from Oven Cook Pro. Set temperature, verify readiness, and bake confidently.

To learn how to put oven in preheat, start by choosing the target temperature. Close the door, select bake or convection bake, and press Start. Wait for the preheat indicator or thermometer to reach the set temp. If using a kitchen thermometer, verify the reading before inserting food. Keep the door closed during preheating and avoid opening it often, which slows heating.
Why Preheating Matters for Baking Consistency
Understanding why you preheat an oven matters is the first step in reliable baking. A properly heated oven ensures even heat distribution, accurate baking times, and better crust formation. According to Oven Cook Pro, a precise preheat routine helps home cooks achieve more consistent results across a wide range of recipes. When you preheat, you establish the temperature that your food will experience from the moment it enters the oven, reducing temperature shocks that can lead to underdone centers or burnt exteriors. In addition, preheating helps activate leavening agents at the right moment, producing better rise and texture. If you skip or rush this step, you’ll often notice uneven browning or longer bake times. Taking the extra minutes to preheat is a small investment for noticeably better outcomes.
- Key takeaway: Preheating aligns oven temperature with recipe expectations, improving bake quality and consistency.
- Practical tip: Use an oven thermometer to confirm the target temperature and catch any calibration drift quickly.
Oven Types and Preheat Behavior: Conventional vs Convection
Different oven designs heat and distribute heat in distinct ways, which impacts preheating times and behavior. Conventional (standard) ovens rely on heating elements located at the top and bottom; temperatures can lag behind the set point, especially in older units. Convection ovens include a powered fan that circulates hot air for faster, more even heating, which often reduces preheat time by several minutes and can shorten bake times. If your recipe specifies convection, you’ll typically reduce the temperature by about 25°F (15°C) or adjust bake times accordingly. Note that preheat indicators may operate differently in each mode: some models show a single “ready” light, while others use a digital readout that confirms the set temperature exactly. Adapting to your oven’s mode helps you predict results more reliably.
Step-by-Step: Practical Preheat Scenarios
In practice, you’ll encounter several common scenarios when preheating. For most recipes, you’ll select Bake (or Convection Bake if your recipe calls for it) and set the target temperature. Close the door and let the oven come to temperature without opening the door. For dense or heavy bakes, some cooks choose to allow the oven to warm with a baking stone or pan inside to help regulate heat. If your oven has a separate preheat function, you can use it in place of manual temperature setting. Remember: the goal is a stable, verified temperature at the moment you start cooking. In kitchens with multiple ovens, you may preheat one oven while keeping the other warm for subsequent steps, but avoid cross-heating issues by labeling pans and racks clearly.
Tip: If you’re cooking multiple items at different temps, preheat to the highest temp you’ll need and let lower-temp items come closer to room temperature before placing them in the oven.
Temperature Targets for Common Bakes
Knowing typical preheat targets helps you plan ahead. For most breads and pastries, preheating to 350–425°F (175–220°C) is common, while roasting meats can require higher temps like 400–450°F (200–232°C). For delicate cakes, medium ranges around 325–375°F (165–190°C) are typical. Always start from your recipe’s specified temperature and adjust only if you know your oven’s calibration. If you’re unsure about your model’s performance, preheat longer and validate with a thermometer to ensure the interior temperature matches the recipe’s expectations before introducing batter or dough.
Using a Thermometer: Accuracy Matters
A reliable oven thermometer placed inside the oven is the best way to confirm the actual heat, independent of the oven’s built-in sensor. Calibrate or re-check the thermometer against a known standard if you notice inconsistent results. When the thermometer reads the exact target temperature, you can confidently insert foods. If you don’t have a thermometer, rely on your oven’s preheat indicator and perform a quick visual/texture check to gauge readiness. For convection ovens, use the temperature reduction guideline if your recipe accounts for air circulation. A thermometer helps you avoid the all-too-common issue of a hot exterior with a cool center.
Safety and Maintenance During Preheating
During preheat, keep doors and drawers closed as much as possible to maintain even heat. Use oven mitts when interacting with racks and pans, and avoid leaving flammable items near the oven. If you notice smoke, unusual smells, or the oven won’t reach the target temperature, turn off the oven and consult your user manual or a technician. Regular calibration checks, especially on older models, help sustain consistent performance. Keeping the area around the oven clear and clean reduces the risk of grease buildup affecting heat distribution and making preheating less predictable.
Troubleshooting Preheat Problems
If the oven seems slow to preheat or won’t reach the target, start with the simplest checks: ensure the door seals properly, confirm you’ve selected the correct mode, and verify you’re using the right unit of temperature (Fahrenheit vs Celsius). A faulty element or sensor can impair performance; in that case, refer to the manufacturer guidance or schedule service. For gas ovens, ensure the burner ignites consistently; for electric ovens, verify that the bake element glows evenly when preheating. Keep a simple log of temperatures and times to identify patterns that a technician can use to diagnose issues more quickly.
Quick-Start Preheat Checklist
- Confirm target temperature and mode (Bake vs Convection Bake).
- Close the door and avoid peeking during heating.
- Place an oven thermometer to verify actual temperature.
- Wait for the indicator or thermometer to confirm readiness.
- Prepare racks and pans only after preheating completes if recipe requires.
- In convection mode, apply recommended temp reduction when following recipes.
Real-World Testing: Preheating with Stones, Pans, and Small Kitchens
Preheating with a baking stone or a heavy steel pan can affect heat distribution, particularly in compact kitchens where heat may dissipate quickly. If you use a stone, allow extra preheat time to ensure the stone comes to temperature and can transfer heat evenly to the dough or batter. When you switch between different bakeware, temperature readings can vary slightly; a thermometer helps you capture those nuances and adjust future recipes accordingly. In sum, preheating is a controllable step that pays dividends with consistent texture, browning, and rise across a wide range of oven-based cooking.
Tools & Materials
- Oven(Electric or gas; ensure power/gas supply is functioning and oven is clean.)
- Oven thermometer (optional but recommended)(Place inside to verify actual temperature; avoid relying solely on the oven’s built-in sensor.)
- Timer or timer function on the oven(Use to track preheat duration and avoid overheating.)
- Oven mitts(For safe handling of racks and hot pans.)
- Baking sheet or pan (optional)(Helpful for testing heat distribution or readying for future baking.)
Steps
Estimated time: 15-25 minutes
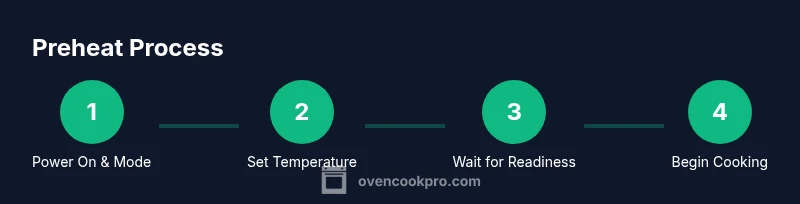
- 1
Power on and select mode
Turn on the oven and choose Bake (or Convection Bake if your recipe specifies it). Check that the display shows the target temperature you set. This initial step ensures the oven begins heating toward the correct target.
Tip: If your oven has a dedicated Preheat function, you can use it to standardize the preheating cycle. - 2
Set the temperature
Dial in or input the recipe’s required temperature. Double-check that you’re using the correct unit (Fahrenheit or Celsius) for your model.
Tip: Some ovens require you to press Start after selecting temperature. - 3
Close the door
Shut the oven door firmly to trap heat inside. Refrain from opening the door repeatedly, as this interrupts the heat buildup and extends preheat time.
Tip: Opening the door wastes energy and can lead to uneven preheating. - 4
Wait for preheat to complete
Allow the oven to come to temperature. If your model has a preheat indicator light or beep, rely on that signal instead of guessing.
Tip: For convection ovens, expect faster stabilization and monitor accordingly. - 5
Optional: verify with thermometer
Insert an oven-safe thermometer away from heating elements to confirm the actual temperature matches the set point.
Tip: Place the thermometer center of the oven, not near a vent or door edge. - 6
Prepare racks and cookware
While the oven reaches the target temp, position racks and warm pans near the oven so you’re ready to bake as soon as preheating finishes.
Tip: Avoid placing cold pans in a hot oven; let warmed items come to room temp first if possible. - 7
Convection considerations
If using convection, lower the set temperature by about 25°F (15°C) or adjust bake times as your recipe directs.
Tip: Convection air flow can boost browning and evenness. - 8
Begin cooking or test again
Once the target temperature is verified, you can start cooking. If you’re testing performance, run a small trial bake to confirm results before committing to a full batch.
Tip: Document any variations to refine future preheating accuracy.
Questions & Answers
Why should I preheat the oven before baking?
Preheating ensures even heat distribution, accurate bake times, and consistent browning. It activates leavening agents at the right moment and helps avoid cold spots that can ruin texture.
Preheating makes sure the oven is hot enough everywhere, so your baked goods rise evenly and brown consistently.
Can I skip preheating for quick meals?
Some fast-cooking foods may not require full preheating, but many recipes rely on a stable starting temperature for proper texture and timing. When in doubt, preheat.
For most recipes, preheating is still recommended for best results.
How long does preheating usually take?
Preheat times vary by oven model and temperature, but ten to fifteen minutes is common for many home ovens. Use an oven thermometer for accuracy.
Usually around ten to fifteen minutes, but check with a thermometer to be sure.
What should I do if the oven won’t reach the set temperature?
Check door seals, heating elements, and ensure you’ve selected the correct mode. If issues persist, consult the manual or contact service.
If it won’t reach the temperature, inspect seals and elements, then seek service if needed.
Is preheating different for convection ovens?
Convection ovens often heat faster; you may reduce the temperature by about 25°F (15°C) or shorten bake times per recipe guidance.
Convection can speed up heating, so adjust temps or times accordingly.
Should racks be in during preheating?
Yes, keep racks in place unless your recipe calls for a different setup. This helps the oven heat evenly from the start.
Racks should stay in place to ensure even heating from the get-go.
Watch Video
Main Points
- Set the correct temperature before baking
- Keep the door closed during preheating
- Use an oven thermometer for accuracy
- Verify readiness before inserting food