How to Fit an Oven Hood: A Complete Step-by-Step Guide
Learn a complete, safe method to fit an oven hood with clear steps, planning tips, and pro insights from Oven Cook Pro. Ideal for homeowners and DIYers seeking reliable venting and installation guidance.

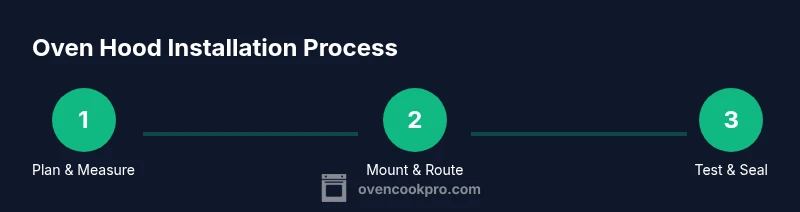
By following this guide, you will safely fit an oven hood that vents properly and looks great. Start with measuring your cabinet space, choose a hood that fits your ceiling clearance and duct layout, and secure it with proper mounting brackets before connecting the duct. This steps-focused approach minimizes error and ensures code-compliant venting.
Planning and safety considerations
Before you lift a finger, map your kitchen layout and confirm venting options. Identify whether you have an exterior vent path or if a recirculating hood is more practical. Check local codes for electrical requirements and venting clearances, and ensure you have a clear workspace with enough headroom. According to Oven Cook Pro, a thoughtful plan reduces rework, minimizes material waste, and helps you select the right hood size and ducting path from the start. Safety is paramount—disconnect power, use a stable ladder, and wear eye protection when cutting panels or ducting. If you’re uncertain about wiring or vent routing, consult a licensed professional. A well-planned install saves time and prevents costly mistakes later in the process.
Measuring space and selecting the hood
Accurate measurements are the foundation of a successful fit. Measure ceiling height, cabinet depth, wall clearance, and the hood’s width, noting the minimum and maximum ducting lengths. Choose a hood that matches or slightly exceeds your cabinet width for balanced appearance and performance. Consider your kitchen’s airflow needs: higher ceilings or long duct runs may require a more powerful fan. Review installation manuals for mounting height guidelines relative to your cooking surface. Keep in mind that some homes require venting through an exterior wall, while others can use ceiling ductwork. Oven Cook Pro’s guidance emphasizes choosing a hood with a compatible duct size and a standard mounting pattern to ease installation and future replacements.
Preparing the work area and electrical plan
Clear the installation zone of obstacles and remove any obstructions within a 3–4 foot radius. If your hood requires wiring, plan for a dedicated junction box or a nearby outlet conforming to local electrical codes. Turn off the circuit feeding the area and verify with a tester that power is off. Have a plan for cable routing and strain relief so the cord won’t snag on drawers or doors. For gas or electric ranges, allow adequate clearance for heat dissipation and service access. Document your plan and keep a copy of the hood’s wiring diagram handy for reference during connection and testing.
Mounting considerations: wall vs cabinet installations
Hoods can mount to a wall or under a cabinet, depending on space, ducting, and aesthetics. Wall-mounted installations often require a sturdy stud mounting or a dedicated cabinet support frame. If you’re mounting under a cabinet, ensure the cabinet structure can bear the hood’s weight and that mounting screws align with internal studs or provided brackets. Level the hood precisely to avoid tilt that can affect airflow and grease collection. Use a helper or a suction cup tool for alignment during initial placement. Check that the hood’s bottom edge sits at a practical height above the cooktop—usually within 24–30 inches for most cooking surfaces, but consult the manufacturer’s guidelines for your model.
Installing the hood: bracket mounting and alignment
Attach the mounting brackets to the wall studs or cabinet frame using the appropriate screws and a level. Then lift the hood onto the brackets and adjust for plumb and level. Secure the hood to the brackets, recheck the alignment, and ensure there is no movement. This step is critical: misalignment can degrade performance and cause uneven grease collection. If the hood is heavy, consider temporary support or a second pair of hands. Keep a notebook handy to note screw lengths and bracket positions for future maintenance or replacement.
Ducting options: routing, sealing, and vent type
Decide between external venting (ducted) or a non-venting recirculating system. For ducted installs, plan a short, straight route with minimal bends to maximize airflow. Use metal ducting appropriate for cuisine-grade venting and secure joints with foil tape, not standard duct tape. Seal all joints with mastic or interior sealant to prevent air leaks and reduce noise. If you must pass through ceilings or walls, cut clean holes and use appropriately sized ducts. For recirculating hoods, ensure the charcoal filters are properly installed and that the hood has adequate resistance and non-venting guidelines from the manufacturer.
Electrical connections: safety basics and professional boundaries
Always de-energize circuits before working near electrical components. If your hood requires a hard-wired connection, hire a licensed electrician to complete the work to code. For plug-in installations, ensure the outlet is properly grounded and accessible for removal if service is needed. Route any wiring away from heat sources and grease-prone areas. Use strain relief where the cord passes through the cabinet or wall. Document the circuit and create a simple labeling system for future maintenance or upgrades.
Testing, sealing, and airflow optimization
With the hood mounted and ducted/exhausted, restore power and run the fan at various speeds to verify airflow, noise, and vibration levels. Check all duct joints for leaks and reseal as needed. Look for smoke or a light visible from the duct path to confirm vent high-velocity airflow. If the hood doesn’t vent effectively, inspect filters, duct length, bends, and sealant integrity. Ensure the chimney or vent cover fits flush and that the exterior vent cap remains unobstructed. Routine testing after installation helps maintain performance and energy efficiency.
Variations, troubleshooting, and maintenance tips
Some kitchens require alternative mounting solutions or non-standard duct routes. If the hood sits near collapsing cabinetry or a fragile ceiling, you may need to reinforce mounting points or adjust bracket heights. Common issues include noisy operation, weak exhaust, or sagging hoods. Check for loose screws, obstructed filters, or dirty fan blades. Schedule regular maintenance—clean grease filters every 1–3 months, inspect ducting for corrosion, and replace damaged seals promptly. Following these practices will extend hood life and ensure consistent performance. The Oven Cook Pro team recommends reviewing the hood’s user manual for model-specific maintenance intervals and cleaning methods.
Tools & Materials
- Measuring tape(at least 3 meters; measure width, height, and duct path clearly)
- Pencil and level(for marking mounting holes and ensuring level alignment)
- Screwdriver set (Phillips and flathead)(use appropriate head size for mounting screws)
- Drill with masonry and wood bits(needed for wall anchors or pilot holes)
- Stud finder(helps locate studs for secure mounting)
- Tin snips or metal shears(for cutting ducting if needed)
- Ducting (metal or semi-rigid), appropriate diameter(match hood outlet size; shorter, straighter routes preferred)
- Foil tape or duct tape (heat-resistant)(seal duct joints; avoid regular tape)
- Silicone sealant or mastic(seal around duct penetrations and joints)
- Safety gear (gloves, safety glasses)(protect hands and eyes during installation)
- Ladder or stable step stool(ensure safe reach to ceiling level)
- Electrical tester(verify circuit power off before work)
- Assistant or temporary support(helps with lifting and alignment)
Steps
Estimated time: 2-4 hours
- 1
Assess space and hood compatibility
Measure the available width, height, and duct path. Compare with the hood's dimensions and clearance requirements. Confirm whether you’ll vent through an exterior wall or ceiling. Make a simple plan on paper before you touch tools.
Tip: Double-check that the hood width matches or slightly exceeds the cabinet width to avoid overhangs. - 2
Prepare mounting zone
Clear the area and locate studs or a solid backing. Mark stud locations and drill pilot holes for brackets. If using a cabinet, ensure it can support the hood’s weight and secure brackets to the frame.
Tip: Use a level to ensure straight placement before mounting brackets. - 3
Attach mounting brackets and anchor points
Install brackets to studs or the cabinet frame using appropriate screws. Verify bracket spacing matches the hood’s mounting holes. Use a helper to hold brackets in place while securing.
Tip: Pre-drill holes to prevent wood splitting and ensure solid anchors. - 4
Hang the hood and verify alignment
Lift the hood onto the brackets and align with the planned position. Check that the unit is level and centered over the cooktop. Fine-tune as needed before final securing.
Tip: Have a second person assist to avoid bending or dropping the hood. - 5
Route ducting path
Plan a straight path with minimal bends. Cut holes through walls or ceilings as needed, using proper tools. Fit ducts and test fit before sealing.
Tip: Keep duct length as short as possible to reduce resistance. - 6
Seal joints and connect ducting
Assemble duct sections and seal joints with foil tape. Avoid leaks that reduce suction. Secure ducts with clamps and ensure a smooth internal surface.
Tip: Avoid overly tight bends; maintain a gradual curve to preserve airflow. - 7
Connect electrical supply
If the hood is plug-in, plug into a grounded outlet. For hard-wired models, hire a licensed electrician. Keep wiring away from heat and grease and use strain relief where needed.
Tip: Turn off power at the breaker before any electrical work. - 8
Test operation and seal around edges
Restore power and run the hood at all speeds. Listen for excessive noise and check for air leaks around the duct and cabinet edges. Apply sealant where gaps exist and adjust if necessary.
Tip: Use a smoke pencil or incense to visualize airflow and leaks.
Questions & Answers
Do I need a professional to fit my oven hood?
For many homes, basic mounting and ducting can be done by a confident DIYer. Electrical connections or complex duct runs should be handled by a licensed professional to ensure safety and code compliance.
For many kitchens, beginners can handle mounting, but electrical and complex duct routes should be done by a professional to stay safe and compliant.
What is the difference between ducted and ductless hoods?
Ducted hoods vent air outside, offering better airflow and odor control. Ductless hoods recirculate air through filters back into the kitchen and are easier to install but require filter maintenance.
Ducted hoods vent outside for strong airflow, while ductless recirculate air with filters, needing more frequent filter changes.
How high should a hood be mounted above the cooktop?
A common guideline is 24–30 inches above the cooking surface, but always follow the hood manufacturer’s recommendations for your model and your cooktop type.
Typically 24 to 30 inches above the stove, but check the hood’s instructions for your model.
Can I vent a hood through an upper cabinet?
Venting through an upper cabinet is possible with the right clearance and structural support, but it can complicate duct routing and access for service. Prefer direct paths where feasible.
Yes, but it can complicate routing; direct paths are usually easier for service and airflow.
What if my kitchen has no exterior wall?
In some cases, a recirculating hood is the practical option. It filters air and returns it to the room, but requires good-quality filters and regular maintenance.
If there’s no exterior wall, a recirculating hood may be your best option with regular filter maintenance.
How long does a typical hood installation take?
Most installations take 2–4 hours for an experienced DIYer, depending on duct routing and electrical work. More complex setups may require additional time.
Most installs take a few hours; more complex routes can take longer.
Watch Video
Main Points
- Plan layout and measurements before tools.
- Mount on solid backing with level alignment.
- Choose ducted or recirculating based on home layout.
- Seal all joints to maximize airflow and minimize noise.
- Celebrate when you test and see proper venting and airflow.