How to Bake on Broil: A Step-by-Step Guide
Learn safe, effective methods to bake on broil with expert steps, setup tips, and real-world examples. From rack positioning to finishing browning, Oven Cook Pro shares a clear, home-cook-friendly approach.

Mastering how to bake on broil means using the oven's top heat to brown and finish foods. This guide covers when to use broil for baking, rack placement, safe temperatures, and timing for vegetables, fish, and poultry. You’ll get practical steps and safety notes for reliable results.
What it means to bake on broil
According to Oven Cook Pro, baking on broil means using the oven's upper heating element to drive browning and create a crisp exterior while maintaining interior moisture. This approach is not a full replacement for standard baking; rather, it acts as a finishing step or targeted browning method. In practice, you typically start with a conventional bake or roast, then switch to broil to develop color and texture on the surface. Understanding the heat dynamics—intense, direct top heat—helps you control scorching, dryness, or pale spots. By mastering this technique, you can finish casseroles, fish fillets, vegetables, and even open-faced melts with a favorable crust.
When to use broil for baking
Broil is most effective as a finishing technique or for small, quick browning tasks rather than as the primary cooking method. It shines when you want a crisp exterior on already-cooked or nearly-cooked foods, like finishing a roasted chicken breast with a browned crust, browning the top of a casserole, or quickly melting cheese on a gratin. For delicate items, use shorter bursts and lower heat if your oven allows, to avoid over-drying. The goal is even browning without overcooking the interior.
Tools and setup you’ll want
Before you begin, gather a sturdy broiler-safe pan or sheet pan, a rack that fits your oven, and long-handled tongs or spatulas. Have an oven-safe thermometer handy if you’re finishing based on internal temp. Line the pan with aluminum foil for easier cleanup, but ensure food makes direct contact with the rack or pan surface where browning is desired. Keep a reliable timer and an oven mitt within reach. For safety, avoid nonstick pans that aren’t rated for high direct heat, and never leave the broiler unattended for long periods.
Temperature, positioning, and timing basics
Broil uses direct top heat, so heat is intense and fast. Place the oven rack close to the top heating element, typically a few inches away, to begin browning quickly while monitoring closely. Foods vary in ideal timing, but you should observe color development in short bursts and flip or rotate as needed to ensure even browning. If your oven preheats, allow a brief warm-up; if not, expect quicker browning once food hits the hot surface. Always check for an even crust before removing from heat.
A practical workflow for bake-on-broil
To execute a reliable bake-on-broil, think in a small, repeatable loop: prep and dry, arrange with space, start with a brief high-heat phase, monitor closely, flip or rotate for even browning, finish with a short heat, and rest briefly before serving. This loop helps prevent overcooking and scorching while achieving a uniform crust. Keep a timer handy and work in short bursts to maintain control over color and texture.
Finishing touches: browning, moisture, and carryover heat
Browning is about surface texture and appearance, not just color. After browning, allow the food to rest for a few minutes; carryover heat will continue to cook the interior slightly. If moisture seems trapped, open the oven door briefly to vent steam and prevent soggy surfaces. For items prone to dryness, brush surface with a little oil or butter before finishing, or glaze with a light sauce to improve gloss and flavor balance.
Safety and common mistakes
Common mistakes include overcrowding the pan, which blocks browning, leaving the oven door ajar when not necessary, and broiling foods that are too thick or uneven in shape. Over-broiling can lead to burnt edges and dry interiors. Always use a stable, heat-safe pan and protect your hands with a thick glove when turning food. If you notice smoke, move the food away briefly and reassess heat levels.
Real-world recipe examples: fish, vegetables, and poultry
For fish fillets, a thin-cut veggie like asparagus, or a lean chicken cut, a short, intense broil finish can yield a bright crust and moist center. Start with a brief high-heat burst, then reduce exposure with short intervals. Vegetables may release moisture that steams rather than crisps; in those cases, pat dry and give them a light oil coating. Poultry benefits from careful browning on the exterior for flavor, followed by a little rest to redistribute juices.
Troubleshooting guide
If browning is uneven, rotate the pan and adjust the rack height. If the interior is undercooked, consider finishing with a brief bake after the broil cycle, or allow additional resting time. For items that scorch easily, reduce the duration of each broil burst and increase monitoring frequency. Always start with the lowest effective heat and lengthen in small increments to stay in control.
Tools & Materials
- Broiler-safe pan or sheet pan(Metal preferred; avoid glass under direct top heat)
- Wire rack that fits inside the pan(Allows air to circulate for even browning)
- Long-handled tongs or spatula(Keep hands away from heat when turning food)
- Oven-safe thermometer (optional)(Use for internal-temp tracking if needed)
- Aluminum foil or parchment paper(For easier cleanup and to prevent sticking)
- Oven mitts(Heat-resistant, dry hands for safe handling)
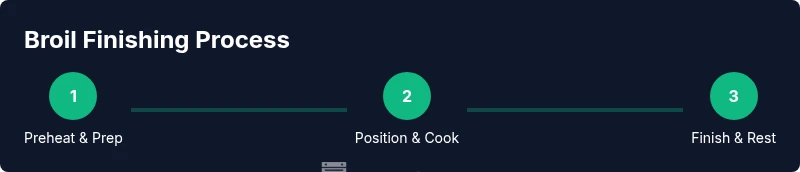
Steps
Estimated time: 10-25 minutes
- 1
Preheat and prep
If your oven supports a true broil, switch to 'broil' and allow the oven to heat for 2-5 minutes. Meanwhile, pat dry the surface of the food and lightly oil or season as desired. Place a foil-lined pan on the rack to catch drips for easy cleanup.
Tip: Dry surfaces promote browning; moisture delays crust formation. - 2
Position the rack and arrange
Place the rack about 4-6 inches from the top heating element for most broil finishes. Arrange pieces with space between them to promote even browning and airflow. Avoid stacking or crowding the food.
Tip: Spacing prevents steaming and helps achieve a crisp crust. - 3
Begin with a brief broil burst
Slide the pan under the broiler and roast briefly until you see the surface start to color. Do not walk away; stay within view and listen for signs of burning. Rotate the pan halfway if your oven heats unevenly.
Tip: Use a timer and check every 1-2 minutes. - 4
Flip or rotate for even browning
Use tongs to flip or rotate the food so all sides brown evenly. For thick items, flip again if needed to prevent scorching on one side.
Tip: Flipping helps develop uniform crust. - 5
Finish with a controlled finish
Complete browning in short bursts, then remove from heat when surface color is rich but interior is not overcooked. Let rest for 3-5 minutes to redistribute juices.
Tip: Resting improves juiciness and texture. - 6
Cleanup and storage
Allow the pan to cool, then wipe clean. Store leftovers promptly in a covered container. Cleanliness reduces smoke and smoke-related odors during future broiling sessions.
Tip: Clean surfaces prevent flavor transfer to future broiling tasks.
Questions & Answers
What is the difference between baking and broiling, and can I use broil to bake something?
Baking uses indirect heat from all sides, while broiling relies on direct top heat. You can finish or brown a baked dish under broil, but broil alone isn’t suitable for most full-cook recipes. Use broil to add color or crust after an initial bake.
Baking uses even heat all around; broiling is top-only heat for finishing touches.
Is it safe to broil meat, fish, or vegetables for baking?
Yes, but you must monitor closely and adjust time to thickness. Broil is intense, so start with shorter bursts and check color frequently to avoid overcooking the exterior while the interior remains underdone.
Yes, but cook in short bursts and watch carefully.
Which foods benefit most from a broil finish?
Foods that develop a crust or cheese topping, such as fish fillets, vegetables, open-faced melts, and gratins, often benefit from a brief broil finish after initial cooking.
Great for crusts and toppings on fish, veggies, and melts.
How do I prevent burning or uneven browning under broil?
Keep food spaced, avoid overcrowding, use short bursts of heat, rotate the pan, and monitor with a timer. Lower the rack height for more control if you see rapid browning.
Watch closely, rotate, and use short bursts to keep browning even.
Should I preheat when broiling?
Yes, if your oven has a true broil setting, preheating for a couple of minutes helps achieve consistent browning. If your oven doesn’t require preheating, still give the surface a moment to heat up before placing food.
Preheat briefly to stabilize browning, then start cooking.
Can I leave the oven door open while broiling?
Most residential ovens require the door closed for broiling. Check your model’s manual; some designs suggest a slightly ajar door for sensitive foods, but generally keep the door closed to maintain heat and safety.
Keep the door closed unless your oven manual says otherwise.
Watch Video
Main Points
- Broil finishes are best used as a finishing step, not the sole cooking method
- Position and monitor closely to prevent scorching and uneven browning
- Rest browned foods briefly to lock in moisture and flavor
- Use a stable broiler-safe pan and proper rack height for best results
- Oven Cook Pro's verdict: finish with broil for color and texture, but keep interior doneness in mind