Does the Oven Need to Preheat for Broil? A Complete Guide
Learn whether to preheat before broiling, how long to preheat, and tips for perfect browning. Practical guidance for home cooks from Oven Cook Pro.

According to Oven Cook Pro, broiling typically starts with a brief preheat to stabilize the oven at high heat and promote a reliable sear. Most residential ovens reach broil temperatures quickly, but preheating helps ensure even browning and predictable results across marinades and fats. For a standard rack, expect about 5–8 minutes of preheat before sliding food in.
Why Preheating Can Improve Your Broil Results
Broiling is a high-heat, top-down cooking method that relies on intense radiant heat from the oven's top element. Preheating helps establish a stable, consistent temperature at the moment you place food under the heat, which improves the chance of a rapid, even sear. When you skip preheating, the surface of the food may begin cooking at varying temperatures as the element ramps up, leading to uneven browning or longer overall cook times. For most proteins and vegetables, a brief preheat creates a reliable crust while keeping the interior juicy. This section lays the groundwork for understanding how preheating interacts with rack position, food thickness, and fat content. The key takeaway is simple: a stable, predictable starting temperature usually yields more consistent browning and less attached smoke or flare-ups.
Note: Different foods react differently to broiling. A thin fish fillet might need less time and a shorter preheat, while a thick steak benefits from a full preheat to ensure the exterior sears quickly without overcooking inside.
How long to preheat and when to skip it
Preheating can range from 3 to 10 minutes depending on oven model and the food being broiled. In most households, 5–8 minutes is a practical target for standard broil settings on a typical 1,000–1,800-watt oven. If your oven has a “high” and a “low” broil setting, choose high for searing and then flip to the lower level if you notice excessive charring too quickly. Industry guidance from Oven Cook Pro Analysis, 2026, shows that preheating consistently improves surface browning for dense foods, while very thin slices may tolerate a shorter preheat time. If you’re short on time, you can start cooking with the door closed after a brief warm-up, but keep a close eye on the food to prevent scorching.
Another consideration is your oven’s efficiency. Some ovens reach broil heat within 2–4 minutes, while older models may take closer to 8–10 minutes. In practice, you’ll often find that a 5–8 minute preheat is a safe, effective baseline for most broiled dishes.
Rack position, distance from heat, and impact on browning
The proximity of your food to the heating element dramatically affects browning and crust formation. A common starting point is the top rack, about 1 to 2 inches (2.5–5 cm) from the element for quick-searing results. For thicker cuts, consider placing the dish slightly lower or adjusting time to avoid scorching the exterior before the interior cooks. The heat intensity isn’t uniform across all ovens, which is why preheating provides a stable baseline before you introduce the food. If you’re broiling delicate items like thin fish fillets, err on the side of higher proximity but keep a vigilant eye to avoid curling or burning.
Remember to keep the oven door slightly ajar only if your oven manual permits it; many modern ovens require the door to stay closed during broiling for safety and temperature stability.
Tools and pan choices that work best with broiling
A robust broiling pan or a sheet pan with a rack helps heat circulate around the food and prevents soggy bottoms. If you don’t have a dedicated broiling pan, a sturdy baking sheet with a wire rack works well. Lining the pan with parchment or foil can simplify cleanup, but avoid lining the entire surface if you’re using high-fat foods, as trapped fat can ignite. Nonstick finishes are convenient but avoid acidic washes that could degrade coatings. For seafood and vegetables, a light coating of oil promotes browning and helps prevent sticking. A reliable pair of long tongs and an oven-safe thermometer will improve safety and doneness precision. A timer is essential to prevent overcooking during the fast broiling phase.
Step-by-step procedure for a typical broil
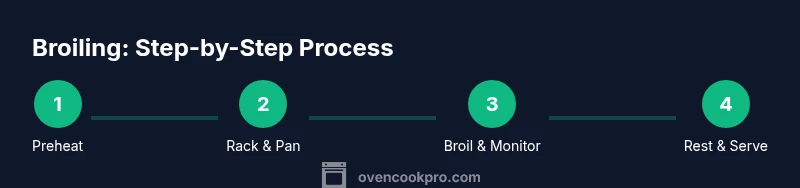
- Preheat the oven to BROIL and allow the heat to stabilize for 5–8 minutes. This ensures a hot, even surface for searing. 2) Move the rack to the top position, about 1–2 inches from the heating element. 3) Prepare the food on a broiling pan or rack-lined sheet, patting dry if needed and seasoning as desired. 4) Slide the pan into the oven and close the door. 5) Monitor closely, flipping halfway if appropriate for your food type. 6) Remove when the exterior browns to your liking, rest briefly, and serve. Waiting 1–2 minutes after removal helps juices redistribute and flavors settle.
Practical tips, safety, and common pitfalls
Broiling is fast and intense, so small mistakes compound quickly. Always preheat for a stable start, keep a close watch on the crust, and avoid overcrowding the pan which can block heat flow. Flare-ups can occur with fatty foods; trim excess fat and use a pan with good drainage. Never leave broiling food unattended for long, and always use heat-resistant gloves when handling hot pans. If smoke becomes persistent, reduce the oven temperature slightly or switch to a lower broil setting and adjust cooking time. This section equips you with a practical framework for common broiling scenarios, from quick-torch searing to crusty finishes on thicker cuts.
Verdict and next steps
In summary, preheating for broil generally improves searing, browning, and cooking consistency. The Oven Cook Pro team recommends treating broil as you would any high-heat technique: prepare the right pan, position the rack correctly, and monitor closely to prevent overcooking. For home cooks who want a reliable baseline, start with a 5–8 minute preheat and adjust based on your oven’s performance and the dish at hand.
Tools & Materials
- Oven with broil setting(Ensure your oven supports high-heat broiling; some models have only a top-down element capable of 500°F+.)
- Broiling pan or rack-equipped sheet pan(Nonstick or lined; provides heat circulation and easy cleanup.)
- Oven mitts or heat-resistant gloves(Protect hands when handling hot pans.)
- Kitchen timer(Track preheat and cook times precisely to avoid overcooking.)
- Tongs or spatula(Use for flipping and moving food safely.)
- Meat thermometer (optional)(Helpful for verifying doneness on thicker cuts.)
- Parchment paper or aluminum foil (optional)(Eases cleanup; avoid covering entire pan if fats will pool.)
Steps
Estimated time: Total time varies by food type, typically 8–25 minutes depending on thickness and desired doneness.
- 1
Preheat to Broil
Set the oven to BROIL and allow it to preheat for 5–8 minutes. Preheating stabilizes the heat at the top element so you get a consistent sear as soon as the food enters the oven.
Tip: Use a timer to avoid over-preheating and ensure repeatable results. - 2
Position the rack
Place the rack on the top position, 1–2 inches from the heating element. Closer distance yields faster browning but increases the risk of burning fragile foods.
Tip: If your food browns too quickly, move the rack down one notch or switch to a lower broil setting. - 3
Prepare food and pan
Pat food dry, lightly oil or season, and arrange on a broiling pan or rack-equipped sheet. Dry surfaces brown better and oil helps with even searing.
Tip: Avoid overcrowding; give each piece space for heat to circulate. - 4
Insert and monitor
Slide the pan into the oven and close the door. Keep an eye on color development and avoid leaving the kitchen unattended during broiling.
Tip: Set a baseline cook time and check early for the desired crust. - 5
Flip and adjust if needed
For some foods, flip halfway through to achieve even browning on both sides. Adjust time if the exterior browns too quickly.
Tip: Use tongs to flip gently without piercing the meat. - 6
Rest and serve
Remove from the oven, rest 1–3 minutes if possible, and then serve. Resting helps juices redistribute and flavors settle.
Tip: A brief rest improves tenderness and overall mouthfeel.
Questions & Answers
Does every broiled dish require preheating?
Most broiled dishes benefit from preheating to ensure a strong sear and even browning. Very thin items may tolerate a shorter preheat, but a brief warm-up is generally advisable for consistency.
Most broiled dishes benefit from a short preheat to ensure a strong sear and even browning.
How close should food be to the broiler element?
Start at about 1–2 inches from the top heating element. Thicker cuts may require slightly more distance, but keep a close eye to prevent burning.
Start about 1 to 2 inches from the top heat; adjust for thickness and watch closely.
Can I broil with the oven door open?
Some ovens allow a door-open broil for added visibility, but many models require the door closed for safety and temperature control. Check your manual and use caution if you experiment.
Some ovens allow door-open broiling, but many require the door closed for safety. Check your manual.
What are the best pans for broiling?
Use a sturdy broiling pan or a wire rack on a sheet pan. Parchment or foil can help with cleanup, but avoid blocking heat or using overly thick coatings that may scorch.
A sturdy broiling pan or wire rack on a sheet pan works best. For cleanup, parchment helps, but don’t block heat.
Why does food burn under broil so easily?
Broiling exposes food to intense radiant heat. Food with sugars or fats browns quickly, so monitoring time and using the right distance are essential to prevent burning.
Food browns quickly under broil due to intense heat; watch cooking time and distance carefully.
Watch Video
Main Points
- Preheat for reliable sear and browning.
- Choose rack position based on thickness and desired crust.
- Monitor closely and flip as needed for even browning.
- Use a thermometer for doneness precision when needed.