How to Put Your Oven on Broil: A Step-by-Step Guide
Learn how to use the broil setting safely and effectively with a clear, step-by-step guide from Oven Cook Pro. Get timing tips, safety notes, and practical cooking ideas for fast, browning perfection.

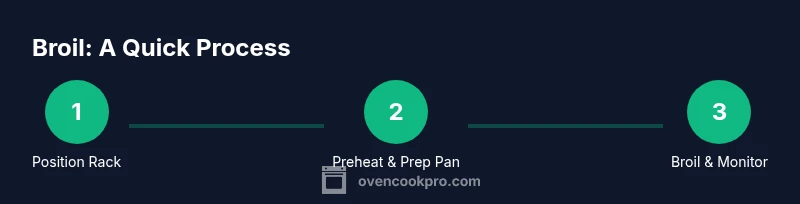
To broil effectively, select the BROIL setting, briefly preheat if your oven requires it, and position the rack 3–6 inches from the top heating element. Keep the door closed on most models, or slightly ajar if your manual specifies. Use a broiler-safe pan and watch food closely, rotating for even browning.
Why Broiling Fits Home Cooks
Broiling is a fast, high-heat finishing method that comes from the top heating element. It excels for browning, searing, and giving foods a crisp crust in a short amount of time. When you learn how to put oven on broil, you unlock a staple technique for steaks, fish, vegetables, and even small-batch toasts. According to Oven Cook Pro, mastering the broil setting can elevate weeknight dinners with fast, even browning and minimal hands-on time. Understanding this method also helps you compare broiling to baking, roasting, and grilling so you choose the best finish for your dish. This guide will walk you through safety, setup, timing, and common pitfalls so you can use broil confidently in your kitchen.
Safety Essentials Before You Broil
Safety matters when using the broil setting. The top element gets extremely hot, so always use broiler-safe cookware and wear heat-resistant gloves. Keep a close eye on food, because browning can happen in minutes. Ensure good ventilation and avoid plastic handles near the heat. Oven Cook Pro Analysis, 2026 emphasizes keeping a dedicated broiler pan and using a thermometer for thicker cuts to prevent under- or overcooking. If you’re unsure about your oven’s specific behavior, consult the user manual before starting. This chapter sets the foundation for safe, successful broiling in any kitchen.
Preparing the Oven, Rack, and Pan
Before you begin, remove any foil or paper that might catch fire, and preheat only if your model requires it. Position the rack so the food will be 3–6 inches from the top heating element. A sturdy metal broiler pan or a thick aluminum tray works best; avoid plastic, glass, or ceramic that isn’t rated for high heat. If you’re broiling seafood or thin slices, a rimmed sheet pan can help catch drippings and prevent spillovers. Set your oven to BROIL and let it reach the desired temperature for a minute or two if recommended by your manual.
Choosing the Right Tools and Panware
Select cookware that can withstand high heat without warping. Metal pans with a raised lip help prevent drips from reaching the oven bottom. For delicate items like fish fillets, a wire rack set over a pan allows even air exposure and prevents sticking. Lightly oil or spray the pan to reduce sticking, and keep a small towel handy to wipe off any fat that vents toward the door glass. Using the right tools ensures more consistent browning and reduces the risk of scorching.
How to Put Your Oven on Broil: Practical Approach
If you’re learning how to put oven on broil, start by arranging your ingredients in a single layer with space between pieces. Place the pan on the rack and slide it into the oven so the food is within the 3–6 inch sweet spot from the heating element. Keep the door closed unless your model specifies otherwise. Use a timer and check frequently during the first couple of minutes to adjust distance or distance moved if needed. When browning looks even, you can finish with a brief rest time to reabsorb juices.
Timing, Browning, and Food Types
Broiling browns foods quickly, but timing varies by thickness and fat content. Sausages and steak may finish in 5–7 minutes per side, while vegetables and fish may require less. Start with shorter intervals (2–3 minutes) and rotate the pan halfway for even exposure. Always watch for smoke; if fat accumulates, lower heat slightly or move the pan away from the element. This section helps you tailor broiling to different foods while preventing overcooking.
Common Mistakes and How to Avoid Them
Common mistakes include using the wrong pan, overcrowding, and not adjusting rack distance. Overcrowding traps steam and prevents browning. Using glass bakeware near the broiler can crack due to rapid temperature change. Avoid leaving the oven door ajar for most models, as this disrupts airflow and temperature stability. The recap here focuses on keeping things consistent to avoid scorching food or undercooking the inside.
Cleaning Up After Broiling
After broiling, give the oven a few minutes to cool and wipe away any splatters. If your pan has baked-on fat, soak it briefly to loosen grime before washing. Regularly check the broiler pan for signs of wear or deformation, and replace it if the nonstick surface is scratched. Proper cleanup preserves broiling performance and prevents lingering odors in future cooking sessions.
Authority sources and Further Reading
For safety and best practices, refer to official guidelines from food safety and workplace safety authorities. You can consult resources such as the USDA, OSHA, and university extension publications for broiling-related tips and temperature guidelines. These sources provide verified information to support reliable oven use and better results in your home kitchen.
Tools & Materials
- Oven-safe broiler pan or heavy-duty metal tray(Do not use plastic or glass near the broiler; metal performs best.)
- Heat-resistant oven mitts(Long gloves preferred for maximum protection.)
- Soft brush or sponge(For cleaning drips after broiling.)
- Cooking oil spray or small amount of oil(Prevents sticking on the pan.)
- Food thermometer (optional)(Useful for thick cuts like steaks or poultry.)
- Aluminum foil (optional)(Used to line trays for easier clean-up)
Steps
Estimated time: 15-25 minutes
- 1
Power on & preheat if required
Turn the oven to BROIL and allow a minute or two for the element to heat. Check your manual if your model requires preheating, since some broil functions engage instantly. Preheating helps achieve a faster, more even browning right from the start.
Tip: If your oven has a dedicated broil preheat indicator, wait for it to signal before placing food. - 2
Position the rack 3–6 inches from the element
Place the rack so the food sits in the top third of the oven, within 3–6 inches of the heating element. The exact distance depends on thickness and desired browning. This positioning is critical for even results without burning the surface.
Tip: For thick cuts, start closer and then move tray back after initial sear to finish cooking. - 3
Prepare and arrange the food
Pat dry moist surfaces, season, and arrange in a single layer on the pan. Overcrowding reduces browning; leave space between pieces for hot air to circulate. A light coating of oil helps with crisping.
Tip: Patting dry and spacing evenly reduces steam that can inhibit browning. - 4
Broil the first side & monitor closely
Slide the pan under the broiler and start timing. Do not leave the kitchen; food can go from perfect to burnt in seconds. If needed, rotate the pan halfway through to promote even browning.
Tip: Set a timer in short intervals (2–3 minutes) to check progress. - 5
Flip or rotate to finish browning
If the food benefits from an additional side, flip or rotate as needed to achieve uniform color on all exposed surfaces. Continue monitoring until the desired crust forms.
Tip: Some foods require only a single surface browning; use your judgment based on color, aroma, and thickness. - 6
Rest briefly & serve
Remove the pan when browning is achieved, and rest the food for 1–2 minutes to reabsorb juices. Slice or serve promptly to enjoy optimal texture and temperature.
Tip: Resting helps retain moisture and improves overall eating quality.
Questions & Answers
Should I leave the oven door closed or ajar while broiling?
Most ovens require the door to stay closed during broiling to maintain temperature, though some models advise leaving it slightly ajar. Always follow your user manual for your specific oven.
Keep the door closed in most ovens to maintain heat, but check your manual for any exceptions.
What foods are best for broiling?
Popular broil targets include steaks, salmon, chicken cutlets, shrimp, zucchini, and bell peppers. Aim for uniform thickness and single-layer arrangement for best browning.
Steaks, fish, and veggies all work well under broil when arranged in a single layer.
How long should I broil each side?
Times vary by thickness and food type. Start with 3–5 minutes per side for most foods, then check and adjust as needed.
Typically around a few minutes per side; start watchful and adjust as you go.
Can I broil from frozen?
For best results, thaw thicker foods first to ensure even browning. Very thin frozen items may work but require extra vigilance.
Thaw when possible; thinner items may cook unevenly if frozen.
Is broiling the same as grilling?
Broiling uses the oven’s top element; grilling uses an outdoor fire. Both use direct heat, but broiling is indoors and relies on air circulation.
Similar method, just indoors with top heat rather than an outdoor flame.
Watch Video
Main Points
- Choose proper rack distance (3–6 inches) for even browning
- Use broiler-safe cookware to prevent damage
- Monitor closely and rotate for even results
- Preheat only if your oven requires it; follow the manual