How to Use the Oven Grill: A Step-by-Step Guide
Learn how to use the oven grill safely and effectively with a comprehensive step-by-step guide. Preheat properly, position food for even browning, monitor heat, and finish with a clean, flavorful result.

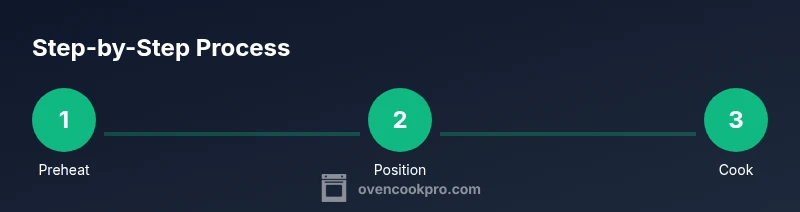
You can master the oven grill by following a clear, step-by-step process: select the grill setting, preheat the oven, place food on a rack or tray, monitor heat and distance, flip as needed, and finish with a brief rest. This guide prioritizes safety and even browning.
Understanding the Oven Grill: What It Does and How It Differs
The oven grill setting is designed to deliver high radiant heat from the top element to brown and crisp foods quickly. It’s different from standard bake or roast; the heating pattern focuses heat from above rather than creating a steady ambient oven environment. For home cooks looking to use this feature properly, knowing how to on oven grill means understanding distance, timing, and airflow. According to Oven Cook Pro, the most consistent results come from a planned approach: preheating, proper rack position, and careful monitoring rather than leaving food unattended. In this section, you’ll learn how the grill mode functions, what foods perform best, and how to avoid common mistakes such as overcrowding, scorching, or uneven browning. The goal is even color with a crisp exterior while preserving moisture inside.
Key terms: radiant heat, browning, crust formation, airflow, and carryover cooking.
Safety First: Precautions Before You Start
There are safety considerations for any indoor grilling. Ensure your oven’s grill/broil element is clean, check for signs of damage, and keep a fire extinguisher handy. Always use heat-resistant gloves, long-handled tongs, and a timer. Work in a well-ventilated area; indoor grilling can push smoke levels higher than typical baking. If you're cooking fatty foods, trim excess fat to reduce flare-ups. Oven Cook Pro Team emphasizes that safety is non-negotiable when learning how to on oven grill; a quick check of accessories and cookware can prevent injuries and damage.
Preheating and Positioning: The Foundation
Preheating the grill helps achieve a consistent browning and reduces the risk of cold spots. Preheat with the oven set to the grill/broil function on the highest safe setting for 5-10 minutes, depending on your model. Place food on a rack above a tray to catch drips and allow air to circulate around edges. Maintain a distance of about 2-4 inches between the food and the heating element for most small portions; thicker cuts may require slightly more distance. Use a thermometer to verify that the surface reaches browning but not scorching.
Food Preparation: What to Grill and How to Prep
Certain foods respond best to the oven grill, including thin-cut meats, broccoli florets, fish fillets, and small vegetables. Pat food dry, lightly oil, and season consistently to promote even browning. Avoid marinades with high sugar content in the first minutes of grilling, as sugary sauces can burn quickly when exposed to intense top heat. For chicken, pork, and beef, aim for a safe internal temperature while relying on the grill’s direct heat for color. The key is to balance surface browning with interior doneness, rather than chasing the dark crust at the expense of moisture.
Step-By-Step Core Method (The Practical Process)
Turn on the grill setting and preheat for 5-10 minutes. Use an elevated rack on a rimmed sheet to catch drips. Place food across the center of the rack with space between pieces for air flow. Start with short 1–2 minute bursts on the hottest areas, then flip and rotate to promote even browning. Check the internal temperature with a thermometer as needed; finish with a brief rest to let juices redistribute. If you’re curious about how to on oven grill, following these steps yields reliable browning and moisture retention.
Troubleshooting Common Issues: Browning, Burning, and Uneven Cooking
Food browns unevenly due to crowded pans or inconsistent distance. If edges burn before centers cook, reduce heat slightly or move food farther from the element, and rotate pieces. A dry surface browns faster than a moist one; patience and spacing help. Smoke and odor can indicate excessive fat or sugars; trim fat and clean drippings promptly. Always verify internal temperatures rather than relying solely on color to avoid undercooked centers.
Cleaning and Maintenance After Grilling
Turn off the oven and allow it to cool before cleaning. Remove racks and trays; wash in warm soapy water. Wipe drips and minor splatters promptly to prevent buildup. For baked-on residue, soak racks and pans, then scrub with non-abrasive pads. A quick wipe of the door gasket protects temperature control for future sessions. Regular maintenance extends grill life and improves future browning results. Oven Cook Pro recommends a light oiling of racks to ease cleaning next time.
Advanced Techniques and Variations for Everyday Cooking
Experiment with finishing sauces, glazes, or a final brief higher-heat burst to set flavors and add gloss on the surface. For fish and delicate proteins, reduce distance to 2 inches and shorten total grill time to avoid overcooking. Crispy vegetables benefit from a light toss in oil and a quick, high-heat finish. The core principle remains: manage heat, space, and timing to achieve a balanced crust with juicy interiors.
Tools & Materials
- Oven with grill/broil function(Ensure the upper heating element is operational and rated for high heat)
- Oven-safe rack or sheet pan(Use a rack above a tray for air circulation and drips)
- Tongs or kitchen tongs(Long, sturdy tongs for safe handling)
- Meat thermometer or instant-read thermometer(Check internal temperature for safety)
- Oven mitts or heat-resistant gloves(Protect hands during high-heat handling)
- Timer or smart device(Set reminders to avoid overcooking)
- Basting brush and minimal oil spray(Optional for enhanced browning)
- Cooling rack(Helpful for resting hot foods after grilling)
Steps
Estimated time: Total time: 25-40 minutes
- 1
Prepare oven and tools
Gather all equipment and confirm the grill setting works. Pre-treat surfaces to avoid smoke staining and ensure your rack is clean before use. Having everything ready reduces hands-on time during the grill session.
Tip: Lay out tools within easy reach to maintain a steady workflow. - 2
Preheat the grill
Set the oven to the grill/broil function and allow 5–10 minutes to reach the target surface temperature. A properly heated surface reduces cooking time and helps achieve an even crust.
Tip: Avoid opening the door during preheat to keep heat stable. - 3
Position food on the rack
Arrange pieces with space between them on the elevated rack over a tray. Crowded pieces create steam and uneven browning, while space allows air to circulate for crisp edges.
Tip: Place thicker items toward the center where air is slightly cooler. - 4
Monitor heat and distance
Keep food about 2–4 inches from the heating element for most items. If your oven’s top element runs hotter, increase distance or reduce grill time to avoid scorching.
Tip: Rotating or flipping halfway through helps even browning. - 5
Check internal temperature
Use a meat thermometer to verify the center reaches safe temperatures. Rely on the thermometer rather than color alone for doneness.
Tip: Pull from heat slightly before target temperature; carryover cooking will finish the job. - 6
Finish with a rest
Let grilled foods rest for a few minutes on a rack or plate; this redistributes juices and improves tenderness.
Tip: Rest times vary by protein: 5–10 minutes for poultry, 3–5 for fish. - 7
Cleanup and storage
Turn off the oven and wait for components to cool before washing. Soak racks if needed and wipe the door and interior surfaces to prevent buildup.
Tip: Clean while warm but not hot to avoid burns.
Questions & Answers
What is the oven grill and how does it differ from baking?
The oven grill uses high heat from the top element to brown and crisp foods quickly, unlike baking which relies on even heat around the food. This makes the grill ideal for finishing and browning, while baking handles long, even cooking. Skills for using it effectively include timing, distance, and monitoring.
The oven grill uses top heat to brown foods quickly, unlike baking which cooks more evenly around the food. Use timing and distance to prevent burning.
Is it safe to grill with the oven door closed?
Yes, but it depends on your oven model. Most ovens require the door closed or slightly ajar during grilling; check your manual. Never leave unattended and monitor smoke or flare-ups.
In most ovens you grill with the door closed, but follow your model's manual and stay nearby.
What foods are best for oven grilling?
Thin cuts of meat, fish fillets, vegetables like zucchini and broccoli, and small potatoes adapt well to the grill function. Avoid very fatty cuts without trimming excess fat to minimize flare-ups.
Thin meats, fish, and veggies work best on the grill; trim fat to reduce flare-ups.
How can I prevent burning when indoor grilling?
Maintain appropriate distance from the top heat, avoid sugary marinades at the start, and monitor with a timer. Rotate pieces and keep sessions short to prevent scorching.
Keep distance from the heat and watch closely; rotate pieces and avoid sugary sauces at first.
How should I clean the oven after grilling?
Cool the oven, remove racks, wash parts with warm soapy water, and wipe the door gasket. Soak and scrub stubborn residue, then wipe dry before next use.
Cool, wash components, soak tough bits, and wipe everything dry for next time.
Watch Video
Main Points
- Preheat and space items for even browning.
- Monitor with a thermometer for safety.
- Rotate pieces to prevent scorching.
- Clean up after grilling to maintain performance.