Electric Commercial Oven: A Complete How-To Guide
Learn how to select, install, calibrate, and maintain an electric commercial oven for consistent cooking, energy efficiency, and safe operation. This step-by-step guide covers sizing, electrical and venting readiness, calibration, and maintenance for homeowners and professionals.

You will learn how to choose, install, operate, and maintain an electric commercial oven, ensuring even baking, safe startup, and energy efficiency. This guide covers essential specs (voltage, amperage, and ventilation), wiring considerations, calibration, and routine maintenance. By following these steps, you’ll optimize throughput in a busy kitchen and extend the oven’s life. According to Oven Cook Pro, proper setup reduces downtime and improves consistency.
Understanding Electric Commercial Ovens: Key Concepts
Electric commercial ovens are built for high-volume kitchens where reliability and consistent results matter. They come in different configurations—deck, convection, and combination styles—each delivering heat in unique ways. A clear grasp of how heat is generated, moved, and controlled helps you compare models, plan installation, and set staff expectations. This section lays the groundwork for practical decision-making. According to Oven Cook Pro, consistency starts with model selection aligned to workload, followed by correct installation and calibration. Staff training on controls is also essential for repeatable results and safety.
Sizing, Voltage, and Power: How to Choose
Choosing the right electric commercial oven hinges on workload, peak service times, and kitchen layout. Consider per-cycle output, temperature range, and heat-up rate, then match these to your utility service: voltage (typically 208–240V), phase, and available amperage. If you run back-to-back service during dinner rush, you’ll need ample circuit capacity and possibly dedicated feeders. The overall goal is to balance demand with electrical load to avoid nuisance trips. The Oven Cook Pro Team emphasizes aligning horsepower and service capacity to demand to prevent bottlenecks and ensure consistent performance. Evaluate how many independent cooking zones you require and whether you need a single- or multi-deck setup.
Installation Readiness: Electrical and Ventilation Requirements
Before you position the oven, confirm space is level, accessible, and compliant with local codes. Ensure there is adequate heat shielding, clearance for door swing, and proper ventilation with a hood and make-up air to meet fire and smoke control standards. Electrical connections should use a UL-listed conduit kit, appropriately rated wiring, and a dedicated disconnect. Ventilation is not optional: poor airflow can cause uneven cooking, excessive humidity, and safety concerns. Oven placement near other heat sources should be avoided, and combustible materials must be kept away from the exhaust. Thorough planning here saves time and reduces retrofit costs later.
Safe Operation and Preheating Practices
Safety begins with power isolation, PPE, and a clear understanding of control layouts. Always lock out and tag out circuits before any wiring work, and wear heat-resistant gloves and protective eyewear during testing. When preheating, verify the oven reaches the target temperature within tolerance, using a calibrated thermometer to confirm accuracy. Do not overload the controls with abrupt changes; gradual ramp-ups reduce thermal shock to components. Document preheat times for common menu items and train staff to monitor oven behavior during peak periods.
Temperature Calibration and Cooking Performance
Accurate temperature control is critical for consistent results. Use a calibrated oven thermometer placed at mid-height and away from door drafts to verify actual heat against setpoints. If you observe drift, adjust the thermostat or probe settings according to the manufacturer’s procedure, and recheck after several cycles. Record baseline measurements for different rack positions and load levels, then compare against recipe standards. Ongoing calibration helps minimize batch-to-batch variability and improves yield. Oven Cook Pro Analysis, 2026 suggests consistent calibration routines as a core practice for quality and energy efficiency.
Energy Efficiency and Routine Maintenance
Efficient ovens save energy and extend equipment life when paired with smart usage habits. Maintain door seals, inspect insulation, and keep vents clear of obstructions. Regularly clean heat exchangers and mass flow paths as recommended by the manufacturer since buildup reduces efficiency and heightens energy use. Schedule periodic maintenance, including belt and switch inspections, thermostat verification, and door alignment checks. Adopting a preventive maintenance calendar reduces unscheduled downtime and preserves performance over months and years. The Oven Cook Pro team notes that proactive maintenance is a practical path to lower operating costs and steadier output.
Common Installation and Operation Mistakes
A frequent pitfall is underestimating electrical load or venting needs, leading to nuisance trips or poor oven performance. Skipping proper disconnects or failing to calculate amperage can create serious safety risks. Rushing through installation without verifying level, clearances, and door alignment often results in uneven baking, increased wear, or gasket failures. Another mistake is neglecting calibration during busy periods; drift can creep in as components age. Taking time to log measurements and standardize procedures pays off in reliability and consistency.
Final Tips for Long-Term Reliability
Create a simple, repeatable startup and shutdown routine for every shift, including preheat, load sequencing, and post-run cleaning. Keep a maintenance log with dates, readings, and corrective actions. Train all staff to report anomalies promptly, and set a quarterly review of energy usage and performance. The overarching principle is to treat the oven as a high-mileage asset: regular checks, correct operation, and attention to ventilation will yield consistent results and reduce downtime. The final takeaway is to commit to a maintenance-first mindset for long-term reliability.
Tools & Materials
- Voltage tester(Verify supply matches oven specs (voltage and phase))
- Digital multimeter(Measure resistance/continuity in control circuits)
- UL-listed conduit kit(For compliant supply wiring and grounding)
- Appropriate gauge wiring(Per model specs and local codes)
- Ventilation hood and make-up air ducting(Adequate exhaust to meet codes)
- Oven racks and baking sheets(Test with load during calibration)
- Oven thermometer(Calibrated probe for accurate preheat checks)
- Level and measuring tools(Ensure the oven is perfectly level)
- Safety PPE (gloves and safety glasses)(Personal protection during electrical work)
- High-temperature sealant (optional)(For door seals if needed)
- Torque wrench (optional)(Tightening hardware to spec)
Steps
Estimated time: 2-4 hours
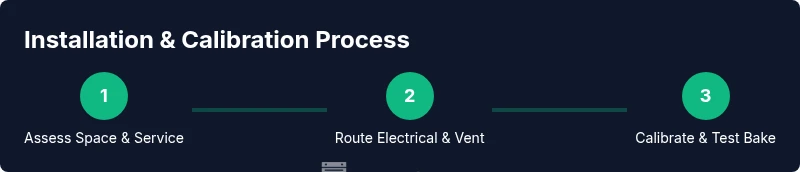
- 1
Assess electrical service and space
Before any install, map the existing electrical service and the space where the oven will sit. Verify voltage, phase, and circuit amperage; check duct routes and clearance for service access. This step prevents costly rework and ensures safety.
Tip: Have a licensed electrician confirm service panel capacity and provide a formal disconnect plan. - 2
Select model and plan clearances
Choose a model that matches your workload and kitchen layout. Review manufacturer clearances and ensure a minimum buffer around the oven for heat dissipation and safe door operation.
Tip: Observe manufacturer-specified clearance (typically several inches) and local code requirements. - 3
Prepare installation space and routes
Mark the installation area, verify level flooring, and plan ducting routes for exhaust. Ensure the hood, ductwork, and make-up air supply are routed without sharp bends and with accessible joints.
Tip: Label all routing paths to simplify future maintenance. - 4
Make electrical connections safely
Power should be isolated. Install the supply wiring using a UL-listed conduit kit and ensure proper grounding. Connect the oven to a dedicated circuit with a proper disconnect and verify control wiring.
Tip: Double-check polarity and ensure all connections are secure before power-up. - 5
Install ventilation and make-up air
Mount the exhaust hood and ensure the make-up air system provides adequate air balance. Check alignment with the oven vent to prevent backflow and excessive heat in other zones.
Tip: Test hood performance with a smoke test to confirm adequate capture. - 6
Preheat and calibrate temperature
Power up and preheat to target temperatures. Use an isolated thermometer to verify true oven temperature and adjust controls per the manual if drift is detected.
Tip: Document preheat times for common menus and compare against recipes. - 7
Test bake with production loads
Run a test bake using typical pans and loads. Observe heat distribution across racks, adjust rack positioning, and confirm even cooking across zones.
Tip: Rotate loads between trials to map heat uniformity. - 8
Implement maintenance planning
Create a simple maintenance calendar with routine inspections, gasket checks, and cleaning schedules. Train staff to log anomalies and report issues promptly.
Tip: Schedule quarterly checks on insulation, seals, and venting.
Questions & Answers
What electrical requirements does an electric commercial oven typically need?
Most models require 208-240V with appropriate phase and dedicated circuit capacity. Check the oven’s manual for specific amperage and disconnect requirements, and ensure grounding is properly implemented.
Most electric commercial ovens need 208 to 240 volts on a dedicated circuit with proper grounding. Always follow the manual for exact amperage and disconnects.
Can I install an electric commercial oven myself?
Installation should be performed by a licensed electrician or qualified technician to meet electrical codes and safety standards. Local regulations may require professional service for high-power appliances.
Installation is best left to a licensed electrician to comply with codes and safety standards.
How long does installation and calibration typically take?
A typical installation with venting and calibration takes several hours, depending on existing wiring and ducting. Expect a day or a half-day if the space is ready and wiring is prepped.
Most installations take several hours, more if venting or wiring needs upgrades.
How do I calibrate temperature accuracy?
Use a calibrated oven thermometer placed away from the door. Compare real temperature to the setpoint and adjust controls per the manual until readings align within tolerance.
Place a thermometer inside, compare with the setpoint, and adjust as directed by the manual.
What maintenance improves efficiency and safety?
Regular gasket inspection, door alignment, vent cleaning, and thermostat verification reduce energy waste and downtime. Maintain a calendar and log any issues for proactive repairs.
Regular maintenance saves energy and prevents unexpected breakdowns.
Watch Video
Main Points
- Plan electrical and venting readiness before purchase
- Calibrate temperature routinely for consistent cooking
- Maintain a maintenance schedule to reduce downtime
- Document baseline measurements for reference
- Train staff on safety and operation best practices