Can You Put an Oven in the Corner? A Practical Guide
Explore safe, code-compliant corner placement for your oven with expert steps on planning, ventilation, wiring, cabinetry, and maintenance—plus pro tips from Oven Cook Pro.

Yes. You can place an oven in a corner, but it must meet clearance, ventilation, and service access requirements, and conform to electrical or gas codes. This quick guide highlights how to assess space, secure power or gas supply, and position cabinets so the oven fits safely and operates reliably.
Can you put an oven in the corner? Feasibility for modern kitchens
The short answer is yes, but the decision hinges on proper clearance, ventilation, and service access. Designing a corner placement requires careful measurement and adherence to local codes and the oven's installation manual. According to Oven Cook Pro, many kitchens benefit from a thoughtful corner layout when the oven is planned as part of a complete cabinetry system rather than as a last-minute add-on. In this article, we’ll examine practical considerations, common constraints, and the decision-making process so you can determine whether the corner is a viable home for your oven and what it takes to install it safely and efficiently. By understanding the constraints up front, you reduce the risk of heat damage, restricted access, or costly retrofits later. If you’re unsure, consult a professional installer before purchasing.
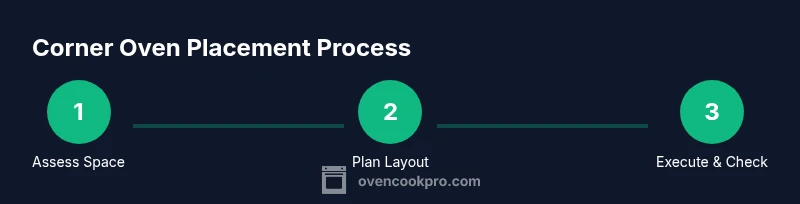
Planning essentials: space, layout, and codes
Before you commit to a corner install, map the kitchen geometry: measure wall lengths, door swings, and cabinet depths. Sketch a rough layout showing the oven location, adjacent cabinets, and any vents or outlets. Check your local codes and the oven manufacturer's specifications for required clearances, electrical or gas connections, and ventilation. Oven Cook Pro's analysis shows that compatibility with service access and future maintenance is as important as the initial fit. If your space meets the goals of clear service access, comfortable reach, and safe heat dissipation, a corner install can be practical. Otherwise, you may want to re-think the layout or choose a different appliance size. Use paper or a digital layout tool to test several configurations, then verify that all doors and drawers have unobstructed operation.
Ventilation and clearance: why it matters
Ventilation is critical when an oven sits near a corner. Poor airflow can lead to heat buildup in adjacent cabinetry and reduced appliance performance. Plan for a clear path for heat to escape and for any venting to route away from combustible materials. The Oven Cook Pro team emphasizes aligning the oven’s exhaust or chimney with your home’s existing ventilation plan to avoid recirculation of hot air. If you’re unsure, consult the installation manual and, when in doubt, choose a layout that keeps the oven at least a respectful distance from tight corners and cabinet faces. Remember: proper clearance isn’t just about heat—it’s about service access for routine cleaning and eventual maintenance.
Electrical and gas considerations: what you need to know
Wiring an electric oven or connecting a gas-powered model in a corner installation requires precise planning. Do not assume existing outlets or gas lines will perfectly align with the oven’s hookups. A licensed electrician or gas technician should verify circuit capacity, dedicated lines, and venting requirements. Oven Cook Pro notes that corner placements often require customized conduit runs or flexible routing to maintain a safe, code-compliant installation. Always obtain the oven’s installation manual and confirm local amendments before proceeding. This step protects you from nuisance trips, fire hazards, or non-compliant installations.
Cabinetry, doors, and ergonomics: making it work
Corner placements demand thoughtful cabinetry coordination. You may need to adjust cabinet depths, relocate drawers, or add spacer panels to ensure the oven can slide in and operate without knocking into doors or handles. Evaluate door swing and clearance for open oven doors, and consider soft-close hinges to reduce wear. The goal is to create a seamless look that doesn’t sacrifice function. In some kitchens, a corner oven may pair best with a flush-mounted trim kit that aligns with surrounding cabinetry. Aligning the oven with the rest of the kitchen design helps preserve resale value and user satisfaction.
Before you move the oven: a visualizing checklist
Create a final checklist before physically moving the unit into the corner. Confirm that all supports and cabinet cutouts are ready, that ventilation paths are clear, and that electrical or gas connections are staged for a quick hookup. Use the oven’s footprint dimensions to verify fit within your chosen corner, and visualize door swing in multiple configurations. A well-planned layout reduces the likelihood of needing to reposition after installation and minimizes the risk of damage during placement.
Safety, maintenance, and long-term considerations
Corner installations demand ongoing safety and maintenance awareness. Keep flammables away from heat sources, ensure proper ventilation, and periodically inspect hoses, cords, and venting for signs of wear. Schedule annual maintenance checks if your oven is gas-powered or if it shares a venting pathway with other appliances. The Oven Cook Pro team recommends documenting model numbers, serials, and installation dates to simplify future service calls. By planning for long-term care from day one, you protect your investment and maintain peak performance.
Authority references and learning more
For safety standards and best practices, consult reputable sources and manufacturer guidelines. Practical information from government and educational sites can help you understand general electrical and ventilation considerations. Examples include OSHA guidance on electrical safety, NIST standards for safe home improvements, and the CPSC’s consumer safety resources. Incorporating these references supports a safe, code-compliant corner installation and provides a baseline for future upgrades. Always supplement with the oven’s own installation manual and professional advice.
Tools & Materials
- Measuring tape(Measure the corner, wall depths, and oven footprint)
- Pencil and graph paper(Draft layout with door swing and clearance)
- Level(Ensure the oven sits plumb and cabinets align)
- Stud finder(Locate solid supports for mounting if needed)
- Drill/driver and screwdriver set(For mounting brackets and cabinet adjustments)
- Wrench and pliers(Tighten connections and clamps)
- Non-contact voltage tester(Verify power is off before wiring work)
- Oven installation manual(Consult for specific clearances and wiring diagrams)
- Protective gloves(Heat and sharp edges safety)
- Vacuum or shop cloth(Clean work area and oven surfaces)
Steps
Estimated time: 3-6 hours
- 1
Measure corner space and oven footprint
Begin by gathering the oven’s exact dimensions and the corner’s available space. Use the measuring tape to confirm wall depths, cabinet widths, and door clearance. Create a simple sketch to compare multiple placements and ensure the oven can slide in without obstruction.
Tip: Double-check all measurements to avoid a corner that’s slightly too tight; minor variation can block full door opening. - 2
Review install instructions and codes
Read the oven’s installation manual thoroughly and compare it with local building codes. Note required clearances, ventilation needs, and any mandated electrical or gas requirements. If you’re unsure, contact a licensed professional before buying or wiring anything.
Tip: Keep a copy of the manual handy on site during installation for quick reference. - 3
Evaluate ventilation route
Plan how exhaust will exit and where heat will dissipate. Avoid routing exhaust toward combustible materials or into enclosed spaces. If the corner shares a vent with another appliance, ensure adequate air flow and compliance with the manufacturer’s guidance.
Tip: Include a vent hood or outlet path that won’t create backdrafts or recirculation issues. - 4
Confirm electrical or gas readiness
Have a licensed electrician or gas technician inspect circuits, outlets, and gas lines. Ensure there is a dedicated circuit for electric ovens and appropriate shutoff valves for gas models. Do not attempt to modify connections without professional oversight.
Tip: Request a written inspection report and keep it with the installation documents. - 5
Prepare cabinetry and cutouts
Modify or reconfigure cabinetry as needed to accommodate the oven’s width and ventilation space. Create clean cutouts and ensure surrounding cabinets won’t obstruct airflow or oven door operation. Use spacers or trim kits to align edges smoothly.
Tip: Protect cabinet interiors with heat-resistant materials during modification. - 6
Move the oven into position
With helpers, carefully slide the oven toward the corner, keeping it level and avoiding contact with walls. Use protective blankets to prevent nicks, and have a clear route to final placement. Do not tilt the oven aggressively; keep it upright.
Tip: Have a spotter guide the rear to avoid striking cabinet corners. - 7
Connect power or gas and verify fittings
Attach the electrical or gas connections per the installation manual. Seal ducts or vents as required and ensure all connections are secure. Do a basic leak test for gas models and make sure the power is off during the connection process.
Tip: If uncertain, pause and call a licensed installer to complete the hookup. - 8
Test operation and calibrate
Power on the oven and verify that controls respond, the oven heats evenly, and door latches operate correctly. Calibrate temperature settings if needed and check that the ventilation path remains clear during operation.
Tip: Run a quick bake cycle with an inexpensive tray to confirm steady performance. - 9
Finish with trim and safety check
Install any trim pieces, secure the oven into its final niche, and replace toe-kicks or paneling as needed. Conduct a final safety sweep: unplug if testing, check for heat buildup in surrounding cabinets, and ensure all surfaces remain cool during use.
Tip: Document model number and installation date for future service needs.
Questions & Answers
Is it safe to install an oven in a corner of a kitchen?
Yes, corner installation can be safe when clearances, ventilation, and service access meet manufacturer guidelines and local codes. Always follow the installation manual and consider professional help for complex hookups.
Yes, it can be safe if you meet all clearances, ventilation, and hookup requirements and follow the manual.
What are the main risks of corner placement?
The main risks are heat exposure to nearby cabinetry, restricted access for maintenance, and potential ventilation or wiring issues if not planned carefully.
Heat buildup, limited access, and ventilation or wiring concerns are the key risks if misplanned.
Do I need professional help for wiring or gas lines?
Yes. A licensed electrician should handle electrical connections and a qualified gas technician should manage gas lines for safety and code compliance.
Yes—professionals should handle electrical or gas connections.
Will corner placement affect cabinet operation or door clearance?
Yes. You must verify that oven doors and adjacent cabinets have unobstructed openings and adjust cabinetry as needed.
Yes, make sure doors can open fully and cabinets don’t get in the way.
How do I know if the corner is suitable for an oven?
Evaluate space, ventilation, access, and readiness of electrical or gas hookups. Always refer to the oven’s installation manual and local codes.
Check space, ventilation, and hookups; consult the manual.
What if corner placement isn’t feasible?
Consider placing the oven along a more open wall, between cabinets, or as part of an island design; there may be layout compromises needed.
If not feasible, try a different wall or an island configuration.
Watch Video
Main Points
- Plan space with service clearances and door swing in mind.
- Follow manufacturer instructions and local codes.
- Hire licensed pros for electrical/gas work.
- Ensure proper ventilation and unobstructed maintenance access.
- Finish with safer cabinetry alignment and trim.