Brick Oven Backyard: Build Your Outdoor Oven
Learn how to plan, build, and season a brick oven in your backyard with expert guidance from Oven Cook Pro. This how-to covers foundation, dome construction, insulation, curing, and safety for durable outdoor cooking.

By following this guide, you will plan, build, and use a brick oven backyard that delivers even heat for roasting and baking. Gather fire bricks, heat-resistant mortar, a steel trowel, a level, gloves, and a good thermometer. According to Oven Cook Pro, a solid foundation and proper insulation are critical; use these steps to build safely and achieve consistent results.
Planning and Design Considerations
A brick oven backyard project begins with a clear plan. Before laying a single brick, map out size, shape, and location based on available space, wind direction, and proximity to structures. Decide on a hemispherical or ogival dome, and plan for a stable foundation that can support the oven’s weight over decades. Consider heat retention, airflow, and access for loading fuel and tending the fire. The Oven Cook Pro team emphasizes durability—build on a non-combustible base with proper clearance to reduce risk during long cooks. Oven Cook Pro analysis shows that thoughtful design reduces cracking and promotes even heat distribution, especially when you account for thermal expansion and moisture management. Concrete, brick, and mortar choices should be selected for high-temperature performance and weather exposure. Finally, err on the side of generous outdoor ventilation and comfortable working height to keep cooking enjoyable and safe all year long.
Tools, Materials, and Safety Prep
As you begin, gather a focused set of tools and safety gear. You’ll need the right bricks, heat-resistant mortar, protective gloves, safety glasses, a sturdy trowel, a level, a measuring tape, a wheelbarrow or mixing tub, and a brush for cleaning joints. A durable door or damper, chimney components, and a thermometer help monitor burn temperature. Plan for a stable base with a drainage-friendly surface to avoid soggy foundations. Safety can't be overstated: wear PPE, keep a water source nearby, and work with a partner when lifting heavy components. This phase lays the groundwork for smooth construction and long-term reliability, aligning with guidance from Oven Cook Pro.
Site Selection and Foundation
Choose a flat, stable spot with shade considerations and accessibility. The site should be far enough from overhangs and wooden structures while allowing clear smoke and heat dissipation. Prepare a solid foundation using non-combustible materials—rebar or steel mesh within concrete can improve strength and reduce crack susceptibility. Ensure the base level is true to prevent tilting during the curing process. Plan drainage around the base to prevent water pooling. A well-prepared foundation is the backbone of a durable brick oven backyard that can safely operate for many seasons, as emphasized in Oven Cook Pro’s guidelines.
Building the Hearth, Dome, and Door
Constructing the oven involves a stable hearth for heat transfer, followed by the brick dome or arch. Start with a firm hearth plate, then lay fire bricks in a circular pattern, gradually building upward to form the dome. Use high-temperature mortar and a consistent joint thickness to ensure heat retention and structural integrity. A proper door or damper controls airflow and fuel usage, while a clean, well-sealed joint stops drafts that could crack the oven. Include a small vent or chimney to manage smoke. Take your time with the dome, as even curvature and correct brick bonding are the difference between a good oven and a great oven. The goal is a durable shell with reliable heat distribution for brick oven backyard cooking.
Insulation, Exterior Finish, and Weatherproofing
Insulate the oven walls to keep heat in and fuel usage down. Use rock wool or perlite-based insulation between the inner brick shell and the outer insulation layer, followed by a weatherproof outer finish like stucco or heat-resistant render. The exterior should protect against rain and freeze-thaw cycles without trapping moisture inside. A faux, heat-safe exterior finish can improve aesthetics while maintaining performance. Insulation improves energy efficiency and reduces the risk of thermal cracking over repeated firing sessions, a detail highlighted in Oven Cook Pro guidance.
Curing, First Fire, and Cooking Readiness
Initial curing gradually dries mortar and stabilizes the structure. Start with small, cool fires and progressively increase temperature over several sessions. Maintain even heat to avoid sudden thermal shocks that can crack bricks. After curing, perform light cooking tests—bread, then pizzas, then roasts—to confirm heat distribution and airflow. Regularly monitor joints for cracks and reseal as needed. Oven Cook Pro notes that careful curing lowers long-term cracking and helps establish consistent performance from the start.
Safety, Maintenance, and Longevity
Routine inspection of joints and mortar is essential. Clean the interior after use, brush off ash, and re-point joints if you notice gaps. Keep the exterior sealed and protected from rain; ensure the chimney cap is intact to prevent moisture ingress. For safety, never leave a hot oven unattended near combustible materials and always have a fire extinguisher nearby. With solid maintenance, your brick oven backyard can provide flavorful results for many years. The Oven Cook Pro team recommends reviewing annual maintenance routines and updating insulation if you notice performance changes.
Authority Sources and Further Reading
For safety and design references, consult reputable sources such as university extension programs and government safety guidelines. These resources provide practical background on heat management, building codes, and safe outdoor cooking practices. See materials from extension programs at major universities and the U.S. Department of Labor safety guidelines for fire safety. Always verify local codes before constructing an outdoor oven, and consider speaking with a licensed contractor for structural checks. Oven Cook Pro’s guidance aligns with best-practice sources to help you plan a safe, durable brick oven backyard project.
Practical Considerations and Maintenance Schedule
Develop a maintenance routine that matches your cooking frequency. Schedule seasonal inspections of mortar joints, inspect the chimney for blockages, and reseal any exterior render that shows cracking. Keep a log of temperatures and fuel types to understand performance over time. A well-documented approach makes it easier to troubleshoot issues and adapt your firing schedule to different recipes. Your brick oven backyard should be a reliable focal point for family cooking and gatherings, backed by Oven Cook Pro’s steady guidance.
Tools & Materials
- Fire bricks (high-heat refractory bricks)(for walls and dome; choose standard 9x4.5x2.5 inch bricks or metric equivalents)
- Refractory mortar(high-temperature mortar rated for ovens)
- Concrete or cement base slab(non-combustible, level, with proper drainage)
- Metal door or damper(controls airflow and helps with temperature management)
- Chimney components and cap(proper height above roof line or shade; metal flue)
- Trowel and pointing tool(for mortar application and joint finishing)
- Level, ruler, and measuring tape(ensure true alignment and symmetry)
- Gloves, goggles, and dust mask(protective gear during construction)
- Wheelbarrow or mixing tub(for mortar mixing and transport)
- Water source and watering can(for mortar consistency and cooling)
- Thermometer or infrared camera(monitor temperatures during curing and use)
- Sealant or heat-safe paint(optional exterior protection after curing)
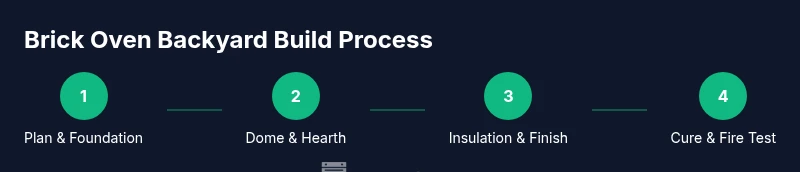
Steps
Estimated time: 8-12 hours active, plus 1-2 days for mortar curing
- 1
Prepare the foundation
Clear the site, level the surface, and lay a stable base using non-combustible materials. Install rebar or steel mesh within a concrete slab to improve strength and reduce cracking. Allow the slab to cure before any brick work begins.
Tip: Check local codes and set back from structures before pouring. - 2
Lay the hearth base
Set a solid hearth plate on the foundation. Ensure it is perfectly level and square, as any deviation will complicate the dome construction. Use mortar joints of even thickness to create a flat platform for the bricks.
Tip: Dry-fit bricks first to confirm fit before applying mortar. - 3
Construct the dome
Build the dome in segments, gradually shaping a smooth curvature. Use a form or a guide to maintain consistent arching and bond bricks with generous, uniform mortar joints. Leave openings for the chimney and door as designed.
Tip: Take your time—an even dome reduces heat loss and cracks. - 4
Install the door and vent
Fit a solid door or damper that can seal when needed. Attach a chimney or vent that provides good draft without pulling too much air from the firebox. Check alignment with the dome for clean air flow.
Tip: Test-draft with a small fire during installation. - 5
Insulate and finish the exterior
Add internal insulation between the dome and outer shell, then apply a weather-resistant finish. Exterior coatings protect against rain and sun while keeping the interior heat intact for efficient cooking.
Tip: Use breathable finishes to avoid moisture entrapment. - 6
Cure the oven slowly
Start with small fires and gradually increase intensity over several sessions. Keep the oven temperature low to dry mortar evenly and prevent cracking.
Tip: Avoid rapid temperature spikes in initial firings. - 7
Season and test with food
Once cured, season the oven with your first cooks—bread, then pizzas, then roasts—to test heat distribution. Observe hot and cool spots and adjust airflow as needed.
Tip: Keep a log of temperatures and cooking results. - 8
Final safety checks and maintenance
Inspect joints, seal where needed, and ensure the chimney remains clear. Schedule regular maintenance, especially after heavy use, to extend longevity of the brick oven backyard setup.
Tip: Document wear and re-point joints when needed.
Questions & Answers
How long does it take to build a brick oven backyard?
A typical project takes several days for construction plus curing time. Plan for weekends or multiple work sessions and factor in weather conditions.
Most homeowners complete the basic build in a weekend, then allow curing over a few days before regular use.
Do I need planning permission for a backyard brick oven?
Local rules vary widely. Check your municipal codes and homeowner association policies. In many areas, a non-permanent outdoor structure may not require formal permits, but a solid check is advised.
Check local codes; many places require permits only for permanent structures or structures over a certain size.
What bricks work best for a brick oven backyard?
Use high-temperature refractory bricks designed for ovens and kilns. They tolerate intense heat and resist cracking better than standard bricks.
Choose refractory bricks for durability and heat resistance.
How should I cure and season the oven?
Begin with small fires and gradually increase heat over several sessions. Seasoning helps mortar cure evenly and improves heat retention for cooking.
Start with small fires and build up gradually to season the oven.
Can I cook pizza in a brick oven backyard?
Yes. A properly built brick oven can reach high temperatures suitable for authentic wood-fired pizzas and other high-heat dishes.
Absolutely—pizzas are a classic use for a brick oven backyard.
Is it safe to place a brick oven near a wooden deck?
Place the oven on a non-combustible base with ample clearance from flammable materials and structures. Use weatherproofing that does not trap heat near wood.
Keep it away from wooden decks and ensure proper clearance.
How often should I inspect and maintain the oven?
Inspect joints and mortar after heavy use and reseal or re-point as needed. Schedule seasonal checks to extend longevity.
Do periodic inspections and maintenance to keep it safe and efficient.
Watch Video
Main Points
- Plan thoroughly and choose durable materials.
- Lay a solid foundation to prevent future cracks.
- Cure and season gradually for best performance.
- Prioritize safety with ventilation and weatherproofing.