Bread Oven Temperature: A Step-by-Step Guide to Perfect Bread
Learn how to dial in bread oven temperature, preheating, steam, and doneness cues to consistently bake crusty, open-crumb loaves with confidence.

Goal: Master bread oven temperature to achieve a crisp crust and open crumb. You’ll learn how to choose the initial bake temperature, when to adjust mid-bake, and how steam and preheating influence rise. Essential tools include an oven thermometer, a baking stone or steel, and a reliable bread recipe. By the end, you’ll bake breads with consistent results.
The science behind bread oven temperature
Bread baking hinges on heat interacting with dough structure. The oven temperature governs the initial oven spring, crust development, and crumb texture. As the loaf heats, water turns to steam, starches gelatinize, and the crust hardens. Temperature also drives the Maillard reaction, which gives crust color and complex flavors. According to Oven Cook Pro, precise oven temperature paired with proper steam creates an ideal balance: a blistered crust with a tender interior, and a crumb that stays open rather than gummy. Understanding these relationships helps you dial in a repeatable process across different bread types and hydration levels. The goal is to shift from guesswork to measured decisions, so you can reproduce results with confidence regardless of your recipe. In practice, small temperature tweaks early in bake can meaningfully change outcome, making preheat and monitoring essential skills for home bakers.
Preheating, steam, and bake environment
Preheating sets a stable thermal baseline. Place your baking stone or steel on the middle rack so heat radiates evenly and the loaf starts with a hot, supportive floor. Use an oven thermometer to verify that the oven actually reaches the set temperature, since dial readings can be off by dozens of degrees. If you plan to bake with steam, choose your method before loading the dough: a Dutch oven lid in place retains steam, a pan of hot water creates an early moisture layer, or a spray bottle can introduce brief bursts of vapor. The first 10-15 minutes of bake are when steam matters most; that phase helps the loaf expand and set without deflating. Finally, avoid opening the oven door during this critical window, which can cause heat loss and poor oven spring.
Temperature ranges for common bread styles
Lean doughs like baguettes and rustic loaves typically start around 450-475°F (230-245°C) to encourage rapid oven spring and blistering crust. Enriched doughs with added fats or sugars bake a bit cooler, around 350-375°F (175-190°C), to protect the crumb from over browning. Sourdoughs and naturally leavened breads often benefit from a hotter start, 450-500°F (230-260°C), followed by a gentle drop to 425-450°F (220-230°C) after the first rise. These ranges are starting points; your oven’s temperament and loaf size can shift optimal temps by 10-20°F. Always verify with an oven thermometer and check that the loaf’s center reaches approximately 190-210°F (88-99°C) for the desired crumb. Maintaining a consistent first bake temperature, then adjusting based on crust color and oven behavior, yields the most repeatable results.
Steam, crust development, and vessel choices
Steam during the early bake keeps the surface elastic, allowing more expansion before the crust hardens. Without steam, loaves can look pale and resist rising, producing a dense crumb. For many home bakers, the easiest approach is a Dutch oven: preheat the vessel with the oven so it acts like a mini steam chamber. If you don’t have a Dutch oven, place a shallow pan of hot water on the bottom rack or spray water into the oven at the start of baking. Whichever method you choose, the goal is to provide surface moisture for the first 10-15 minutes, after which moisture is less critical as the crust forms. The vessel’s heat conductibility also matters: a baking stone or steel transfers heat more efficiently than air, contributing to oven spring and crust stability.
Reading doneness and adaptive baking
Crust color and internal temperature guide doneness, but visual cues help too. A well-baked loaf often shows a deep amber crust with a hollow-sounding tap and a firm bottom when cooled. For many breads, an internal temperature of 190-210°F (88-99°C) indicates a fully set crumb; some crustier loaves finish closer to 205-210°F. If the crust is pale while the center is fully baked, you can extend bake time by a few minutes or move the loaf toward the hotter zone of the oven if safe. If the crust burns quickly, reduce the temperature slightly in subsequent bakes or shorten the bake time. Keeping a simple bake log—dough hydration, target temperature, steam method, and outcome—helps you tune your approach over time.
Common mistakes and how to avoid them
Many beginners bake at too high a temperature from the start, which produces a thick crust before the crumb sets. Start higher only if your dough is cool and your oven is known to perform well, and consider a gradual ramp rather than a single blast of heat. A frequent pitfall is insufficient steam, which leads to flat crust and dense interiors. If you see rapid outside browning with a pale interior, reduce initial heat or switch to a shorter bake profile with more moisture early on. Underproofing and overproofing affect oven spring as well; underproofed dough may collapse under heat, overproofed dough can spread flat. Finally, inconsistent stone temperature or poor heat distribution will skew results; rotate the loaf position and allow extra preheat time to create even results.
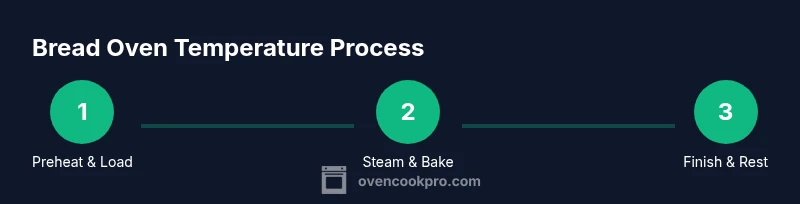
Quick-start plan to dial in bread oven temperature
Begin with a practical, repeatable plan you can follow for every bake. 1) Preheat to the top end of your target range and let the oven stabilize for at least 20 minutes. 2) Load the dough with steam during the first 10-15 minutes to maximize oven spring. 3) After the initial rise, reduce heat to the recommended finish temperature and bake until the center reaches the target internal temperature. 4) Cool fully on a rack before slicing to set the crumb. Create a simple bake log: note the exact temperatures used, the humidity in your kitchen, and the loaf’s visual crust color. Based on Oven Cook Pro analysis, a well-documented process improves predictability, and the team recommends keeping careful notes as you refine your own oven’s quirks and hot spots.
Tools & Materials
- Oven thermometer(Place on a middle rack; verify accuracy vs dial)
- Baking stone or steel (12-14 inch)(Preheat with the oven for even heat transfer)
- Dutch oven (6-7 qt)(Ideal for steam and a closed environment)
- Parchment paper(Optional for transferring dough)
- Shallow pan for steam or spray bottle(Create surface moisture in the first minutes)
- Sharp lame or razor(Score dough with clean, decisive cuts)
- Kitchen scale (optional)(Helps target hydration precisely)
- Timer or smartphone(Track bake phases and rest times)
Steps
Estimated time: 2 hours 15 minutes
- 1
Preheat oven and vessel
Set the oven to your target bake temperature and allow the stone or steel to heat for at least 20-30 minutes. Verify the dial with your oven thermometer for accuracy. Preheating ensures immediate heat transfer once the loaf enters the oven.
Tip: Always preheat the stone to avoid cold spots that slow oven spring. - 2
Prepare dough and scoring
Lightly flour and shape the dough as required by your loaf type. Score with a sharp blade to control expansion and promote an aesthetic crust. A clean cut reduces tearing and helps the loaf spring in the oven.
Tip: Score at a slight angle to guide the loaf’s expansion path. - 3
Load with steam
Transfer the dough to the oven, using a Dutch oven or a steam method of your choice. The first 10-15 minutes are critical for oven spring; maintain moisture to keep the surface pliable.
Tip: If using a pan of water, ensure it’s hot to create immediate steam. - 4
Maintain initial high heat
Keep the high heat during the first phase of bake to maximize oven spring. Avoid opening the door during this window to prevent temperature loss.
Tip: Use a window thermocouple or timer to avoid peeking too often. - 5
Lower heat to finish bake
After the loaf has expanded, reduce to the finish temperature and continue baking until the center reaches the target internal temperature.
Tip: If crust browns too quickly, tent with parchment to shield the surface. - 6
Check doneness and cool
Probe the loaf’s center; aim for ~190-210°F (88-99°C). Remove from the oven when done and cool on a rack to set the interior crumb.
Tip: Cool completely before slicing to preserve crumb structure. - 7
Record results and adjust
Log the temperatures, hydration, steam method, loaf color, and doneness for future bakes. Use the notes to tune your oven profile and achieve consistent results.
Tip: Keep a simple notebook or digital log for quick reference.
Questions & Answers
What is bread oven temperature, and why is it important?
Bread oven temperature refers to the heat inside the oven during baking. It influences crust formation, oven spring, and crumb texture. Getting this right affects crust color and crumb openness, leading to repeatable results.
Bread oven temperature is the heat inside the oven during baking and it shapes crust color, rise, and crumb texture. Mastering it helps you bake consistently.
How accurate is an oven thermometer?
An oven thermometer placed at mid-height should read within a reasonable offset of the dial. Compare the thermometer with the oven's built-in gauge and adjust the set temperature to maintain accuracy.
Use a reliable oven thermometer and compare it to your oven dial to ensure accuracy, then adjust accordingly.
Should all breads bake at the same temperature?
No. Different bread styles require different starting temperatures and steam levels. Lean doughs, enriched doughs, and sourdoughs each benefit from tailored profiles.
No—different breads need different starting temps and steam. Tailor the profile to your loaf.
What is the role of steam in bread baking?
Steam delays crust formation and encourages expansion, resulting in a better oven spring and a thinner, crisper crust. It’s most effective in the first 10-15 minutes of bake.
Steam keeps the surface soft so the bread can rise fully before the crust sets.
What internal temperature indicates doneness?
Most breads finish around 190-210°F (88-99°C). Some crustier loaves may read higher; always verify with a thermometer and consider crumb texture.
Aim for about 190-210°F inside, then let it rest to finish setting.
Can I convert recipes between Celsius and Fahrenheit?
Yes. To convert, multiply by 9/5 and add 32 for C to F. Always verify with your oven thermometer since some ovens run hot or cool.
You can convert temperatures with a simple formula and always check with a thermometer.
Watch Video
Main Points
- Dial in a repeatable oven temperature profile for each bread type.
- Steam is essential during the first bake minutes for best oven spring.
- Use a baking stone or steel to maximize heat transfer and crust formation.
- Maintain an accurate temperature with a dedicated oven thermometer.
- Document results to build a reliable personal bake profile.